Long hair offers endless styling possibilities but finding the perfect cut that adds movement dimension and modern flair can feel overwhelming. That’s where layered hairstyles come to the rescue – they’re the ultimate game-changer for transforming flat lifeless locks into gorgeous voluminous tresses that turn heads wherever you go.
We’ve curated the most stunning layered cuts that’ll breathe new life into your long hair while keeping you ahead of the style curve. From soft cascading layers that frame your face beautifully to bold choppy cuts that scream confidence these trending styles work with every hair texture and face shape.
Whether you’re looking to add subtle movement or make a dramatic statement we’ll show you exactly which layered look will become your signature style. Get ready to discover the layered hairstyle that’ll have you falling in love with your long hair all over again.
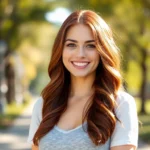
Long Layers With Face-Framing Highlights
Face-framing highlights transform long layered cuts into dimensional masterpieces that illuminate your features. Strategic color placement enhances the natural movement of layered cuts while creating stunning contrast.
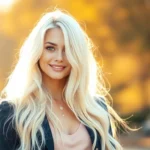
Blonde Balayage Accents
Blonde balayage creates seamless transitions that complement long layers beautifully. We recommend hand-painted highlights that follow the natural flow of your layers, concentrating lighter tones around your face and gradually deepening toward the interior. Professional colorists focus on the front sections where layers naturally fall, creating a sun-kissed effect that appears effortlessly chic.
Placement techniques vary based on your base color and desired intensity. Subtle honey blonde accents work perfectly with medium brown hair, while platinum highlights make dramatic statements on darker bases. The key lies in selecting tones that enhance your skin undertones while maintaining harmony with your natural color.
Maintenance schedules typically require touch-ups every 8-12 weeks. Root growth blends naturally with balayage techniques, making this highlighting method particularly low-maintenance for busy lifestyles. We suggest using purple shampoo weekly to prevent brassiness and maintain vibrant blonde tones.
Caramel Lowlights for Depth
Caramel lowlights add richness and dimension to long layered hairstyles without overwhelming natural beauty. These deeper tones create shadow effects that enhance the carved appearance of well-executed layers. Professional application involves weaving darker caramel shades throughout the mid-lengths and ends of your layered cut.
Color formulation depends on your starting shade and desired outcome. Warm caramel tones complement golden undertones beautifully, while cooler caramel shades work better with ash-based hair colors. The contrast between your base color and lowlights should remain subtle for the most natural-looking results.
Application techniques focus on creating depth where layers naturally separate. Stylists typically concentrate lowlights in areas where shadows would naturally fall, improving the three-dimensional quality of your layered cut. This strategic placement makes your layers appear more defined and voluminous without additional styling products.


Shag Layers With Curtain Bangs

Shag layers with curtain bangs combine retro charm with modern sophistication to create one of today’s most coveted layered looks. This versatile style transforms long hair into a textured masterpiece that frames your face beautifully.
Modern 70s-Inspired Texture
Contemporary shag layers deliver effortless movement through strategic choppy cuts that enhance natural hair texture. We love how this updated version maintains the classic shag’s rebellious spirit while incorporating refined layering techniques that work with today’s styling methods. Professional stylists create these layers by cutting shorter pieces throughout the crown and gradually increasing length toward the ends.
The textured finish comes from point cutting techniques that remove bulk while adding definition to each layer. Your hair gains incredible volume at the roots while maintaining flowing movement through the mid-lengths and ends. Modern shag layers work exceptionally well on straight to wavy hair textures, creating that coveted “just rolled out of bed” aesthetic that looks polished yet relaxed.
Styling becomes remarkably simple with sea salt sprays and texturizing mousses that enhance the natural separation between layers. The cut’s inherent movement means you can air dry for casual days or use a diffuser for more defined texture without losing that authentic shag character.
Feathered Side Swept Bangs
Feathered side swept bangs perfectly complement shag layers by creating seamless transitions from your fringe to face framing pieces. These bangs start longer on one side and gradually taper across your forehead, mimicking the feathered technique used throughout the rest of your layered cut. We recommend starting with longer lengths that can be adjusted during follow up appointments to achieve your ideal proportions.
The feathering technique involves cutting into the hair at an angle to create soft, wispy ends that blend naturally with your curtain bang sections. Professional colorists often add subtle highlights to these feathered pieces to enhance the dimensional effect and create more visual interest around your face.
Maintenance requires trimming every 4 to 6 weeks to preserve the feathered shape and prevent the bangs from becoming too heavy. Daily styling involves using a round brush to lift the bangs while blow drying, then finishing with a light hold hairspray to maintain the feathered separation throughout the day.


Butterfly Layers With Subtle Waves

Butterfly layers create ethereal movement through strategically placed cuts that mimic delicate wing patterns throughout your long hair. This sophisticated technique adds instant volume while maintaining length and creating beautiful dimension that flows seamlessly with gentle waves.
Graduated Length Variations
Graduated butterfly layers work by creating distinct length differences that cascade from shorter interior pieces to longer perimeter sections. The shortest layers typically begin around your collarbone area and gradually extend toward your waist for maximum impact. Professional stylists cut these variations at exact angles that range from 15 to 45 degrees depending on your hair density and desired movement level.
Interior layers receive the most dramatic graduation while face-framing pieces maintain moderate length differences for balanced proportions. We recommend discussing your lifestyle and styling preferences with your hairstylist since maintenance requirements vary based on the graduation intensity you choose. Clients with fine hair benefit from subtler variations while those with thick textures can handle more pronounced length differences without appearing too choppy.
Regular trims every 8 to 10 weeks help maintain the graduated effect and prevent the layers from growing out unevenly. Your stylist should evaluate your hair’s growth patterns and adjust the cutting technique accordingly for optimal results.
Soft Beach Wave Styling
Soft beach waves enhance butterfly layers by adding gentle texture that emphasizes each graduated section beautifully. Start with damp hair and apply a volumizing mousse from mid-lengths to ends, avoiding your roots to prevent heaviness. Sea salt spray works exceptionally well for creating that effortless coastal texture without weighing down your layers.
Scrunching techniques prove most effective for achieving natural-looking waves that complement butterfly cuts perfectly. Use your palms to gently squeeze sections of hair upward while blow-drying on medium heat with a diffuser attachment. This method encourages your hair’s natural wave pattern while improving the dimensional qualities of your layers.
Air drying produces the most authentic beach wave results when combined with proper product application and scrunching methods. We suggest braiding slightly damp hair into loose plaits overnight for subtle waves that require minimal morning styling. Finish with a light-hold texturizing spray to maintain movement without stiffness throughout the day.


Choppy Layers With Bold Color

Choppy layers create edgy texture that becomes even more dramatic when paired with vibrant color techniques. We love how bold color placement transforms traditional layered cuts into modern statement styles.
Chunky Highlight Placement
Strategic chunky highlights amplify the choppy movement in layered cuts by creating bold contrast between light and dark sections. We recommend placing these thick color ribbons throughout the mid-lengths and ends where layers naturally separate and move. Professional colorists typically use foils that are twice the width of traditional highlights to achieve this chunky effect.
Placement techniques focus on irregular patterns rather than uniform distribution to enhance the choppy layer’s natural rebellion. We suggest alternating between face-framing chunks and interior sections to create maximum visual impact when hair moves. Bleached sections should be at least two shades lighter than the base color for optimal contrast.
Maintenance schedules require touch-ups every 8-10 weeks since chunky highlights show regrowth more obviously than subtle techniques. We advise clients to use color-safe shampoos and deep conditioning treatments weekly to prevent brassiness in the lighter sections.
Edgy Textured Ends
Textured ends amplify the choppy layer effect by creating intentionally uneven perimeter lines that add grunge-inspired movement. We achieve this edgy finish through point cutting and razor techniques that break up blunt edges into varied lengths. Stylists use thinning shears to remove bulk while maintaining the sharp, disconnected feel that defines choppy layers.
Color application on textured ends involves concentrating bold tones at the tips where movement is most visible. We often apply fashion colors like burgundy, purple, or electric blue using balayage techniques that fade into the natural base. These pop colors emphasize each individual layer’s movement and create ever-changing visual interest.
Styling products specifically designed for texture work best with these edgy ends. We recommend sea salt sprays, texturizing pastes, and dry shampoos to enhance the piecey separation that makes choppy layers so striking. Scrunching motions while hair air dries help maintain the intended tousled effect without weighing down the textured pieces.


V-Cut Layers With Center Part

V-cut layers create stunning visual drama by forming a distinctive triangular silhouette that elongates the hair’s overall appearance. This precision cutting technique pairs beautifully with a center part to showcase symmetrical balance.
Dramatic Back Silhouette
Creating a striking V-shaped silhouette transforms long layered hair into a show-stopping statement piece. The dramatic angle draws the eye downward while maintaining substantial length at the center back section. Professional stylists achieve this look by cutting shorter layers that gradually extend to create the signature V formation.
Positioning the longest point strategically enhances the dramatic effect of this cut. We recommend placing the apex at mid-back length for optimal visual impact. The graduated layers create movement that becomes more pronounced when hair is worn down and viewed from behind.
Maintaining the sharp V-cut requires regular trims every 6-8 weeks to preserve the geometric precision. Between appointments, gentle brushing prevents tangles that can disrupt the clean lines. Deep conditioning treatments keep the longer center section healthy and lustrous.
Sleek Straight Styling
Achieving poker-straight styling amplifies the architectural beauty of V-cut layers. Heat protectant products become essential when using flat irons to create this sleek finish. We suggest sectioning hair into 2-inch pieces for thorough straightening from root to tip.
Temperature control prevents damage while maintaining the desired smooth texture. Set ceramic flat irons to 350-375°F for fine hair and up to 400°F for thicker textures. Multiple passes on the same section can cause breakage and should be avoided.
Finishing products seal the cuticle and add mirror-like shine to straight V-cut layers. Anti-humidity serums prevent frizz in challenging weather conditions. Light-reflecting sprays enhance the dramatic contrast between the shorter face-framing pieces and the longer back sections, making the V-cut silhouette even more striking.


Feathered Layers With Volume

Feathered layers create gorgeous dimensional movement that transforms long hair into a voluminous masterpiece. This classic technique adds incredible lift and body while maintaining the elegant length we love in long hairstyles.
Blown-Out Root Lift
Blown-out root lift amplifies feathered layers by creating dramatic volume directly at the scalp. We recommend using a round brush with boar bristles while blow-drying sections away from the head to achieve maximum lift. Professional stylists suggest applying volumizing mousse to damp roots before using the blow dryer on medium heat.
Directional blow-drying techniques work best when we lift each section straight up and curl it around a large barrel brush. The feathered layers respond beautifully to this method because the varying lengths create natural separation points. Root-lifting sprays containing lightweight polymers help maintain the volume throughout the day without weighing down the delicate feathered texture.
Finishing with cool air sets the lifted roots in place while the feathered layers cascade naturally around the face. We find that backcombing the crown area gently after the blowout adds even more dramatic height to complement the flowing feathered movement.
Layered Crown Texture
Layered crown texture enhances feathered styles by creating strategic volume exactly where we need it most. Crown layers should be cut approximately 2 to 3 inches shorter than the perimeter length to establish the perfect foundation for feathered movement. These shorter pieces naturally lift away from the scalp and create the illusion of thicker, more voluminous hair.
Texturizing techniques like point cutting add incredible dimension to crown layers while maintaining the soft feathered appearance. We recommend asking your stylist to use thinning shears sparingly on the crown sections to avoid creating choppy edges that compete with the smooth feathered flow.
Strategic crown layering works especially well when combined with side-swept styling because the shorter pieces frame the face beautifully. Volumizing powder applied directly to the crown layers before styling creates additional grip and texture that makes feathered styles last longer. The layered crown serves as an anchor point that supports the cascading feathered lengths while adding essential volume at the root area.


Cascading Layers With Loose Curls

Cascading layers with loose curls create the perfect balance between structured layering and soft romantic texture. This stunning combination transforms long hair into a voluminous cascade that moves beautifully with every turn.
Natural Movement Flow
Natural movement flow emerges when cascading layers work in harmony with loose curl patterns to create effortless bounce. We achieve this gorgeous effect by cutting layers that follow the natural fall of curly hair rather than fighting against its texture. Strategic layer placement starts approximately 2-3 inches below the collarbone and continues throughout the lengths to maintain weight while adding dimension.
Moisture retention becomes crucial for maintaining this natural movement since dry curls lose their elasticity and flow. We recommend applying leave-in conditioner to damp hair before styling to preserve the curl’s natural spring. Scrunching techniques work better than brushing for encouraging the layers to cascade naturally without disrupting the curl pattern.
Air drying methods enhance the organic movement of cascading layers while preserving curl integrity. Plopping the hair in a microfiber towel for 15-20 minutes removes excess water without creating frizz. Diffusing on low heat and speed settings maintains the curl’s natural formation while speeding up the drying process.
Romantic Spiral Patterns
Romantic spiral patterns develop when we enhance cascading layers with defined curl techniques that create consistent spiral formations throughout the hair. Finger coiling works exceptionally well with layered cuts because each layer can form its own spiral pattern at varying lengths. We start by sectioning the hair into 1-2 inch pieces and wrapping each section around our finger from root to tip.
Curl cream application before finger coiling helps define each spiral while providing hold and moisture. We work the product through each layer systematically to ensure even distribution and consistent curl formation. The layered structure allows spirals to stack beautifully, creating depth and dimension that catches light from multiple angles.
Setting techniques preserve romantic spiral patterns overnight and extend the style’s longevity. Pineappling the curls at the very top of the head prevents crushing while sleeping. Silk or satin pillowcases reduce friction that can disrupt the spiral formation. Refreshing sprays containing water and a small amount of curl cream revive the spirals the next day without needing to restyle completely.
Heat styling tools can enhance spiral patterns when used correctly with cascading layers. We use a diffuser attachment with upward scrunching motions to encourage spiral formation while adding volume at the roots. Curling wands with 1.5-2 inch barrels create consistent spiral patterns when we wrap each layer section around the barrel and hold for 8-10 seconds before releasing.


Asymmetrical Layers With Side Part

Asymmetrical layers paired with a dramatic side part create stunning visual interest that breaks traditional symmetry. This contemporary approach to layered cuts adds unexpected sophistication while maintaining the movement and dimension we’ve explored in previous styles.
Uneven Length Distribution
Creating strategic uneven lengths transforms ordinary layers into a bold statement piece that catches light beautifully. Professional stylists achieve this look by cutting one side slightly shorter than the other, typically removing 1-2 inches from the preferred side. Placement of the shortest layers begins around the collarbone area and gradually increases to maintain overall balance.
Measuring techniques involve sectioning hair into precise triangular patterns that follow the natural fall of your side part. Expert colorists often enhance these asymmetrical cuts with highlights placed 2-3 shades lighter than your base color. Styling becomes effortless when you work with the natural direction of your hair’s growth patterns.
Maintenance schedules should include trims every 6-8 weeks to preserve the intentional unevenness. Face-framing pieces require particular attention to prevent overgrowth that diminishes the asymmetrical effect. Products like texturizing spray and lightweight oils help define the varying lengths without weighing down shorter sections.
Modern Geometric Shape
Geometric precision elevates asymmetrical layers into architectural masterpieces that showcase advanced cutting techniques. Sharp angles created through point cutting methods produce clean lines that contrast beautifully with softer curved sections. Angular placement typically starts at jaw level and creates dramatic diagonal movement across your shoulders.
Contemporary stylists use razor cutting tools to achieve ultra-sharp edges that maintain their geometric integrity for weeks. Color blocking techniques using 2-3 coordinating tones enhance the geometric visual impact significantly. Structural elements include precisely measured angles that create perfect triangular shapes when hair falls naturally.
Finishing touches involve using smoothing serums to emphasize the crisp geometric lines throughout your asymmetrical layers. Professional blow-drying with paddle brushes creates the sleek foundation necessary for geometric shapes to appear most striking. Touch-up appointments every 5-6 weeks ensure your geometric asymmetrical layers maintain their architectural precision and modern edge.


Razored Layers With Beachy Texture

Razored layers create effortless texture that mimics the carefree movement of hair after a day at the beach. This cutting technique produces soft, feathered edges that enhance natural volume while maintaining a relaxed appearance.
Lived-In Tousled Look
Lived-in tousled styling transforms razored layers into an effortlessly chic masterpiece. We achieve this natural appearance by working with the hair’s existing texture rather than fighting against it. Applying texturizing cream to damp hair creates the foundation for piece separation and movement.
Scrunching techniques enhance the razored layer structure while maintaining softness. We recommend gathering small sections of hair in your palms and gently squeezing upward toward the roots. Working from the bottom layers to the top ensures even distribution of product and natural volume creation.
Air-drying preserves the organic texture that makes this style so appealing. We suggest avoiding heat styling tools whenever possible to maintain the hair’s natural movement patterns. Plopping hair in a cotton t-shirt for 10-15 minutes removes excess moisture without disrupting the curl formation.
Salt Spray Finish
Salt spray finishes amplify the beachy texture in razored layers by creating grip and definition. We apply this styling product to slightly damp hair for maximum absorption and texture enhancement. Quality sea salt sprays contain minerals that mimic ocean water’s natural texturizing properties.
Strategic application techniques maximize the salt spray’s effectiveness on long layers. We recommend sectioning hair and misting each layer individually rather than spraying randomly. Starting with the underneath sections ensures complete coverage and prevents oversaturation of the top layers.
Finishing touches involve gentle manipulation to enhance the natural texture. We twist small sections around our fingers while the salt spray dries to encourage wave formation. Avoiding brushing or combing after application preserves the intentionally messy texture that defines this beachy aesthetic.


Wispy Layers With Soft Bangs

Wispy layers with soft bangs create an enchanting feminine look that perfectly balances sophistication with effortless charm. This romantic styling approach transforms long hair into a dreamy cascade of movement while adding gentle texture around the face.
Delicate Fringe Detail
Delicate fringe detailing elevates wispy layers by introducing subtle texture variations that create depth without overwhelming the natural flow. We recommend starting with longer fringe pieces that gradually blend into the layered sections, maintaining approximately 2-3 inches of length difference between the shortest and longest fringe elements. Feathering techniques work exceptionally well for achieving this soft transition, allowing each strand to fall naturally while preserving the wispy aesthetic.
Professional stylists often use thinning shears to create the perfect balance of density in delicate fringe areas. Point cutting methods help achieve those coveted whisper-light ends that catch natural light beautifully. Regular maintenance every 6-8 weeks keeps the fringe detail looking fresh and prevents any harsh lines from developing.
Styling delicate fringe requires minimal product application to preserve the natural movement. We suggest using a lightweight texturizing mist on damp hair before air drying or using a diffuser on low heat. Avoid heavy creams or oils that can weigh down the delicate strands and diminish their ethereal quality.
Ethereal Face Framing
Ethereal face framing with soft bangs creates a halo effect that enhances natural features while maintaining the wispy layer structure throughout the length. These face framing pieces typically begin at cheekbone level and cascade into longer layers, creating seamless transitions that appear almost weightless. Strategic cutting angles ensure the framing elements complement various face shapes while preserving the dreamy, floating appearance.
Customization plays a crucial role in achieving perfect ethereal face framing for individual features. Round faces benefit from slightly longer side pieces that create vertical lines, while square faces look stunning with softer, curved framing that follows the natural jawline. Heart shaped faces shine with delicate framing that adds width at the chin level through subtle layering techniques.
Color placement can dramatically enhance the ethereal quality of face framing elements. Subtle highlights placed throughout the framing pieces create dimension and movement that amplifies the wispy effect. We recommend staying within 2-3 shades of the natural base color to maintain the soft, angelic appearance rather than creating stark contrasts that might disrupt the gentle flow.
Styling ethereal face framing requires gentle techniques that preserve the natural movement without adding excessive volume or structure. Round brushing during blow drying helps create subtle curves that follow facial contours naturally. Finishing with a light hold texturizing spray maintains separation while adding touchable softness that moves beautifully throughout the day.


Graduated Layers With Ombre Effect

Graduated layers paired with ombre coloring create stunning hair transformations that blend seamless cutting techniques with sophisticated color artistry. We’ll explore how this powerful combination delivers both structural beauty and dimensional richness.
Color Transition Technique
Gradual tonal shifts enhance the natural movement of graduated layers by creating smooth color progressions from darker roots to lighter ends. We recommend starting with your natural color at the crown and gradually lightening through three to four distinct color zones that follow the layer placement. Professional colorists typically use foil sectioning methods to ensure each layer receives appropriate color treatment based on its position within the overall cut.
Strategic color placement amplifies the visual impact of each graduated section by highlighting the length variations between layers. We suggest applying the darkest tones to the shortest interior layers while reserving the lightest shades for the longest perimeter pieces. This technique creates natural-looking dimension that mimics how sunlight would naturally lighten hair over time.
Blending boundaries between color zones requires expert feathering techniques that prevent harsh lines from disrupting the graduated layer flow. We advise using balayage methods to softly transition between each ombre section, ensuring the color changes complement rather than compete with the layer structure. Root melting techniques help create seamless connections between your natural color and the first ombre transition point.
Dimensional Depth Creation
Multi-level highlighting within graduated layers produces incredible depth by treating each layer as an individual canvas for color application. We recommend incorporating subtle lowlights in the mid-tone sections to create shadow effects that enhance the three-dimensional quality of the cut. These darker accents help define the separation between layers while maintaining the overall ombre progression.
Contrast optimization between adjacent layers maximizes the visual impact of both the cut and color by creating distinct tonal differences that highlight each layer’s unique length. We suggest using at least two shades difference between consecutive layers to ensure adequate definition without creating jarring transitions. This approach makes each graduated section clearly visible while maintaining color harmony throughout the entire style.
Light reflection patterns change dramatically with graduated ombre layers as different color zones catch and reflect light at varying intensities based on their positioning. We find that the lighter ends create brilliant shine points that draw attention to the longest layers, while the darker roots provide grounding depth that prevents the overall look from appearing washed out. Strategic glossing treatments can enhance these reflection patterns to maximize the dimensional effect of your graduated ombre layers.


Textured Layers With Pin-Straight Finish

Textured layers paired with a pin-straight finish create sophisticated contrast that showcases both structural precision and sleek elegance. This styling approach transforms layered cuts into polished masterpieces that command attention in professional and formal settings.
Sleek Polished Appearance
Creating a sleek polished appearance with textured layers requires strategic smoothing techniques that preserve dimensional movement while achieving mirror-like shine. We recommend using a high-quality flat iron with ceramic plates heated between 300-350°F to seal the hair cuticle without causing damage.
Professional heat protectant serums form essential barriers that prevent thermal damage while providing slip for smooth iron gliding. Apply these products section by section, ensuring complete coverage from roots to ends before beginning the straightening process.
Sectioning hair into horizontal layers allows for thorough heat styling that reaches every strand effectively. Start with bottom sections and work upward, maintaining consistent tension as you pull the flat iron through each piece in slow, deliberate passes.
Finishing touches include lightweight shine serums applied sparingly to prevent weighing down the textured layers. These products enhance the polished appearance while maintaining the structured movement that makes layered cuts so appealing.
Heat-Styled Perfection
Achieving heat-styled perfection with textured layers demands precise temperature control and methodical application techniques. We suggest investing in flat irons with adjustable heat settings to accommodate different hair textures and density levels throughout the layered cut.
Temperature selection varies based on hair type: fine hair responds well to 280-300°F, while thicker textures may require temperatures up to 350°F for optimal results. Testing lower temperatures first prevents unnecessary damage while determining your hair’s exact heat styling needs.
Timing becomes crucial when straightening textured layers, as rushing through sections can create uneven results that compromise the overall finish. Spend 3-5 seconds per pass, allowing the heat to penetrate thoroughly while maintaining steady movement to prevent hot spots.
Cool-down periods between sections help set the straight finish and prevent heat buildup that can lead to damage. We recommend allowing each straightened section to cool completely before moving to adjacent areas.
Root lifting techniques applied before straightening create volume that prevents the pin-straight finish from appearing flat against the scalp. Use a round brush during initial blow-drying to establish lift that complements the sleek length sections.


Layered Bob Extensions With Long Length

Layered bob extensions with long length offer the perfect solution for achieving dramatic volume and movement without committing to a permanent cut. This innovative approach combines the structured beauty of bob layering with the versatility of extended length.
Blended Extension Integration
Professional extension integration requires careful attention to matching both texture and color for a seamless appearance. We recommend selecting extensions that complement your natural hair’s undertones and movement patterns to create an authentic layered bob effect.
Strategically placed extensions work best when positioned at mid-lengths rather than directly at the crown area. This placement allows your natural layers to cascade naturally over the extension points, creating the illusion of organically grown length.
Color matching becomes crucial for achieving professional results with layered bob extensions. We suggest bringing a strand of your natural hair to the salon to ensure perfect color coordination across all extension pieces.
Texture blending requires extensions that mirror your hair’s natural wave pattern or curl structure. Straight extensions won’t integrate well with naturally wavy hair, while curly extensions may overpower fine, straight textures.
Professional installation typically takes 2-3 hours depending on the complexity of your desired layered bob shape. We recommend scheduling this service with a stylist experienced in both layering techniques and extension application.
Seamless Length Addition
Seamless length addition focuses on creating natural transitions between your existing hair and the extension pieces. The key lies in selecting extensions that gradually increase in length rather than creating obvious demarcation lines.
Graduated extension lengths help maintain the organic flow of layered bob cuts while adding substantial length to the overall style. We position shorter extension pieces near the crown and progressively longer pieces toward the perimeter for authentic dimension.
Strategic cutting after installation ensures your layered bob extensions blend perfectly with your natural hair texture. Your stylist will trim and shape the extensions to match your existing layers, creating one cohesive cut.
Maintenance appointments every 6-8 weeks help preserve the seamless integration of your layered bob extensions. During these sessions, we address any grown-out roots and refresh the layered shape to maintain the desired look.
Heat styling tools work effectively on quality extension pieces, allowing you to maintain your layered bob’s shape between salon visits. We recommend using medium heat settings and protective products to preserve both your natural hair and extension integrity.
Quality extension fibers hold their shape better throughout multiple styling sessions, making them ideal for maintaining the structured appearance of layered bob cuts. Synthetic options may lose their form more quickly than human hair alternatives.


Boho Layers With Natural Waves

Boho layers embrace the free-spirited beauty of natural texture while creating movement that feels authentically effortless. This style captures the essence of carefree elegance through strategically placed cuts that enhance your hair’s organic wave patterns.
Effortless Hippie Chic
Effortless hippie chic layers channel the bohemian spirit through loose, flowing cuts that work harmoniously with your natural texture. We recommend asking your stylist for long layers that start around the collarbone and cascade down to create gentle movement without sacrificing length. The key lies in cutting layers that follow your hair’s natural fall pattern rather than forcing structured uniformity.
Creating authentic hippie chic requires minimal styling intervention that preserves your hair’s organic character. We suggest applying lightweight curl cream to damp hair and scrunching gently to enhance existing waves. Air drying becomes your best friend with this style, as it maintains the natural texture variations that make boho layers so captivating.
Color placement plays a crucial role in achieving that sun-kissed hippie aesthetic we all love. We recommend subtle highlights around the face and through the mid-lengths to mimic natural lightening from outdoor adventures. These golden touches enhance the dimensional quality of your layers while maintaining the effortless vibe that defines this timeless look.
Undone Organic Texture
Undone organic texture celebrates the beauty of imperfection through deliberately tousled layers that appear naturally windswept. We achieve this look by incorporating varied cutting angles that create intentional asymmetry throughout your length. The technique involves point cutting through sections to eliminate harsh lines while maintaining the structural integrity of your layers.
Building organic texture requires working with your hair’s natural cowlicks and growth patterns instead of against them. We recommend using texturizing sea salt spray on slightly damp hair to enhance grip and definition without creating stiffness. Finger combing replaces traditional brushing to preserve the organic separation that makes this texture so appealing.
Maintenance becomes effortless when your layers embrace natural texture patterns that grow out beautifully over time. We suggest scheduling trims every 12 weeks to refresh the organic shape while allowing your layers to develop their own character between appointments. This approach ensures your boho waves maintain their carefree appearance while looking intentionally styled rather than neglected.


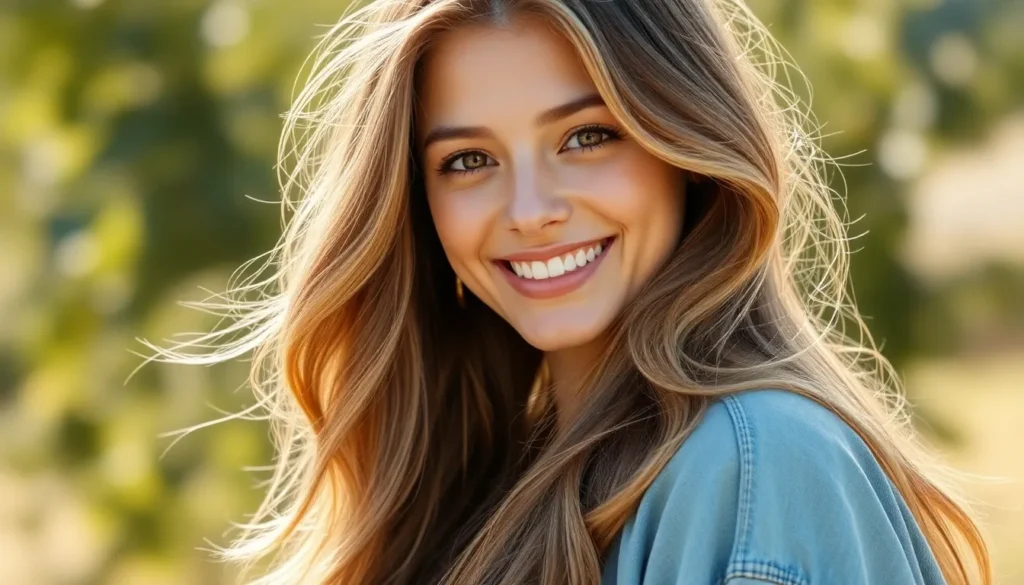
Face-Framing Layers With Honey Highlights

Honey highlights paired with face-framing layers create a luminous combination that instantly brightens your complexion while improving the dimensional movement of your cut. We’ve discovered this pairing transforms ordinary layered styles into stunning showstoppers that catch light beautifully.
Golden Tone Enhancement
Golden honey tones work exceptionally well with face-framing layers because they amplify the natural warmth around your features. These highlights create depth by establishing contrast between the darker base color and the lighter accent pieces throughout your layers.
Professional colorists recommend selecting honey shades that complement your skin’s undertones for the most flattering results. Warm undertones pair beautifully with deeper honey shades like amber or caramel, while cooler undertones benefit from lighter golden honey variants with subtle platinum undertones.
Maintenance for honey highlights requires touch-ups every 8-10 weeks to preserve the golden vibrancy. We suggest using color-safe shampoos and deep conditioning treatments weekly to prevent brassiness and maintain the lustrous quality of your highlights.
Seasonal adjustments help keep your honey highlights looking fresh throughout the year. Summer calls for slightly lighter honey tones to complement sun-kissed skin, while winter benefits from richer, deeper golden shades that provide warmth during cooler months.
Strategic Light Placement
Strategic placement of honey highlights within face-framing layers requires careful consideration of your bone structure and natural hair patterns. Colorists focus the lightest honey pieces around the front sections where they’ll catch natural light and illuminate your features most effectively.
The key technique involves weaving highlights through the shorter face-framing pieces while gradually reducing the lightness as you move toward the back sections. This creates a natural-looking gradient that appears as though the sun has naturally lightened your hair over time.
Balayage application works particularly well for honey highlight placement because it allows for customized light distribution throughout your layers. Professional stylists hand-paint the color onto exact sections, creating a more organic and dimensional appearance than traditional foil highlights.
Root placement remains crucial for achieving the most flattering face-framing effect with honey highlights. We recommend keeping the highlights approximately 2-3 inches away from the scalp to create depth while ensuring the lighter pieces frame your face naturally without appearing too stark or artificial.


Conclusion
These 15 trendy layered hairstyles prove that long hair doesn’t have to be boring or one-dimensional. From ethereal butterfly layers to edgy choppy cuts we’ve explored options that work for every personality and lifestyle.
The key to gorgeous layered hair lies in finding the right balance between cut color and styling technique. Whether you’re drawn to soft romantic cascades or bold asymmetrical designs there’s a layered style that’ll make your long hair feel fresh and modern.
We encourage you to experiment with these looks and work with your stylist to create a customized version that suits your unique features. Remember that great layers are an investment in your daily styling routine making your hair easier to manage while looking effortlessly chic.
Frequently Asked Questions
What are the main benefits of layered hairstyles for long hair?
Layered hairstyles transform flat, lifeless long hair into voluminous, stylish tresses with movement and modern flair. They work well with different hair textures and face shapes, creating dimension and helping you fall in love with your long hair again.
How do face-framing highlights enhance layered cuts?
Face-framing highlights enhance the natural movement of layers by creating visual depth and dimension. They brighten your complexion and work particularly well with honey tones that complement your skin undertones, creating a luminous, natural-looking effect.
What are butterfly layers and how do they work?
Butterfly layers create ethereal movement through strategically placed cuts that mimic delicate wing patterns. They feature graduated lengths that cascade from shorter interior pieces to longer perimeter sections, adding volume and dimension while maintaining overall length.
How do I maintain choppy layers with highlights?
Maintain choppy layers with regular touch-ups every 6-8 weeks and use color-safe products to preserve vibrancy. Apply texturizing products to enhance piecey separation and consider point cutting or razor cutting techniques to maintain the edgy finish.
What styling products work best for beach wave textures?
Use volumizing mousse and sea salt spray to enhance natural waves. Apply texturizing cream for a lived-in look, scrunch hair while damp, and air-dry to preserve organic texture. Salt spray adds grip and definition for that perfect beachy aesthetic.
How do V-cut layers differ from regular layered cuts?
V-cut layers create a striking triangular silhouette that elongates the hair through precision cutting techniques. They require regular trims to maintain the sharp V-shape and work best with sleek straight styling using heat protectants and proper temperature control.
What are the best techniques for styling feathered layers?
Use volumizing mousse with round brushes for maximum lift, focusing on blown-out root volume. Apply volumizing powder for added grip and texture, and use strategic sectioning when heat styling to maintain the dimensional movement characteristic of feathered layers.
How do I achieve the perfect shag layers with curtain bangs?
Combine retro charm with modern sophistication through refined layering techniques. Use feathered side-swept bangs for seamless transitions, apply lightweight styling products, and maintain regular trims every 8-10 weeks to preserve the textured, face-framing effect.
What maintenance is required for asymmetrical layers?
Asymmetrical layers need regular touch-ups every 6-8 weeks to maintain intentional unevenness and geometric precision. Use color blocking techniques if desired, and work with your stylist to preserve the dramatic visual interest while maintaining movement and dimension.
How do I blend extensions with layered bob cuts?
Focus on matching texture and color for seamless integration. Use graduated extension lengths with professional installation techniques, ensuring strategic placement that maintains the organic flow of your layered bob while adding dramatic volume and movement.