If mornings feel rushed and the hair routine seems out of reach, this post is for you. I made it because I keep getting asked for cute, simple little girl hairstyles that actually stay through a busy day. From school runs to family photos, I want you to have easy options that look sweet without a big fuss.
Who it’s for. If you’re a parent, grandparent, nanny, teacher, or anyone who looks after a little girl, this one is for you. You care about hairstyles that are comfy, safe, and quick to do. You want trends that feel doable and keep hair healthy. You want ideas that fit real mornings and real lives.
What you’ll get. Here are 27 adorable little girl hairstyles perfect for any occasion. Each idea is practical, quick, and gentle on hair. I share simple steps, the basic materials, and tips to help you nail the look in minutes. You’ll find ideas that work for everyday wear and for special events, all in kid-friendly styles.
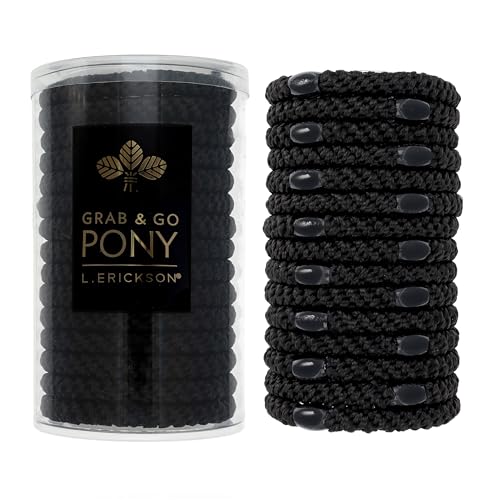
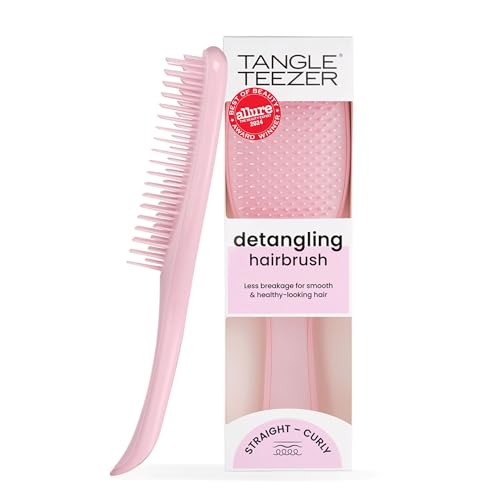
Let’s break it down with variety. From cute ponytails and easy braids to gentle buns and half-up styles, you will find something for every mood. I note which hair types work best, how to prep with a light detangler, and how to choose comfy accessories like soft elastic bands and satin ribbons that prevent snagging. These tips make hairstyles for kids feel doable, not a chore.
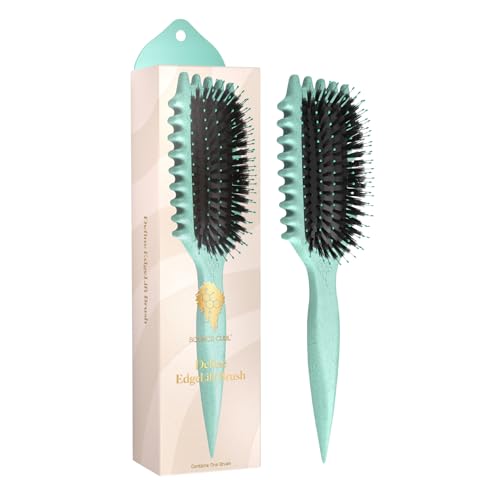
How to use this guide. Choose a look based on time, event, and how much your little one enjoys being involved. Put together a tiny kit: a wide-tooth comb, a light detangler, a few gentle hair ties, and a couple of clips. Then follow the steps: detangle, part, twist, pin, and add a touch of charm. These are easy updos for kids that still look polished and cute.
A quick note you can trust. Hair comes in many textures and lengths, so some ideas may need a little tweaking or a helper. Practice helps, and you can adapt each style with the tools you have. Start with one or two you like, then grow your routine as you and your little one get the hang of it. Next steps: pick a few you love and try them this week.
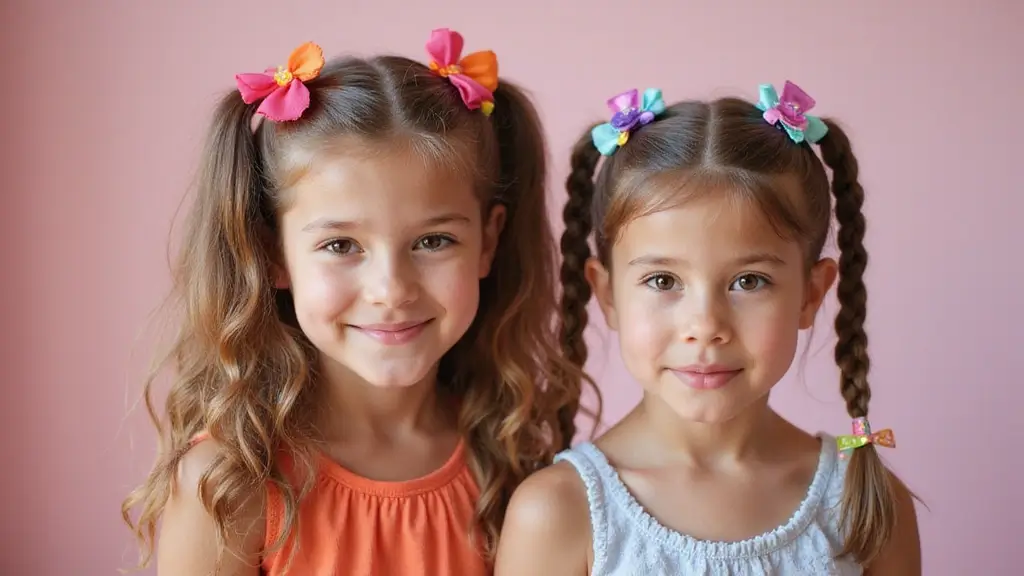
1. Twisted Pigtails

Twisted pigtails give you a playful take on a classic look. They are quick, comfy, and cute enough for any event. You can tweak them so they fit a school day or a weekend playdate.
What you need
– You need a comb or brush for neat parting.
– You need two small hair ties that match her hair.
– Optional ribbons, beads, or tiny clips can add color and fun.
Steps to do it
– Part the hair into two equal sections at the top of the head.
– Twist each section from root to tip.
– Secure each twist with a hair tie near the ends.
– If any strands pop out, tuck them under the twist with your finger.
Why this style works
– Twists pull hair away from the face.
– They keep hair neat and comfortable during play.
– They also look tidy with minimal effort.
Style ideas
– Tie a bright ribbon along each twist for color.
– Add beads or small flowers for a boho vibe.
– Use cute clips to hold stray strands and add sparkle.
Tips for best results
– Use a touch of hair gel to smooth flyaways.
– Adjust the tightness: looser twists feel more casual; tighter twists stay longer.
Occasion: These twists are perfect for casual outings or a playground day. You can repeat on both sides for balance. This keeps the look neat and symmetric.
2. Half-Up Braided Crown

Half-Up Braided Crown: A cute, sturdy look for any occasion
You want a style that is sweet and easy to wear, yet stays put during photos and party games. The half-up braided crown fits that need. It feels gentle on little heads and looks polished in the end.
What you’ll need
– Clear hair elastics
– Bobby pins
– A brush or comb
– Hairspray
– Optional: tiny flowers, glitter, or a soft ribbon
Let’s break it down
– Part the hair right down the middle so both sides sit even.
– Braid each side from just above the ears toward the ends.
– Secure the braids with small elastics at the tips.
– Wrap the braids across the crown and pin where they meet.
– Tuck any loose ends and pin them securely.
– Lightly spray to keep the look neat all day.
Tips to make it last
– On wash day, use a touch of leave-in conditioner at the roots for grip.
– If the hair is slippery, braid when it’s a little damp.
– A tiny dab of styling cream at the crown can help, then re-pin as needed.
Variations and touches
– Add tiny flowers or small pearls for a formal touch.
– Weave a pastel ribbon along one braid for color.
– A sprinkle of glitter along the crown adds a playful sparkle.
Occasions and options
– Great for weddings, birthday parties, and family photos.
– Works as a formal kids hairstyle or a charming everyday option.


3. Messy Bun with Beads

Looking for a quick, cute hairstyle that keeps up with a busy morning and busy day? A messy bun with beads fits perfectly. It’s simple to make and comfy to wear.
– Step 1: Gather hair into a high ponytail.
– Step 2: Twist the ponytail and wrap it into a bun.
– Step 3: Secure with a soft hair tie. Leave a few strands loose for that relaxed vibe.
– Step 4: Add beads or mini hair ties. Slide them along the bun or thread them into a loose braid at the base.
Materials you’ll want:
soft elastic, a handful of plastic or wooden beads, a few bobby pins, and a soft scrunchie. Pick lightweight beads so they don’t pull.
Why it helps you:
It cuts prep time. The bun stays through recess, gym, and play. Beads add color and personality without making the style bulky.
Tips to keep it comfy:
Choose a gentle scrunchie to prevent breakage. Don’t wrap the bun too tight. Use pins to tame any loose ends.
Next steps:
Try different bead colors to match outfits. If you have fine hair, add an extra pin for security. For longer hair, stack two buns for extra hold.
You’ll love the ease.


4. Side-Swept Fishtail Braid

You want a cute hairstyle that stays neat for photos or parties. The side-swept fishtail braid fits that need. It rests along one shoulder and looks polished without fuss.
– Materials: a brush, a clear hair tie, a few small elastics, and decorative pins or sparkly clips. A light spray helps it hold.
– How to do it: brush the hair until it’s smooth. Gather it over one shoulder. Split it into two equal sections. From the outer edge of one section, pick a tiny lock and cross it to the other. Repeat the move down the hair. Tie the end. Gently pancake the braid with your fingers to add fullness.
– Quick tips: a light mist keeps the braid in place. Pin any loose strands for a neat finish. Add a sparkle pin near the base for glam.
– When to wear: family photos, birthday parties, or a special dinner.
– Personalize: weave in a thin ribbon or place pins diagonally for a unique look.
– Variations: start the braid higher on the head for a half-up style, or let it drape over the shoulder for a softer look. Bigger sections make the braid bolder but still easy to manage.
It grows with your style.
5. Double Dutch Braids

You want a hairstyle that looks cute and lasts. Double Dutch braids stay tight and keep hair away from your face. They work for any event, from sports day to a day at the amusement park. Here is why this style fits your day. Let’s break it down.
– Part the hair down the middle so you have two equal halves.
– On each side, start a Dutch braid by picking up hair from the scalp and weaving it under each new strand.
– Keep the braids snug to the head so they sit on top of your neck.
– Braid to the ends, then secure with a small elastic.
– For a bold look, try thicker sections or colored elastics that stand out.
Next steps
– Occasion: Great for sports days or a busy day at the park.
– Style Tip: Pair with bright hair elastics or small charms to add pop.
– Maintenance: These braids hold hair in place for hours and are easy to unwind at the end of the day.
6. Braided Bun

If you want a clean, comfy look for any occasion, try a braided bun. You braid a section, then wrap it into a low bun at the nape. It stays in place and feels light on warm days. With a little practice, you can finish in about five minutes.
Here is why this style works: it keeps hair off the neck, it looks neat, and it moves with her.
– Occasions: Family gatherings, errands, a day of shopping, or a school event.
– Tip: Use a hair donut for extra lift. Wrap the braid around it, tuck in the end, and pin.
– Extra touch: Add a decorative clip or a small barrette to make it pop.
– What you’ll need: a comb, several bobby pins, a small elastic, a hair donut (optional), and a decorative clip.
How to do it in easy steps:
– Step 1: Braid a section from the side or crown.
– Step 2: Secure the end with an elastic.
– Step 3: Wrap the braid around the base to form a bun.
– Step 4: Pin all layers so the bun stays flat.
Next steps:
– Variation ideas: Try a side braid into a bun for a new look, or switch to a smooth low bun for a sleeker style.
Finish: a light mist of hairspray helps it last all day. If it loosens, add a pin.
7. Rainbow Braid

Want a look that pops for a party or festival? A rainbow braid is a simple, playful choice. It adds color without long prep, and you can tailor it to your mood.
What you’ll need
– Hair extensions in rainbow colors or color hair chalk
– A classic three-strand braid, or your favorite braid style
– Small clear elastics
– Beads or tiny charms for extra sparkle
– A light detangler or smoothing spray
Step by step
1) Plan your colors. Pick 3 to 5 shades. Decide the order so the colors flow as you braid.
2) Prep hair. Brush out tangles. Smooth the crown so the braid sits flat.
3) Start the braid. Make a neat three-strand braid from the chosen area.
4) Add color. Clip in small color extensions as you braid. If you use chalk, apply a thin layer to the strands before braiding.
5) Finish the look. Slide a bead onto the end or along the braid for extra pop. Secure with a clear elastic.
6) Tidy up. Gently pin any loose ends. A light spritz helps keep the braid neat and tangle-free.
Pro tips
– Keep colors evenly spaced so the rainbow reads clearly in photos.
– Use a detangler before braiding to reduce snags.
– If you want a headband effect, braid a thin strand across the top like a crown.
– For the safest color, test chalk on a small strand first.
Occasion tips: Rainbow braids shine at parties, festivals, or outdoor events. They’re great for picnics and family gatherings too. You can switch colors to match outfits or themes.
Next steps: Practice on a calm day, then take a quick photo to see the color balance. With a little practice, you’ll have a bright, confident style that lasts all day.

8. Princess Braids

You want a look that feels magical and stays neat. Here is why princess braids work for busy mornings. They hold up through play and still look sweet for photos. Here is how to do it with simple tweaks.
– What you’ll need: A comb, small clear elastics, a few sparkly clips, and a touch of glitter gel.
– Part and braid: Part the hair down the middle with the comb to create two clear sections. Braid each side from the front toward the back using three even strands.
– Wrap and secure: Bring the braids around the front of the head and pin them at the back. Keep the pins flat so she can wear a headband later.
– Add sparkle: Clip in a couple of tiny shimmering clips or run a fine line of glitter gel along the braids for a fairy-tale shine.
– Occasion: Perfect for dress-up parties and themed birthdays.
– Tip: If the hair is slippery, mist it with a little water before braiding. A quick comb-through helps.
– Variation: Try a fishtail braid or a classic three-strand braid for a different look.
– Next steps: Practice a couple of times. With patience you’ll finish in minutes. For shorter hair, twist the ends and pin them for a softer frame.


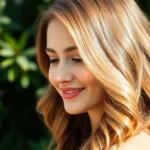
9. Layered Loose Waves

If your girl has soft, bouncy waves, you can let them shine with layered loose waves. This look adds gentle texture that stays comfy all day.
– Occasion: Casual outings, park days, or playdates where hair should stay off her face.
– What you need: A small amount of mousse, a leave-in conditioner, a wide-tooth comb, soft hair ties, and a cute headband.
– How to style: 1) Start with damp hair. 2) Rub a pea-size amount of mousse in your hands and work it through from roots to ends. 3) Use your fingers to scrunch and twist small sections into soft waves. 4) Let hair air dry or use a cool diffuser on low heat. 5) If you want more shape, gently lift the crown and smooth the rest so pieces fall in layers.
– Care tip: Finish with a light leave-in conditioner to keep waves soft and easy to manage.
– Accessory idea: Slip on a headband to keep hair from sliding into her eyes and add a sweet, playful touch.
Here is why this works: the layers let the waves sit naturally, so hair looks styled but stays relaxed. Next steps? Try it after baths or on weekends to see what pieces you like most.
10. Simple Ponytail with a Twist

You want a ponytail that looks neat and stays comfy.
Here is why a tiny twist helps.
This quick move hides the hair tie and adds a polished look fast.
What you’ll need
– You will need a hair tie, a small strand from the base of the ponytail, and a couple of bobby pins.
– Optional option: use a scrunchie for volume and color.
Step-by-step guide
1) Create a ponytail at the height you like. Keep the hair smooth as you pull it tight.
2) Take a thin strand from the base of the ponytail.
3) Wrap that strand around the hair tie to hide it.
4) Tuck the ends under the wrap and secure with a pin.
5) If you want more hold, use a soft scrunchie instead of the basic tie.
Variation ideas
– Before tying, braid a small section into the tail for a peek of plaits.
– Try a partial braid with a loose strand at the front for a playful look.
Tips to keep it neat
– Use a light spray to tame flyaways.
– Pin the wrap at the back to keep it in place.
Common questions
– Will this hold during recess? Yes, with a snug tie and a pin.
– Is this easy for beginners? Yes, it takes a few minutes.
Next steps
Practice in front of a mirror and snap a quick photo to see the result.
11. Twisted Halo Braid

A polished, fairy-tale look that lasts through photos and dancing might be what you want. The twisted halo braid fits. It feels fancy and stays in place all day. It works with long or shoulder length hair.
How to create it
– Step 1: Part the hair to one side.
– Step 2: Make two loose twists near the part.
– Step 3: Bring each twist around the head and secure at the back to form a halo.
– Step 4: Tuck in ends and pin them for a smooth circle.
What you’ll need
– Materials: small bobby pins, a light hairspray, optional sparkle pins or tiny flowers.
– Tools: a comb or tail comb.
Why it works
– It frames the face with a soft circle.
– It holds up well for events and wind.
– It suits many hair types with a touch of texture spray.
Tips for a clean finish
– Use pins to anchor loose ends.
– If hair is slippery, spray a little texture or dampen slightly.
Fun variations
– Add a tiny braid along the halo for extra detail.
– Clip in sparkly pins or fresh flowers for a magical look.
Ideal occasions
– Weddings, dances, family parties.
Next steps
– Practice once at home, then wear it to your next event.
You might also like


12. Bubble Ponytail

What you need
– Soft elastic hair ties in a few colors
– A wide-tooth comb or small brush
– Optional: ribbons, beads, or extra color ties
– A light hair serum or detangler
Here is why bubble ponytails work
They add volume along the length. The bubbles create a playful look that stays comfy. The ties hold the hair without pulling hard.
How to build the bubbles
Start with a high ponytail. Brush the hair smooth. Place a small band at the top. Add another tie 2 to 3 inches down. Do not pull tight. Repeat down the length. Gently tug the hair between ties to puff each bubble.
Make it your own
Switch colors for a bold vibe. Put a bead charm at each bubble for a party look. A slim ribbon around the last wrap hides the end and adds shine.
Tips for a smooth finish
A light serum helps tame flyaways. Use soft ties to avoid dents. If a bubble slips, tighten the nearby tie and puff again.
When to wear it
Great for birthday parties, school events, or casual days with friends. It stays comfy during games and fun.
Bubble ponytails are like a fun party for your little one’s hair! With just a few soft ties and a sprinkle of creativity, you can create a look that’s comfy, cute, and perfect for any occasion.
13. Twisted Low Bun

If you want a look that feels polished but is easy to do, try the twisted low bun. It sits at the nape of the neck and gives a neat, grown-up vibe that works for many events.
Here is what you need to start:
– Hairbrush or comb
– Elastic hair tie
– A handful of bobby pins
– A little smoothing serum or cream
– A decorative hairpiece (optional)
How to create it in simple steps:
1) Brush your hair smooth and rub in a tiny amount of serum so it stays sleek.
2) Gather all your hair at the back of your neck, near the nape.
3) Twist the hair away from your head, making a neat coil.
4) Wrap the twist into a small bun and pin it in place with several bobby pins. Cross the pins for extra grip.
5) Add a decorative piece if you like, then finish with a light spray to keep flyaways down.
Here are quick ideas to mix it up:
– Side bun option: shift the twist to one side for a softer, different look.
– Soft finish: pull out a few wisps near the ears for a gentle, relaxed feel.
Best for and practical notes:
– Perfect for family gatherings, school events, or formal occasions.
– For extra hold, use a light mist of hairspray and a tiny bit more serum before starting.
Next steps: try the side bun or add a small flower clip to match outfits and mood.
A polished look doesn’t have to be complicated! The twisted low bun is a chic choice for any occasion, keeping your little girl stylish and ready for anything.
14. Twisted and Knotted Braid

You want a cute style that lasts. Twisted and knotted braid delivers. Tiny knots at the crown meet a neat braid below. It looks playful and clean.
What you’ll use
– Comb or brush, a few small clear elastics, and one larger hair tie
– Colorful hair ties for a fun pop
Steps
1. Start with dry hair. Brush out tangles so knots stay smooth.
2. Pick a crown section. Twist a small piece into a tight knot. Secure with a small elastic.
3. Repeat along the top edge for neat knots.
4. Leave the rest loose and braid it in a simple three strand braid.
5. Secure the end with a hair tie.
Here is why this works: the knots grab the eye and keep hair off the face. The braid below holds the look together and adds texture.
Tips
– Use colorful ties to make the knots stand out.
– If hair is slippery, spray a light hold mist before you start.
Variations
– Try a side part and run the knots along one side for a chic twist.
– Add small braids near the knots for more detail.
Occasions
– Great for school, field trips, or casual days out.
– Perfect when you want a hairstyle that lasts.
– Easy to adjust if you need to move between activities.
15. Boho Braids

You want a breezy look that stays comfy in heat and looks cute. Boho braids give you a free spirit vibe with little work. You can wear them loose and carefree or pull them into a soft side pony for easy movement in the sun. This look works on many hair types too.
Here is how to make boho braids that stay soft and pretty.
– Step 1: Part your hair into several small sections along the crown or sides.
– Step 2: Braid each section into a tiny plait. Leave the ends free for a soft, relaxed feel.
– Step 3: For a loose look, gather the braids into a loose side pony.
– Step 4: Gently tug on the braids to loosen them.
– Step 5: Finish with a light spray if you want longer hold.
Where to wear boho braids
Where to wear boho braids: festivals, beach days, backyard parties. The style feels light and airy, so you can move with the breeze and not worry about heat. If your hair is thicker, braid extra sections to keep the style full.
Extras to upgrade the vibe
Small touches keep the look fresh. Try floral clips for a dreamy, festival vibe. Or grab hair chalk to add a pop of color without long commitment.
16. Classic French Braid

The classic French braid stays neat and simple. It works for school, parties, and everyday wear. If you want hair that lasts and looks tidy, this is a solid choice. Here’s how to do it.
– What you’ll need: a comb, a brush, and a clear elastic. A light spray helps if the hair is slick.
– Start at the crown: take a small section from the top. This base gives you control.
– Begin braiding: divide the top into three strands. Braid, then add a little hair from the sides each time you cross.
– Keep it smooth: pull the braid toward the scalp as you go. Stop at the nape.
– Secure and finish: knot with the clear elastic. Smooth flyaways.
– Tips for a polished look: light touch, clear elastic. A little hairspray can tame frizz.
– Variation to try: a Dutch braid sits higher and adds pop. It’s a fun switch if you want something new.
– Common questions: How tight should it be? Snug but not painful. How long will it last? It stays neat with a quick touch-up.
Next steps: practice in daylight, then set a quick morning routine.
17. Twisted Side Ponytail

Are you looking for a cute hairstyle that stays neat through a busy day? The twisted side ponytail is a simple twist on a classic look. It adds charm without extra fuss. Here is how you make it fast and easy.
Steps
– Gather hair to one side and smooth it with a brush. Keep a little volume at the crown for shape.
– Create a loose twist or mini braid along the side. Let a few strands peek out for texture.
– Secure the end with a soft hair tie that matches her outfit.
– Optional texture: add two tiny braids near the front of the twist for extra detail.
– Finishing touch: spritz with a light spray to hold the style without stiffness.
– Practical tip: choose a hair tie that blends with the hair or adds a small pop of color.
Occasion and fit
Perfect for school days, casual events, or a quick party look.
Materials
Soft hair ties, a smooth brush or comb, and optional small elastics for the braids.
Here is why
It keeps hair off the face and stays comfortable all day. It looks neat in photos and works well with helmets or headphones.
Next steps
Practice the twist a few mornings to find the best tension. Try different tie colors to match outfits.
18. Chignon with Braid

Looking for a hairstyle that feels formal yet easy to copy at home? The chignon with a braid gives a neat bun with a delicate front twist. It looks polished and stays comfy for hours.
Materials you’ll need
– Wide-tooth comb and brush
– Small hair elastics
– Bobby pins
– Light hair spray or a little shine spray
– Cute accessories (clips, flowers, or a tiny veil)
Step-by-step guide
– Start with clean, brushed hair. Smooth the crown so the braid sits nicely.
– Take a front section and weave it into a gentle three-strand braid. Keep it loose so it fans softly across the forehead.
– Secure the braid with a small elastic, but don’t pull too tight.
– Gather the rest of the hair at the nape into a low chignon. Twist the hair into a bun and tuck the ends under.
– Wrap the front braid around the base of the bun. Pin it in place with a few bobby pins.
– Tidy any loose strands with a light spray. Smooth the surface and check for balance.
Finish and accessories
– Add tiny clips or fresh flowers to brighten the look.
– A veil or a few delicate petals create a whimsical touch for special occasions.
– Use one or two pins to secure the braid where needed so it stays all day.
Occasions to wear it
Ideal for formal events, family gatherings, and photoshoots. This style holds up well for long days and looks great in pictures.
A chignon with a braid is your go-to for a polished look that’s easy to master—perfect for any occasion! Elevate your little girl’s style in just a few steps and let her shine!


19. Simple Side Twist

Busy mornings call for a quick, cute fix. The simple side twist fits that need. It keeps hair away from her face and adds a tidy look.
Here is why this style works: it uses just a small section from the front and a pin.
What you’ll need
– A small section from the front near the temple
– A bobby pin or small clip
– Optional: a colorful clip for a playful touch
How to do it
1) Grab a thin strand from the hairline at the temple.
2) Twist it gently toward the back, keeping the twist neat and flat.
3) Secure the end with a pin or clip just behind the ear.
Double twist option
– For added flair, repeat on the same side with another thin section and pin beside the first twist.
Tips
– Use colorful clips to make it fun.
– If hair is slippery, a tiny mist of water helps the twist stay.
– Place pins close to the scalp for best hold.
Occasions
– School days
– Casual outings
– After-school activities
Next steps
– Try it on the other side for a balanced look.
– Combine with a small headband for more control.
– Practice once to speed up your routine.
– With a little practice, you can add a tiny braid next to the twist for a new look.
20. Creative Cornrows

You want a cute look that lasts and stays cool. Creative cornrows fit. They lie flat on the scalp and stay in place when your kid plays. They protect hair and cut morning prep. You can switch patterns to fit any mood.
Here is why this style helps you:
– It stays neat during sports and trips.
– It cuts tangles and makes brushing easier.
– It lets you mix colors and shapes.
How to create cornrows
– Part the hair into small, even sections near the scalp.
– Braid each section tight to the scalp.
– Run braids across the head to cover the area you want.
– End with a knot or beads for a fun touch.
Style tips
– Use a light gel or moisturizer to control flyaways.
– Add beads or charms at the ends for flair.
– Sleep with a satin scarf to protect the braids.
Occasions and care
– Great for summer trips, vacations, and school days.
– Keep the scalp moisturized and check for tight spots.
Pattern ideas
– Straight back rows.
– Circular patterns around the crown.
– Zigzag lines across the scalp.
– Halo cornrows that frame the face.
Maintenance tips
– Check the scalp every few days for tension or itching.
– Re-braid after washing and drying.
– Give the hair a rest if you see breakage.
Next steps
Try one simple pattern this weekend, then add beads or a scarf to fit your style.
You Might Also Like


21. Simple Clips and Braids

Looking for a quick, cute hairstyle you can do in minutes? Simple clips and braids give a bright look that stays neat for school, play, or casual days.
Steps to achieve the look:
– Create two or three small, thin braids. Let the ends hang loose or tuck them back into the hair for a softer line.
– Pin each braid back with a colorful clip. Place clips on the side or at the crown so the braids shine.
– Pick clips that match her outfit or mix several colors for a fun vibe.
Why this works:
– It adds color and texture without heavy styling.
– It holds up well through quick moves and busy days.
– It’s easy to adjust if she wants more braids or fewer clips.
Tips to elevate the look:
– Use small clips and a light touch of hairspray to keep things in place.
– Layer clips in different shapes and colors for an eclectic feel.
– Space clips evenly so the style stays balanced as she moves.
Perfect for school days, playground outings, and casual gatherings. This simple combo of braids and clips keeps hair neat and easy to manage, while still looking cute and fun.
22. Twisted Flower Braid

For a special day, you want a look that feels magical but stays neat. The twisted flower braid does just that. You braid a strand and then twist it into a flower shape. Pin the petals so they stay secure through every moment. This style works well for weddings or formal events.
What you’ll need
– Hairbrush and light detangler
– Small bobby pins or clear pins
– Optional flower pins
– Light hairspray
– A touch of glitter spray for sparkle
Steps to twist a flower braid
1) Brush hair and part to the side.
2) Make a shallow braid along the chosen section.
3) As you braid, twist the strand into a circle to form a flower.
4) Pin the base with two or three pins and adjust the petals until they lay flat.
Tips
– Use flower pins for color and charm.
– A quick mist of glitter spray catches the light in photos.
– If hair is slippery, apply a tiny amount of styling gel at the crown.
Where it shines
This braid is ideal for weddings, family gatherings, and proms. It holds through long events and looks polished in photos.
Variations
Try a larger bloom by combining two twisted braids, or place a companion flower on the other side for balance. Pair this with a simple low bun or half-up style for a different vibe.
A Twisted Flower Braid isn’t just a hairstyle; it’s a magical moment! Perfect for any special day, it keeps little ones looking adorable while feeling like fairy tale princesses.
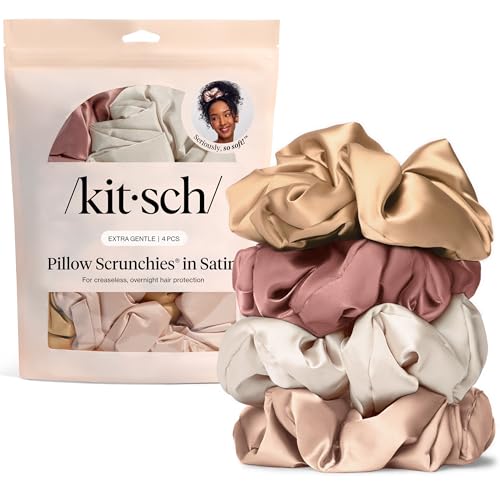
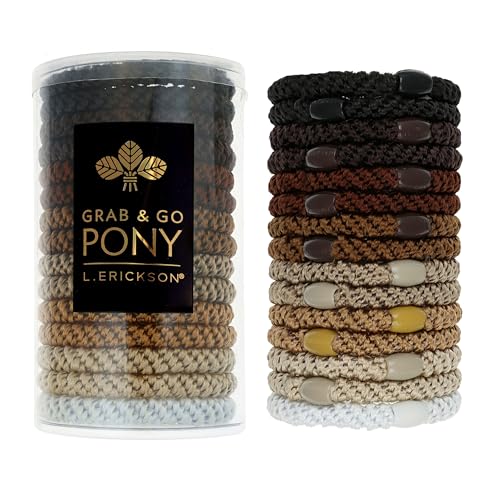
23. Cute Hair Accessories

You want to upgrade a simple style fast. The right accessories can add charm without effort. Use clips, headbands, and small bows to create new looks in minutes.
– Quick picks: Gather kid-safe clips, plastic barrettes, fabric bows, and a soft headband.
– Match the outfit: Pick colors that echo her dress, shoes, or a favorite shirt.
– Layer for flair: Clip two small pieces on one side to create movement.
– Texture and style: Try velvet bows, satin ribbons, glittery barrettes, or floral fabrics.
– Safe and comfy: Avoid sharp edges and ensure clasps stay closed.
– Occasion ideas: Use simple pieces for everyday wear and sparkly pieces for parties.
– Quick setup: Apply while hair is damp for grip, or use a light spray to help hold.
– Materials: Choose soft plastics, fabric, or wood to reduce snagging.
– Next steps: Create a mini accessory kit with a few clips, headbands, a small mirror, and a storage tin.
– Rotation tip: Rotate pieces to keep looks fresh.
For different hair types:
– For fine hair, choose light clips and a soft headband that won’t slip.
– For thick or curly hair, use bigger clips or two pieces to hold the style.
Maintenance and storage:
– Keep the kit in a small box.
– Check the pieces often for loose parts.
With practice, choosing the right pieces becomes fast and easy.
– Your child will love the little details.
– It also helps you save time in the morning.


24. Side Braid with Ribbons

If you want a look that’s sweet and easy, try a side braid with ribbons. It adds color near the face and stays comfy during play and photos. It’s a small touch that can make her outfit feel special. Here is why this works and how to do it.
– What you’ll need
– Ribbons in colors that match her outfit
– Clear elastic hair ties
– Small bobby pins for extra hold
– Steps
– Part hair to the side so the braid sits near the shoulder
– Start a loose three strand braid from the head’s side
– Weave ribbons into the strands as you braid, every few stitches
– Finish with a clear elastic and pin loose ends
– Tips to get it right
– Colors complement her outfit
– Add 2 ribbons for depth
– Keep the braid soft, not tight
– Trim ribbons so they lie flat
– Why this style works
– It frames the face with color
– Quick to learn and stays in place
– Fits school days, parties, and trips
– Best occasions
– Parties and photos days
– Casual weekends
– Next steps
– Practice on a doll head or a friend’s hair
– Start with one ribbon, then add more as you gain skill
– With time you will braid faster and the colors will pop
25. Fun Hair Chalk Styles

You want a pop of color that looks awesome and washes out fast. Hair chalk makes that easy. It’s kid-friendly, simple to apply, and safe for everyday use. Let’s grab some chalk and get creative.
Here is why hair chalk can work for you:
– It adds bright streaks or mini rainbow bits in minutes.
– It dries quickly and cleans off with a few shampoos.
– It works on most hair lengths, from short cuts to long curls.
Next steps to get the best results:
– Pick washable, kid-safe hair chalk in your favorite colors.
– Work on dry hair. Tie back any clothes you don’t want stained.
– Put a small amount on a gloved hand or a makeup brush. Lightly rub color onto the strands you want to color.
– Build color slowly. More color means bolder stripes, less is softer.
– Seal the look with a light spray or a dab of gel so the chalk stays put during a party or photos.
– Wash out with regular shampoo when you’re done or the day ends.
Fun ideas to try at home:
– Color streaks in a braid for a cute party look.
– Rainbow tips on a ponytail for a playful vibe.
– Color pops around the face for a mini, easy fringe effect.
Tips you’ll use again and again:
– Test one small strand first to see how it shows on your hair.
– Choose colors that match outfits or themes.
– Keep a damp cloth handy to wipe skin or ears if you get chalk on them.

26. Layered Braid with Beads

Layered Braid with Beads
Want a hairstyle that looks sweet and stays in place? A layered braid with beads gives a fun, trendy finish you can wear every day. It feels playful but is easy to pull off with a little practice.
What you’ll need
– Small beads in a couple of colors
– Clear elastic bands that are gentle on hair
– A fine comb or hair pick
– A light hold spray or hair mist
How to create it
1) Part the hair and lift a small section at the crown. This is the starting point for the “layered” look.
2) Braid loosely. Use three strands and keep the braid relaxed so the layers show.
3) Slide beads onto the hair as you braid. Place beads at different lengths along the strand so some sit higher and others closer to the ends.
4) Tie off the braid with a clear elastic and spray lightly to keep it neat. Gently shake out the top layers so the braid looks soft and full.
Bead ideas and color tips
– Match bead colors to her outfit for a coordinated look.
– Use a few pastel beads for a gentle vibe, or stick to clear beads for a versatile finish.
– Keep bead sizes small to avoid snagging during play.
Variations to try
– Sweep the braid to one side for a chic asymmetry.
– Create two smaller layered braids for a playful twin-braid style.
– Experiment with different braids like a French or fishtail to change the finish.
Care and safety
– Check beads before she heads out for school or a play date.
– Reattach any bead that slips loose.
– Comb gently to keep the layers looking neat and tidy.
Next steps
Now you have a simple, stylish plan. Practice once or twice to build confidence, then try new bead colors to suit any occasion.
27. Fun Braided Headband

Overview
Want a quick, neat way to keep hair off her face for school or a party? A braided headband is perfect. It looks cute and stays comfy all day. Two small braids on each side frame her face, then you pin them back to form a soft headband.
What you’ll need
– Colorful small elastics to match outfits
– A few bobby pins that hide easily
– A tiny clip or flower for extra charm
– Optional: a thin ribbon to weave in
Step-by-step guide
1) Part the hair across the crown so you have a clean start.
2) Braid a small, neat braid on each side.
3) Secure each braid with a tiny elastic.
4) Bring the braids toward the back of the head and pin them in place.
5) Tidy the look by lifting and pinning any loose strands.
6) Add a clip or small flower where the knots meet for a pretty finish.
Tips and variations
– Try two bright colors for a playful vibe.
– If hair is slippery, mist with a light leave-in spray first.
– For longer hair, make the braids a bit longer so the headband sits higher.
– Switch to a single thin braid along the crown for a sleeker look.
– Use a ribbon woven through the braids for extra flair.
Why it works
It keeps hair away from the face during class or photos. It’s fast to do on busy mornings. It also adapts to many outfits and events. Next steps: grab your supplies and practice once, then you’ll be ready in minutes.

Conclusion

These 27 adorable hairstyles are perfect for any occasion! Each one offers a unique style that can be easily customized with accessories and colors.
Whether you’re getting ready for a special event or just a fun day out, there’s a hairstyle here for every little girl to enjoy. Don’t hesitate to experiment and find what works best for your little one’s personality and style!
Frequently Asked Questions
What Are Some Cute Hairstyles for Kids That Are Easy to Do?
If you’re looking for cute hairstyles for kids that won’t take ages to create, you’re in luck! Styles like the twisted pigtails and messy bun with beads are both adorable and quick to master. These hairstyles are perfect for busy mornings and can easily transition from school to playdates!
Which Hairstyles Work Best for Parties?
For party hairstyles, consider options that look polished yet are easy to achieve. The half-up braided crown and twisted halo braid are excellent choices, as they stay secure during all the fun activities and look great in photos! Plus, you can accessorize them with cute clips or ribbons for an extra festive touch.
How Can I Keep My Little Girl’s Hair Neat Throughout the Day?
To maintain neatness throughout the day, opt for styles like the double Dutch braids or side-swept fishtail braid. Both styles not only look cute but also keep hair away from the face, making them ideal for active days at school or play. Using good-quality hair ties and a bit of hair spray can help ensure everything stays in place!
What Are Some Trendy Hairstyles for Children Right Now?
Trendy hairstyles for children include fun options like the rainbow braid and bubble ponytail. These styles allow for a pop of color and creativity while being simple to execute. Plus, they’re perfect for any occasion, from casual outings to birthday parties, ensuring your little one stays stylish and comfortable!
Can I Use Accessories to Enhance Simple Hairdos for Girls?
Absolutely! Accessories can take simple hairdos for girls to the next level. Adding clips, headbands, or even colorful ribbons can make a simple ponytail with a twist or a braided headband look super special. Get creative with colors and styles to match your child’s outfit or the occasion!
Related Topics
cute hairstyles
easy hairstyles
braided hairstyles
party hairstyles
trendy children styles
quick hairdos
simple hairstyles
little girl styles
fun hair accessories
creative hair ideas
everyday hairstyles
playful looks