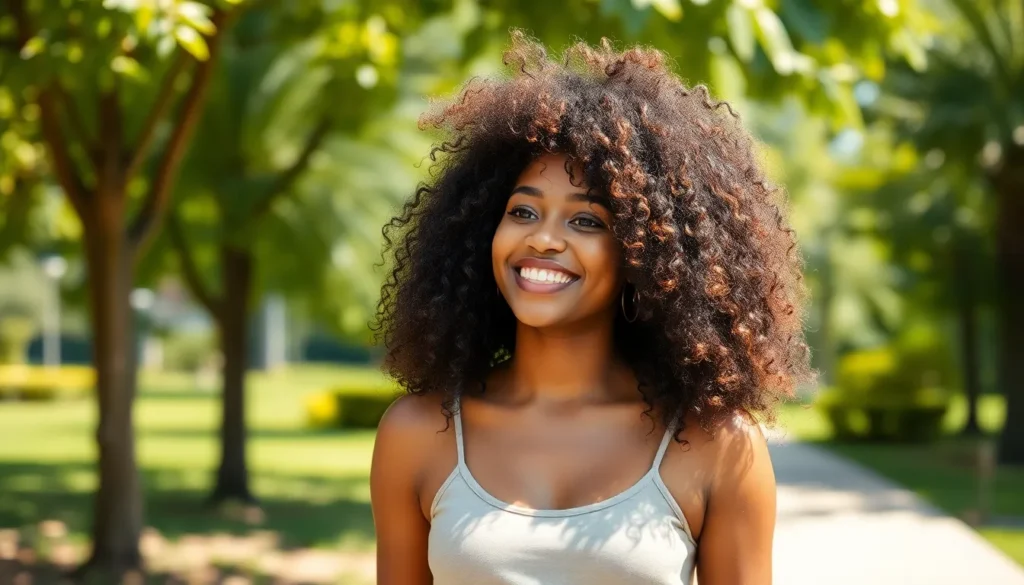
We’ve all been there – staring at our natural curls wondering how to make them look effortlessly gorgeous without spending hours in front of the mirror. The truth is, curly hair isn’t a challenge to overcome; it’s a beautiful asset waiting to be celebrated with the right techniques and styles.
Natural curly hairstyles have taken center stage in recent years as more people embrace their texture and discover styling methods that work with their curls rather than against them. From loose waves to tight coils, every curl pattern offers unique possibilities for stunning looks that turn heads and boost confidence.
We’re here to share game-changing styling tips, protective techniques, and gorgeous hairstyle ideas that’ll help you fall in love with your natural texture. Whether you’re a curl newbie or looking to refresh your routine, these strategies will transform your hair game and simplify your styling process for good.
Embrace Your Natural Texture With These Stunning Curly Hairstyles
Working with your natural curl pattern opens up endless possibilities for gorgeous hairstyles that celebrate your unique texture. These versatile looks highlight the beauty of curly hair while keeping maintenance manageable and stylish.
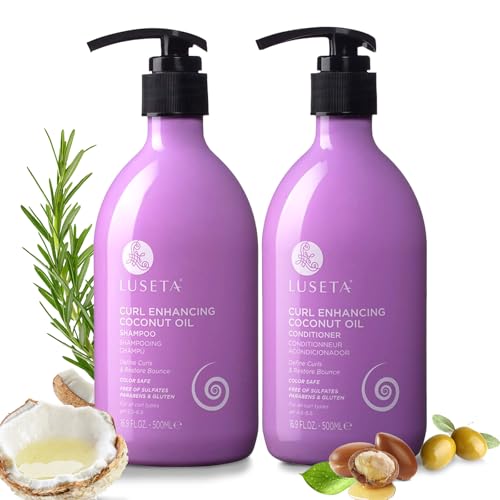
The Luseta Curl Enhancing Coconut Oil Shampoo is a gentle cleanser that can rid the hair strands of build-up adding more bounce to your curls. The formula is lightweight, but since it contains coconut oil, it still packs a lot of moisturizing power. Even dry hair will have more shine and luster. Plus, this curl enhancing shampoo will also add plenty of overall volume to the hair. It also contains plenty of vitamins and beneficial fats which promote hair growth.

SMOOTHING ARGAN OIL: People love how this argan oil shampoo from Pure Nature Lux Spa works hard to smooth flyaways and frizz; Powered by Moroccan argan oil, this moisturizing shampoo helps you achieve smoother, more manageable hair

Shampoo for Curly Hair: This curly hair shampoois formulated for curly hair that needs lightweight, anti-frizz hydration; Coconut Oil delivers deep moisture for up to 48 hours of curl definition
The Wash and Go Method
Start with freshly washed curls using a sulfate-free shampoo designed for curly hair. Apply a leave-in conditioner while your hair is still damp, focusing on the mid-lengths and ends. Scrunch gel or curl cream through your strands using the praying hands method to enhance definition without disrupting your natural curl pattern. Allow your curls to air dry completely, then gently scrunch out any crunchiness for soft, bouncy results that last 3-5 days.
Protective Twisted Updos
Create elegant twisted updos that protect your curls while maintaining their natural beauty. Divide damp hair into 6-8 sections, then twist each section loosely before pinning them up with bobby pins. Secure the twists in a low bun or high crown arrangement depending on your preference. Release a few face-framing pieces to soften the look and add movement around your features.
Half Up Curly Styles
Section the top portion of your curls from ear to ear, gathering this hair into a high ponytail or messy bun. Leave the remaining curls flowing freely around your shoulders for a balanced, romantic appearance. Accessorize with decorative hair clips, headbands, or silk scarves to add personality while keeping curls off your face during work or special occasions.
Curly Braided Crowns
Begin with second or third-day curls that have some texture and grip for easier braiding. Create loose Dutch or French braids along your hairline, incorporating curls as you work around your head like a crown. Pin the braid ends behind your ears and allow the remaining curls to cascade naturally down your back or shoulders.
Pineapple Ponytails
Gather your curls at the very top of your head using a silk scrunchie to prevent breakage and frizz. Position the ponytail high enough that curls fountain down around your face and neck area. Fluff the curls gently at the crown to create volume and prevent flatness from the elastic band.
Side Swept Curly Looks
Part your curls deeply on one side, then sweep the majority of your hair across to create asymmetrical volume. Use lightweight mousse or curl cream to enhance definition while maintaining the swept shape. Tuck one side behind your ear and secure with a decorative bobby pin or small hair accessory for added elegance.
Define Your Curls With The Classic Wash and Go

The wash and go method transforms freshly washed hair into beautifully defined curls using minimal styling products. We’ll walk you through perfecting this foundational technique that showcases your natural curl pattern.

15 oz jar of Aunt Jackie's Transform Hydrating Leave-In Hair Conditioner

Curls Start Soft with Every Spray: Marc Anthony’s Curl Envy Leave-In Conditioner delivers lightweight hydration to curly hair, softening and detangling while boosting definition and shine. 8.4 fl oz

Moisturized Curly Hair- Dream Lengths Curls Non-Stop Dreamy Curls leave-in conditioner moisturizes and defines by day with a silk pillowcase effect by night. Say goodbye to frizzy curls. Best for wavy hair to coily hair
Choose The Right Leave-In Conditioner
Lightweight formulas work best for fine curls because they won’t weigh down delicate strands. Look for leave-in conditioners containing glycerin, aloe vera, or shea butter that provide moisture without heaviness. Cream-based conditioners suit thick, coarse curls while spray conditioners benefit fine to medium curl types.
Water should be the first ingredient on any quality leave-in conditioner label. Check that your chosen product doesn’t contain drying alcohols like denatured alcohol or isopropyl alcohol. Protein-free options prevent buildup for low porosity hair while protein-enriched versions strengthen high porosity curls.
Apply leave-in conditioner to soaking wet hair for maximum distribution and curl definition. Start with a quarter-sized amount and add more if needed based on your hair length and thickness. Focus application from mid-shaft to ends where curls need the most moisture and definition.
Apply Curl-Improving Products Properly
Layer products from thinnest to thickest consistency to ensure proper absorption and avoid product buildup. Start with leave-in conditioner, followed by curl cream, then finish with gel or mousse for hold. Wait 30-60 seconds between each product application to allow proper penetration.
Section your hair into 4-6 parts depending on thickness and length for even product distribution. Apply products using praying hands method by smoothing palms down each section from roots to ends. Rake through with fingers to separate curls and ensure every strand receives product coverage.
Use the right amount for your hair density to avoid weighing down curls or creating crunchiness. Fine hair typically needs a dime-sized amount per section while thick hair may require quarter-sized portions. Start with less product and build up gradually until you achieve desired definition and hold.
Master The Scrunching Technique
Scrunch from ends upward toward the scalp using a microfiber towel or cotton t-shirt to remove excess water without disturbing curl formation. Squeeze gently rather than rubbing to maintain curl clumps and reduce frizz. Work in small sections to ensure even moisture removal throughout your hair.
Pulse scrunching creates better curl definition than continuous scrunching motions. Hold each scrunch for 2-3 seconds before releasing, then move to the next section. This technique encourages curls to spring up and form defined coils while preventing breakage from excessive manipulation.
Finish with plopping or air drying to maintain curl shape and reduce frizz. Plop hair in a microfiber towel for 10-20 minutes to absorb excess moisture before air drying. Avoid touching curls during the drying process to prevent frizz and maintain definition until hair is completely dry.
Create Volume With The Big Chop Style

The big chop transforms your natural curly hair journey by creating instant volume and bounce that’s impossible to achieve with longer lengths. This dramatic cut celebrates your curl pattern while maximizing the natural lift that comes from shorter, lighter strands.

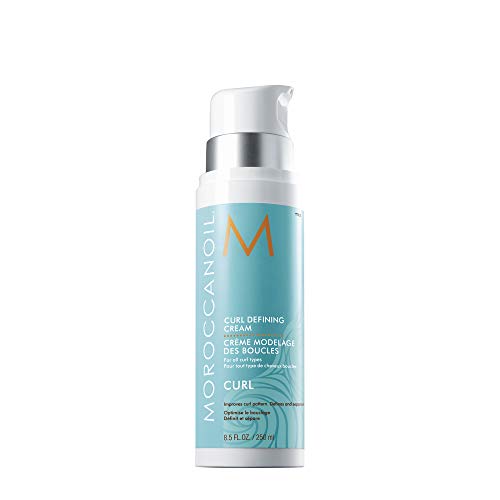
Curl Defining Gel for Frizz Control: Garnier Fructis Curl Scrunch Gel is a styling gel for curly hair that creates defined, volume-controlled curls with 24-hour hold, keeping frizz in check while leaving curls ultra-shiny and residue-free

Curls Without Stiffness, Residue, Weighdown, or Crunch: Our Flexi Hold Curls hair styling gel is a breakthrough formula that provides your curls with up to 100 hours of moisture and flexible hold. Enjoy defined, flexible curls that move with you
Color safe, sulfate free,phosphate free, paraben free
Understand The Benefits of Short Natural Hair
Reduced weight creates natural lift that allows your curls to spring up and outward instead of being pulled down by gravity. We’ve found that shorter curls maintain their shape throughout the day without the heaviness that causes longer styles to fall flat.
Faster drying time means less manipulation and heat damage to your delicate curl structure. Your hair air dries in 30-45 minutes compared to 2-3 hours for longer lengths, reducing the risk of frizz from over handling wet curls.
Product distribution becomes more effective when you’re working with less hair surface area. A quarter sized amount of curl cream covers your entire head evenly, ensuring every strand receives the moisture and definition it needs.
Damage elimination happens instantly when you remove years of chemical processing, heat damage, and mechanical stress from brushing. Your new growth emerges with its natural curl pattern intact and healthy.
Styling versatility increases dramatically with shorter natural hair that can be finger coiled, twist outs, or simply scrunched for different textures. We can create 5-7 distinct looks using the same length and simple techniques.
Style Tips For Maximum Volume
Start with soaking wet hair to ensure your products distribute evenly and your curls form their natural shape. Apply your leave in conditioner and curl cream to dripping wet sections for optimal definition and volume.
Scrunch upward from the ends toward your scalp to encourage your curls to lift away from your head. This technique activates your curl pattern while building height and fullness throughout your crown area.
Avoid touching your hair while it dries to prevent frizz and maintain the volume you’ve created. Resist the urge to fluff or separate your curls until they’re completely dry and set in their natural formation.
Sleep on a silk pillowcase or use a silk bonnet to preserve your volume overnight without flattening your curls. Cotton fabrics create friction that destroys curl definition and reduces the lift you’ve worked to achieve.
Refresh with water spray and a small amount of leave in conditioner on day two and three to revive flattened areas. Focus on the roots and gently scrunch to reactivate your curl pattern without weighing down your style.
Add Elegance With Protective Twist Outs

Twist outs offer a sophisticated styling option that protects natural curly hair while creating gorgeous, elongated curl patterns. We’ve discovered that this versatile technique transforms our curls into elegant spirals that last for days when executed properly.
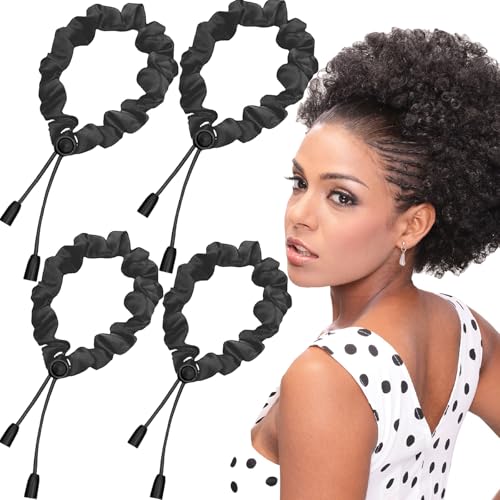
No-Damage Hair Ties: Traditional elastic bands need to be twisted to tighten your hair, and they cannot be easily adjusted, which will cause damage, and the elasticity and size cannot meet all hair volumes. Puff hair ties slide to your desired tightness and stay put until you squeeze the switch to loosen your hair

Package includes: 12 pcs fashion satin silk hair scrunchies, 12 classic colors, Enough to match your various hairstyles, fashion trend hair accessories.

to be made of premium smooth and soft shiny satin with delicate sewing craftsmanship, our hair scrunchies are durable and comfortable to wear
Prepare Your Hair The Night Before
Start with clean, slightly damp hair to ensure optimal twist formation and curl definition. We recommend applying a leave-in conditioner from mid-length to ends, focusing on the most porous sections of your hair. Follow with a lightweight styling cream or curl enhancer to provide hold without weighing down your natural texture.
Section your hair into 8-12 parts depending on your hair density and desired curl size. Smaller sections create tighter curls while larger sections produce looser waves. Begin twisting each section tightly from root to tip using a two-strand twist technique. Secure the ends by wrapping them around themselves or using small hair ties if needed.
Sleep protection becomes crucial for maintaining your twist out preparation. We suggest covering your twists with a silk or satin scarf to prevent friction and frizz formation overnight. Alternatively, use a silk pillowcase to reduce hair breakage while you rest.
Unravel Technique For Best Results
Timing matters significantly when unraveling your twists for maximum curl definition. We’ve found that slightly damp twists unravel more smoothly than completely dry ones, creating better spiral formation. Test one twist first to determine if your hair needs additional moisture before proceeding.
Work with one twist at a time using gentle finger separation rather than aggressive pulling motions. Start unraveling from the bottom and work your way up to the roots for smoother curl formation. Apply a tiny amount of lightweight oil or serum to your fingertips to reduce friction during the unraveling process.
Separate each unraveled curl into 2-3 smaller sections for increased volume and definition. We recommend working quickly through all sections to maintain consistent moisture levels throughout your hair. Avoid touching or manipulating the curls once you’ve finished separating them to prevent frizz formation.
Maintain The Style Throughout The Week
Refresh your twist out curls on day two and beyond using a spray bottle filled with water and a small amount of leave-in conditioner. We suggest targeting only the areas that appear flat or frizzy rather than saturating your entire head. Focus the moisture application on your curl ends where dryness typically occurs first.
Nighttime preservation extends your twist out longevity significantly with proper techniques. Gather your curls loosely at the very top of your head using a silk scrunchie to create a pineapple shape. This method prevents flattening while you sleep and maintains curl volume for the next day.
Combat frizz between wash days by sealing your hair cuticles with a light coating of natural oil like argan or jojoba. We apply these oils sparingly to avoid weighing down the curl pattern you’ve worked to achieve. Regular scalp massage with fingertips stimulates natural oil production and keeps your roots healthy throughout the styling period.
Rock The Versatile Curly Bob

Curly bobs offer endless styling possibilities while maintaining the manageable length that works beautifully with natural curl patterns. We’ll explore how to customize this classic cut to flatter your unique features and adapt it for any occasion.

STYLISH AND VERSATILE DESIGN: Elevate your hairstyle with these Kitsch Spiral Hair Pins. These hair pins are perfect for both casual and formal occasions. The rich brown color blends seamlessly with various hair tones, enhancing your overall appearance with a chic and polished finish.

【User-Friendly Design】There are wavy folds on both sides of the U-shaped hairpin, so that it will firmly hold your hair and will not slip. The tips have smooth, round balls that don't scratch your scalp. It won't pull your hair.

20PCS Brown Pins in A Set: Firm, lightweight, not flimsy, well-made of strong metal with set of 20 pcs and good size packing in a paper box, our stylish bun bobby pins are definitely a cost-effective choice! The material is high quality metal and the cover is glossy. Lightweight keep Your hair won't be pulled and your scalp won't feel uncomfortable. Large number of the pins make sure be enough for your need and for a long run, offer the perfect blend of premium quality and abundant quantity.
Find The Right Length For Your Face Shape
Round faces benefit most from chin-length curly bobs that create vertical lines and elongate facial features. Position the longest layers just below the jawline to draw attention downward while allowing curls to frame your face naturally. Avoid bobs that end at the widest part of your cheeks as they can emphasize roundness.
Square faces look stunning with shoulder-grazing curly bobs that soften angular jawlines through gentle curl movement. Layer the front sections longer than the back to create asymmetrical balance while maintaining volume at the crown. Side parts work exceptionally well to break up the strong horizontal lines of square face shapes.
Oval faces can experiment with virtually any curly bob length since this balanced face shape accommodates most styles effortlessly. Try collarbone-length bobs for elegant sophistication or go shorter with ear-length cuts for playful bounce. Center or side parts both complement oval faces beautifully with curly bob styles.
Heart-shaped faces shine with longer curly bobs that add width at the jawline to balance narrower chins. Aim for lengths between the chin and collarbone while incorporating layers that create fullness around the lower half of your face. Avoid too much volume at the crown which can emphasize forehead width.
Long faces require curly bobs with maximum volume and width to create the illusion of shorter proportions. Choose chin-length cuts with heavy layers that encourage curls to spring outward rather than downward. Deep side parts and face-framing layers add horizontal emphasis that balances elongated features.
Styling Options For Different Occasions
Professional settings call for polished curly bob styles that project confidence while maintaining workplace appropriateness. Smooth your curls with a lightweight cream and define individual curl clumps using the praying hands method. Create subtle side parts that showcase your natural texture without appearing too voluminous or distracting.
Casual everyday wear allows for effortless curly bob styling that celebrates your natural texture with minimal manipulation. Apply leave-in conditioner to damp hair and scrunch gently before air drying or diffusing on low heat. This approach maintains curl definition while preventing frizz throughout your daily activities.
Evening events transform your curly bob into glamorous styles through strategic product application and styling techniques. Use a curl improving mousse at the roots for lift then scrunch a shine serum through mid-lengths and ends. Pin one side back with decorative clips or bobby pins to create asymmetrical elegance perfect for dinner dates or parties.
Workout sessions require secure curly bob styles that keep hair off your face while protecting curl patterns from excessive manipulation. Try the pineapple method by gathering curls loosely at the very top of your head with a silk scrunchie. This technique prevents flattening while allowing air circulation during physical activities.
Beach or pool days benefit from protective curly bob styling that shields hair from chlorine and salt water damage. Apply a leave-in conditioner with UV protection before swimming then braid damp sections loosely to prevent tangling. Refresh curls afterward with a mixture of water and curl cream sprayed gently throughout your bob.
Special occasions elevate your curly bob through elegant updos that showcase your curl texture while creating sophisticated silhouettes. Twist sections of your bob into a low chignon or create a half-up style with face-framing tendrils left loose. These formal adaptations prove that curly bobs work beautifully for weddings and celebrations.
Show Off Your Length With Long Layered Curls

Long layered curls create stunning cascading movement that celebrates your hair’s natural texture while adding dimension and visual interest. Strategic layering transforms heavy curls into bouncy, flowing styles that showcase every inch of your beautiful length.

CURL DEFINITION: Turn up the volume on your curls with this curly hair shampoo and conditioner set from Bellisso. Our shampoo and conditioner set for curly hair has been specially formulated for enhanced definition and bounce. Turn heads for all the right reasons with this premium curly shampoo and conditioner.

Shampoo and Conditioner for Curly Hair: This curly hair shampoo and conditioner set is formulated for curly hair that needs lightweight, anti-frizz hydration; Coconut Oil delivers deep moisture for up to 48 hours of curl definition

CLEANSE & REFRESH: Wash away heavy build up to leave hair and scalp refreshed
Layer Placement For Natural Movement
Strategically placed layers transform long curly hair from flat and weighty to voluminous and ever-changing. We recommend face-framing layers that start at chin level to enhance your features while maintaining length throughout the back sections. Mid-length layers around the collarbone area create natural bounce and prevent the triangular shape that often occurs with single-length curly cuts.
Professional stylists suggest avoiding layers that are too short near the crown, as these can create unwanted volume and frizz at the roots. Instead, longer layers beginning around ear level allow curls to maintain their natural weight distribution while still achieving movement. The key lies in graduated cutting techniques that preserve curl integrity while encouraging natural spring patterns.
Bottom layers should remain the longest to anchor your style and prevent the mushroom effect that can occur when layers are cut too aggressively. Consider asking your stylist for “invisible layers” that work within your curl pattern rather than against it, creating seamless transitions between different lengths.
Products That Enhance Long Curly Hair
Leave-in conditioners specifically formulated for long curly hair provide essential moisture without weighing down your curls. We recommend applying these products to damp hair, focusing on mid-lengths and ends where curl definition matters most. Look for lightweight formulas containing ingredients like glycerin and panthenol that attract moisture while maintaining bounce.
Curl creams designed for long hair should offer hold without stiffness, allowing your layers to move naturally throughout the day. Apply these products using the praying hands method, smoothing from roots to ends to encourage uniform curl formation across all layer lengths. Avoid products with heavy oils that can weigh down longer sections and disrupt your curl pattern.
Mousse becomes particularly important for long layered curls because it provides lift at the roots while maintaining definition through the ends. Use a golf ball sized amount for shoulder-length hair and adjust accordingly for longer styles. Scrunch the product into wet hair, focusing on areas where layers meet to enhance natural movement patterns.
Diffusing sprays help set your curl pattern while reducing drying time for long hair. These products work best when applied before air drying or using a diffuser attachment, creating lasting definition that withstands humidity and daily activities.
Make A Statement With The Curly Mohawk

Curly mohawks offer the perfect balance between edgy sophistication and natural texture celebration. This bold style transforms your curls into a stunning centerpiece that commands attention while maintaining the integrity of your natural hair pattern.

PERFECT FOR curly hair

12 fl oz of Aunt Jackie's Quench Moisture Intensive Leave-In Conditioner
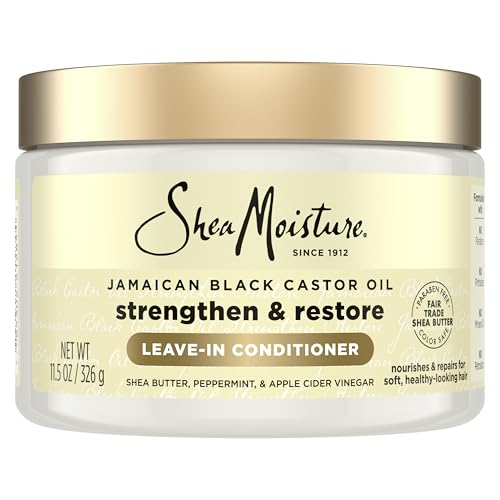
SheaMoisture Jamaican Black Castor Oil Leave In Conditioner is a reparative leave-in conditioner that softens and detangles hair while controlling frizz.
Create The Look Without Cutting
Sectioning becomes your secret weapon when crafting a faux curly mohawk without permanent alterations. We recommend dividing your hair into three distinct zones: the center strip running from your forehead to the nape of your neck creates the mohawk section, while the side sections get temporarily secured or styled downward.
Twisting techniques help achieve the height and definition essential for this dramatic look. Start by applying a leave-in conditioner to damp hair, then create tight two-strand twists along the center section while smoothing the side sections back with a brush or comb.
Bobby pins and small hair elastics secure the style without causing damage to your curl pattern. Pin the twisted side sections flat against your head or gather them into low ponytails behind your ears, ensuring the center section stands prominently.
Hair scarves or headbands enhance the mohawk illusion by covering the pinned side sections completely. Choose accessories that complement your outfit while drawing attention to the voluminous center strip of curls.
Styling Products For Hold and Definition
Strong hold gels provide the foundation for maintaining curly mohawk structure throughout the day. We suggest using products with a gel cast that can be scrunched out once dry, such as those containing aloe vera or flax seed for natural hold without harsh chemicals.
Mousse creates volume and lift in the center section while keeping curls bouncy and defined. Apply mousse to sections before twisting or scrunching, focusing on the roots to maximize height and preventing flatness.
Edge control smooths the side sections for that sleek, polished contrast against the textured center. Use a small amount on damp hair and brush it back smoothly to create clean lines that highlight the mohawk’s dramatic shape.
Setting sprays lock everything in place once you’ve achieved your desired look. Choose alcohol-free formulas that won’t dry out your curls while providing flexible hold that moves naturally with your hair.
| Product Type | Application Area | Hold Level | Best For |
|---|---|---|---|
| Strong Hold Gel | Center section | Maximum | All-day wear |
| Volumizing Mousse | Roots and mid-lengths | Medium | Lift and bounce |
| Edge Control | Side sections | High | Smooth finish |
| Setting Spray | Entire style | Flexible | Final lock-in |
Go Bold With Finger Coils

Finger coils transform natural curly hair into perfectly defined spirals that showcase your curl pattern’s natural beauty. This technique creates uniform, bouncy coils that last for days with proper execution.
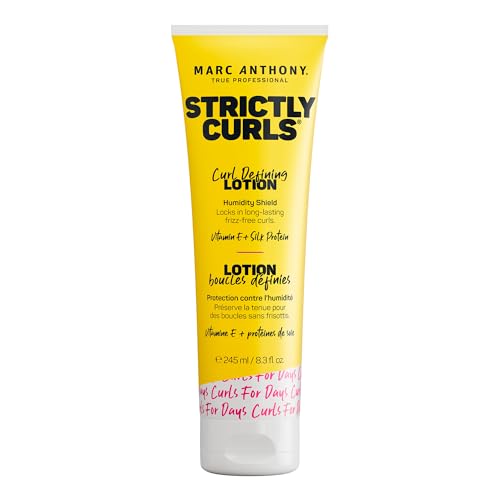
Defined Curls, Zero Crunch: Marc Anthony’s Strictly Curls Curl Defining Lotion is a lightweight styling cream designed to help shape, smooth, and hold curly hair with natural bounce and a soft finish. 8.3 fl oz

🩷 THE OG IN CURL: We've been definining all types of curls, coils & waves since 1998

RUNWAY-READY CURLS: Curls Rock is our signature cream for defining, styling, and shaping dry and unruly curls. When it's time to tame your waves and hit the stage, nothing stops flyaways and brings together beautiful, voluminous curls like Curls Rock
Section Your Hair Properly
Dividing your hair into manageable sections ensures even product distribution and consistent coil formation. Start with freshly washed, damp hair and apply a generous amount of leave-in conditioner throughout your strands.
Create four main quadrants by parting your hair down the middle from your forehead to the nape of your neck, then across from ear to ear. Work with one quadrant at a time, keeping the other sections clipped away to maintain organization. Within each quadrant, separate hair into smaller sections ranging from half-inch to one-inch wide, depending on your desired coil size.
The section size directly impacts your final look – smaller sections create tighter, more defined coils while larger sections produce looser, voluminous spirals. Consider your hair’s density when determining section size, as thicker hair typically requires smaller sections for even coverage. Fine hair works best with slightly larger sections to prevent the coils from appearing too sparse.
Technique For Uniform Coils
Mastering the finger coiling method requires the right product combination and consistent hand movements. Apply a small amount of curl cream or styling gel to each section, starting from the roots and working down to the ends.
Hold the section of hair between your thumb and index finger at the base near your scalp. Twist the hair around your index finger in a clockwise direction, maintaining steady tension as you spiral down the entire length of the strand. Keep your movements smooth and continuous to create even coil distribution throughout each section.
Release the coil gently from your finger, allowing it to spring back naturally into its formed shape. Repeat this process on every section, ensuring you maintain the same twisting direction and tension level for uniformity. Apply additional product if needed, but avoid oversaturating the hair as this can weigh down your coils and reduce their bounce.
Drying Methods For Long-Lasting Results
Proper drying techniques preserve your finger coils’ shape and extend their longevity. Air drying produces the best results for maintaining natural curl definition, though it requires patience and proper technique.
Allow your coils to dry completely without touching or manipulating them during the process. This typically takes 4-6 hours depending on your hair’s thickness and length. Create a humid environment by staying in a bathroom after a shower or using a humidifier to prevent frizz formation.
| Drying Method | Time Required | Best For | Results |
|---|---|---|---|
| Air Drying | 4-6 hours | All hair types | Maximum definition |
| Diffusing | 45-60 minutes | Thick, dense hair | Faster with good volume |
| Plopping | 20-30 minutes prep | Fine to medium hair | Enhanced curl formation |
Diffusing offers a faster alternative when time constraints exist. Use a blow dryer with a diffuser attachment on the lowest heat and speed settings. Cup sections of coils in the diffuser bowl and lift toward your scalp, holding for 10-15 seconds before moving to the next section.
Sleep protection maintains your finger coils for multiple days. Cover your coils with a silk or satin scarf, or use a satin pillowcase to reduce friction that can disturb the coil pattern. Refresh your coils in the morning by lightly misting with water mixed with leave-in conditioner, then gently scrunching to reactivate the curl definition.
Try The Trendy Curly Shag

The curly shag brings effortless edge to natural curly textures while maintaining that coveted lived-in look. We love how this versatile cut works beautifully with various curl patterns from loose waves to tight coils.

Package includes: 4 Pcs Fruits Print Hair Scrunchies in Random colors; Diameter: 11cm /4.33 inch

【Material】These hair scrunchies are made of soft satin, good texture and shiny, easy to use and comfort soft.

Soft Butter Satin: The fabric and the gentle elasticity of scrunchies, making them less likely to cause headaches or discomfort when worn for extended periods. These hair scrunchies won't leave an annoying bend in your hair if worn overnight because the soft butter satin
Modern Updates To The Classic Cut
Face-framing layers define modern curly shags by creating movement around the jawline and cheekbones. We recommend asking your stylist for graduated layers that start shorter at the crown and blend seamlessly into longer pieces. Textured ends replace the heavy blunt cuts of traditional shags, allowing curls to bounce freely without appearing weighed down.
Curtain bangs complement curly shags perfectly by softening facial features while maintaining that rock-and-roll vibe. We suggest opting for longer bang lengths that graze your eyebrows rather than short choppy pieces that can shrink up with curl spring. Side-swept variations work exceptionally well for those who want bang-like framing without the daily styling commitment.
Asymmetrical elements add contemporary flair through subtle length variations on each side of the head. We’ve seen stunning results when one side features slightly shorter layers while the other maintains more length. This creates visual interest without requiring dramatic maintenance or growing-out periods.
Styling For Different Hair Densities
Fine curly hair benefits from strategic product layering that creates volume without overwhelming delicate strands. We recommend starting with a lightweight leave-in conditioner followed by a volumizing mousse applied to damp hair. Scrunch products upward from ends to roots to encourage natural lift at the crown area.
Medium density curls respond beautifully to curl creams that define individual curl patterns while maintaining bounce. We suggest applying cream to soaking wet hair in small sections, then gently squeezing out excess water with a microfiber towel. This technique preserves curl formation while preventing frizz during the drying process.
Thick curly hair requires stronger hold products to maintain shag structure throughout the day. We find that combining a curl cream with a light-hold gel creates the perfect balance of definition and movement. Apply products section by section, ensuring even distribution from roots to ends for consistent curl patterns.
Dense curls need strategic sectioning during styling to prevent products from sitting on top of the hair. We recommend dividing your hair into four quadrants, then working with smaller subsections within each area. This ensures every curl receives adequate product coverage and maintains the shag’s layered appearance.
Achieve Effortless Style With Pineapple Updo

The pineapple updo stands as one of the most beloved protective styles for natural curly hair. We’ve discovered this technique creates a loose ponytail positioned at the very top of your head, resembling a pineapple’s crown.

50PCS Brown Pins in a Set: Our spin hair pins, the perfect combination of premium quality and abundant quantity, designed to meet all your hairstyling needs with elegance and durability. With 50 pcs in a set in brown, make sure be enough for your need or share with your friends. With the high-quality metal, The spiral pins allow for a firm grip, making them suitable for all hair types, from thin and fine to thick and curly.

Reliable: Our spiral hair pins are made from high-quality iron, ensuring long-lasting and reliable use. Their spiral shape provides extra grip for complex updos.
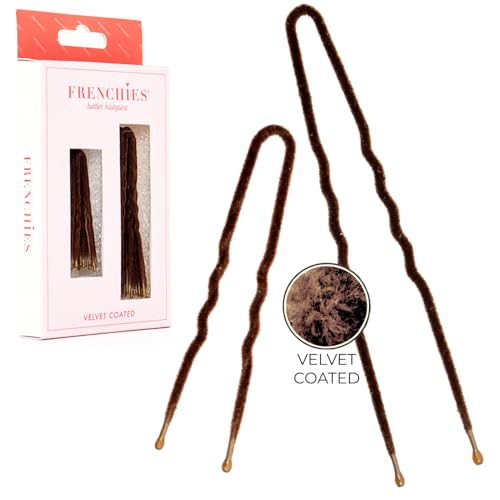
STAY PUT IN BUNS, UPDOS, AND FRENCH TWISTS. Frenchies velvet coated French hair pins grip from first use and provide a non slip hold that lasts all day without slipping, shifting, or falling out. One pin does what three standard pins can't.
Positioning For Overnight Protection
Sleep preservation begins with gathering your curls at the highest point of your head using a silk or satin scrunchie. We recommend loosely securing the ponytail to avoid creating dents or flattening curl patterns during rest.
Optimal positioning involves tilting your head forward and collecting all curls above your ears into one central location. The elastic should sit directly on your crown, allowing curls to cascade naturally without weight pulling them down.
Moisture retention improves significantly when we apply a light leave-in conditioner or curl refresher before creating the pineapple. This technique prevents dryness and maintains curl definition throughout the night.
Pillow protection requires adding a silk or satin pillowcase to complement your pineapple updo. We suggest switching traditional cotton cases since they create friction that leads to frizz and tangling.
Morning release should happen gently by carefully removing the scrunchie and shaking curls loose with your fingers. Avoid brushing or combing at this stage to preserve the natural curl pattern you’ve protected overnight.
Daytime Styling Variations
Transform your basic pineapple into versatile daytime looks that celebrate your natural texture. We’ve mastered several techniques that elevate this simple updo for various occasions and settings.
Professional adaptation involves smoothing the front sections with a small amount of curl cream before gathering hair up. This creates a polished appearance suitable for workplace environments while maintaining curl integrity.
Casual weekend styling allows for messier texture by scrunching curls before positioning them in the pineapple. We recommend using a volumizing mousse to enhance natural bounce and create effortless movement.
Decorative elements can transform your pineapple updo using silk scarves, decorative pins, or headbands wrapped around the base. These accessories add personality while keeping the style secure throughout busy days.
Volume enhancement happens when we tease the crown section gently before creating the pineapple. This technique adds height and dimension, making the style appear fuller and more dramatic for evening occasions.
Side-swept variations offer asymmetrical appeal by gathering curls slightly off-center rather than directly on top. We find this positioning flatters different face shapes while maintaining the protective benefits of the traditional pineapple method.
Perfect The Art of Braid Outs On Natural Curls

Braid outs offer exceptional versatility for natural curly hairstyles while providing gentle stretching and definition enhancement. We’ll explore targeted techniques that work harmoniously with your unique curl pattern to achieve stunning, long-lasting results.
Braiding Techniques For Different Curl Patterns
Type 2A-2B curls respond beautifully to loose three-strand braids that preserve natural wave patterns while adding gentle texture. We recommend creating 4-6 large sections throughout your hair, ensuring each braid remains relaxed to avoid disrupting your curl’s natural formation. Start each braid at mid-length rather than the roots to maintain volume at your crown.
Type 2C-3A textures benefit from medium-tension French braids that provide controlled stretching without causing excessive manipulation. Section your hair into 6-8 portions, beginning each braid close to the scalp for maximum length and definition. Maintain consistent pressure throughout the braiding process to ensure uniform curl patterns across all sections.
Type 3B-3C curl patterns thrive with tight four-strand braids that create beautiful elongation and reduce shrinkage significantly. Divide your hair into 8-12 smaller sections, allowing for more detailed curl definition and easier unraveling. Apply gentle downward tension while braiding to encourage length without compromising your hair’s natural elasticity.
Type 4A-4C textures achieve optimal results through box braids or cornrows that provide maximum stretch and definition enhancement. Create 10-15 sections depending on your hair density, ensuring each braid receives adequate tension for proper curl formation. Focus on keeping your braids uniform in size to maintain consistent texture throughout your finished style.
Product Application For Defined Results
Leave-in conditioner application forms the foundation of successful braid outs by providing essential moisture and slip for easy manipulation. We apply this product to damp hair using the prayer hands method, ensuring complete coverage from roots to ends. Focus extra attention on your hair’s mid-lengths and ends, which tend to be more porous and require additional hydration.
Curl cream distribution enhances definition while providing lightweight hold that doesn’t weigh down your natural curl pattern. Apply this product section by section using gentle raking motions, allowing each strand to receive adequate coverage. Work through small portions at a time to ensure even distribution and prevent product buildup that can cause stiffness.
Styling gel placement creates lasting hold and reduces frizz throughout the unraveling process and beyond. We recommend using a strong hold gel sparingly, focusing on the outer layer of each braid section rather than saturating the entire strand. Smooth the gel from root to tip using your palms to encourage uniform curl formation.
Setting spray application locks in your curl pattern and extends the longevity of your braid out style significantly. Mist this product lightly over completed braids before drying, maintaining a 6-8 inch distance to avoid oversaturating any single area. Allow the spray to penetrate for 2-3 minutes before beginning your preferred drying method.
Conclusion
We’ve explored an incredible range of natural curly hairstyles that celebrate your unique texture while keeping maintenance simple and achievable. From wash-and-go simplicity to protective twist outs and bold curly mohawks each technique we’ve shared empowers you to embrace your curls with confidence.
Your natural curl pattern is a beautiful asset that deserves to be showcased not hidden. Whether you’re working with loose waves or tight coils there’s a perfect styling method waiting to transform your daily routine into something you’ll genuinely love.
The key to curly hair success lies in understanding your exact curl type and choosing techniques that work with your natural texture rather than against it. We encourage you to experiment with these methods and discover which ones make you feel most authentically beautiful.
Remember that healthy curls start with proper care and the right products for your unique needs. Embrace the journey of discovering what works best for your hair and celebrate every curl along the way.
Frequently Asked Questions
What is the “Wash and Go” method for curly hair?
The “Wash and Go” method is a simple technique that defines curls using minimal products. It involves applying the right leave-in conditioner based on your hair type, followed by curl-enhancing products in the correct order. The key is mastering the scrunching technique to enhance curl definition while maintaining natural texture with proper drying methods.
How does the “big chop” benefit natural curly hair?
The “big chop” creates instant volume and bounce by removing weight that pulls curls down. Benefits include reduced weight for natural lift, faster drying times, more effective product distribution, and elimination of chemical damage. Shorter curls also offer greater styling versatility and easier maintenance while maximizing natural curl patterns.
What are protective twist outs and how do they work?
Protective twist outs are a sophisticated styling method that protects natural curly hair while creating elongated curl patterns. Hair is twisted with leave-in conditioner and styling cream the night before, then gently unraveled when slightly damp. This technique provides curl definition while protecting hair from environmental damage and manipulation.
How should I style a curly bob for different face shapes?
Choose chin-length bobs for round faces and shoulder-grazing styles for square faces. Curly bobs can be styled professionally with defined curls, casually with scrunched texture, or elegantly for evening events. The key is maintaining natural texture while adapting the style to suit different occasions and settings.
What makes long layered curls effective for natural hair?
Long layered curls create stunning movement and dimension through strategic layering that prevents flatness. Face-framing layers enhance natural bounce while avoiding overly short layers that cause frizz. The right lightweight products like leave-in conditioners, curl creams, and mousse maintain definition and volume for vibrant, manageable curls.
How do I create a curly mohawk without cutting my hair?
Create a faux curly mohawk using sectioning and twisting techniques to achieve height and definition. Use strong hold gels, volumizing mousse, edge control, and setting sprays to maintain structure. Section hair into three parts, twist the sides back, and create volume in the center section for an edgy look.
What is the finger coiling technique?
Finger coiling transforms natural curly hair into perfectly defined spirals. Section hair into quadrants, apply products evenly, then twist small sections around your finger to create uniform coils. Proper drying methods like air drying or diffusing maintain definition, and sleep protection helps preserve the style for multiple days.
How does a curly shag enhance natural texture?
A curly shag adds effortless edge with face-framing layers and textured ends that allow curls to bounce freely. Modern updates include curtain bangs and asymmetrical elements for a rock-and-roll vibe. Different hair densities require specific products – lightweight for fine curls, curl creams for medium density, and stronger hold for thick curls.
What is the pineapple updo technique?
The pineapple updo is a protective style created by gathering curls into a loose ponytail at the top of the head using a silk or satin scrunchie. This prevents dents and maintains curl patterns overnight. It offers versatile daytime styling options including professional, casual, and decorative variations while protecting natural texture.
How do braid outs work for different curl patterns?
Braid outs provide gentle stretching and enhanced definition through specific techniques for each curl type. Use loose three-strand braids for Type 2A-2B, medium-tension French braids for Type 2C-3A, tight four-strand braids for Type 3B-3C, and box braids for Type 4A-4C. Apply leave-in conditioner, curl cream, and styling gel for defined, long-lasting results.