I put this together because wedding season is here. Many guests want a look that feels polished but is easy to pull off. Why I wrote this is simple: I want you to walk in looking confident without hours at the mirror. You may be tight on time or want to save money on a stylist. This post gives you simple, stylish options that fit real life.
Who this is for is you if you love looks that feel put together but don’t require a pro. If you want hair that lasts from ceremony to dancing, you’ll find choices that stay in place. From a quick updo to a loose wave, there is something for every hair type and length.
What you’ll get in this guide is 28 DIY wedding guest hairstyles that are elegant yet easy. You’ll see what tools to gather, a simple prep plan, and steps you can follow. There are looks for short, medium, and long hair. Braids, twists, buns, and soft waves show up in friendly styles that hold with just a few pins.
Each look comes with practical tips you can use right away. Gather a few bobby pins, a clear elastic, and a light spray. If your hair holds curl poorly, you’ll learn a trick to keep the look in place. A short practice run makes the timing easy on the day.
Not every look fits every hair type or length. You may need a tweak or two. I keep things honest and practical so you can pick what works.
Ready to pick a style? Start with a photo you love and gather the basics. Practice once and you will feel more confident. If you try a look that clicks, drop a note in the comments and tell me how it went.
1. Bohemian Braided Crown

Looking for a wedding guest hairstyle that looks polished but is easy to pull off? The bohemian braided crown fits. This look sits softly around your head with a romantic vibe for outdoor ceremonies. It’s a stylish DIY choice that stays comfortable all day.
Here is why it works: the braid adds texture without heavy volume. It suits many hair types, and you can add tiny flowers or greenery for a natural touch.
What you’ll need
– curling wand or iron
– small clear elastics
– a few bobby pins
– light hold spray
– tiny flowers or greenery to tuck in
Step-by-step
1. Curl sections for soft texture.
2. From one side, pick a thin front strand and braid loosely.
3. Pin the braid at the back.
4. Wrap the braid around the crown and tuck ends.
5. Let the rest of your hair stay down or form loose waves.
6. Lightly spray and add a bloom here and there for charm.
Tips
– Keep the braid loose for a romantic feel.
– Hide pins under hair or braid for a clean look.
– If your hair is slick, a quick dry shampoo at the crown adds grip.
Next steps: practice the look once before the event and adjust bloom placement to suit your dress.

2. Messy Bun with Floral Accents

Looking for a look that feels easy yet stylish for a wedding guest? The messy bun with floral accents gives a laid‑back boho vibe and still reads polished in photos. It works in real life, not just on runways, and it holds up through dancing and cake cutting.
Here is how to do it in minutes:
– 1) Start with dry hair. Pull it into a high ponytail at the crown. This gives lift.
– 2) Twist the tail into a bun. Loosen a few strands to create that relaxed, messy look.
– 3) Add florals. Tuck in small flowers or tiny sprigs of greenery around the bun, placing stems snug against the hair.
– 4) Secure. Use a handful of bobby pins to hold the bun and the blooms in place.
– 5) Finish. Lightly mist with a texturizing spray to pump up volume and keep everything where you want it.
Pro tip: A small bouquet of baby’s breath or mini blooms makes the style feel fresh and not overdone.
Why it works: it suits textured hair and fine hair alike. It hides little flyaways and can be adjusted to be looser or tighter based on the day’s heat or humidity. Choose lightweight flowers so you don’t feel weighed down.
Next steps: practice at home before the wedding. Gather a few pins, a small spray, and a couple of flowers. Move around, bend, and sit to test security. If it feels loose, pin again. You’re ready to shine in a simple, chic way.
3. Twisted Half-Updo

You want a wedding guest hairstyle that looks polished without stealing the show. The twisted half-updo gives you that balance. It shows off your hair’s length and shine while keeping the face framed and fresh. Here is why this simple style works: it adds height at the crown and creates a soft, romantic line with little effort.
What makes this look great
– It’s easy to do, even if you’re not a pro.
– It holds up through photos and a long day.
– You can add a little sparkle with a hairpin for glam.
Steps to achieve it
1) Prep clean, dry hair. Brush smooth. A touch of light-hold product helps.
2) Take two large sections from the front near your temples. Keep them about the size of your index fingers.
3) Twist each section toward the back, letting the rest of your hair fall into loose waves.
4) Secure the twists with a small elastic or a few bobby pins behind your ears.
5) Clip a sparkly hairpin into the twist if you want extra shine.
Next steps: run a quick comb-through, smooth any flyaways with a bit of spray, and you’re set.
4. Effortless Beach Waves

Here is why this style fits a wedding guest. It looks polished yet relaxed and works with any hair length for an outdoor ceremony.
Let’s break it down into simple steps you can follow.
– Prep your hair. Start with clean, dry strands. Apply a light heat protectant so your hair stays smooth.
– Create the waves. Use a curling iron with a loose barrel or a flat iron. Take small sections and wrap hair away from your face. Hold briefly, then release.
– Loosen for texture. Let the curls cool a moment, then gently loosen with your fingers or a wide-tooth comb.
– Set softly. Spritz with a light-hold spray. It should hold without weighing you down.
– Add a touch of sea salt. A quick spray gives grip and a sunlit glow. If your hair is fine, skip heavy products.
– Tailor to length. Long hair gets loose, flowing waves. Short hair benefits from a larger barrel or a quick twist to show the bend.
– Outdoor tips. If it’s windy, reapply a light mist to keep the look alive.
You’re ready to mix and mingle with beachy waves that stay put.
Effortless beach waves are the perfect blend of elegance and ease, making you the ultimate wedding guest. With just a few simple steps, you can rock this polished yet relaxed look for any outdoor ceremony!
5. Sleek Low Ponytail

You want a look that feels polished yet simple for a wedding. The sleek low ponytail fits that need. It looks clean, modern, and pairs with almost any dress.
Here is how to get it quickly and well.
– Start with clean, dry hair.
– If your hair has a little wave, apply smoothing cream.
– Push it through with your fingers.
– A quick blow-dry helps lock in the smooth finish.
– Brush your hair straight.
– Make sure there are no tangles.
– Gather all the hair at the nape of your neck.
– Hold it snug but comfortable.
– Secure with a slim hair tie.
– Take a small section from the pony and wrap it around the base.
– Tuck the end under the band with a pin for a clean finish.
– Apply a light shine serum along the length.
– Focus on the ends to boost gloss and tame any flyaways.
– If you like, finish with a soft mist of hairspray.
– Optional: add a tiny clip or a simple pin for a wedding-ready touch.
Next steps: This style works for long and mid-length hair. If your hair is thick, you may need two pins. If it’s very straight, a quick pass with a flat iron helps keep it extra smooth.
6. Side Braid with Loose Strands

Here is why the side braid with loose strands works for a wedding guest. It feels romantic and stays comfortable all day. You can adapt it to your hair texture and dress style.
What you’ll need
– Brush and comb
– Clear elastic
– Bobby pins
– Light hairspray or texture spray
– Small flowers or a decorative pin (optional)
Steps to style
– Gather your hair to one side.
– Braid loosely from the crown down to the ends.
– Pull out a few strands around your face for softness.
– Slide the braid into place along your side and pin it so it stays flat.
– Tuck the end under the braid or secure with another pin.
– Add a flower or a pin for a gentle sparkle.
– Finish with a light mist of spray for hold without stiffness.
Tips for different hair types
– Textured or wavy hair looks especially pretty with this braid.
– If your hair is straight or fine, add a touch of texture spray before braiding.
Next steps
– Try this at least once before the big day so you know it’s quick.
– Practice on damp hair for a softer, touchable look.
– If a strand slips, a quick pin fix keeps you confident.

7. Classic French Twist

You want a wedding guest hairstyle that feels timeless and easy to pull off. The classic French twist fits that need. It pairs with many dresses and keeps you cool on a warm day.
Here is why it works: it looks polished without hours of work, and it stays put through photos and hugs.
Steps
1) Prep and texture. Brush your hair until it’s smooth. Spritz a light texture spray so the hair grips well.
2) Gather and twist. Lift the hair at the back of your neck. Twist it upward toward the crown in a neat coil.
3) Tuck and pin. Tuck the ends under the twist. Secure with bobby pins in an X pattern for strong hold.
4) Front pieces and finish. Leave a few face-framing strands for softness. Smooth the rest with a touch of spray.
5) Accessorize and set. Add decorative pins or a small comb where the twist sits for a subtle glow. Quick mist of spray locks the style in place.
Tips and quick fixes
If it slips, add a pin or two where the twist feels loose. For very fine hair, use extra pins and a light-hold spray to keep the shape overnight. For short or shoulder-length hair, pull the twist higher and tuck more hair around the pins to create the same silhouette.
With these steps you get an elegant yet easy French twist that works for almost any wedding guest.
8. Low Chignon with a Twist

You’re after a wedding guest hairstyle that looks polished and is easy to pull off. The low chignon with a twist delivers. It sits at the nape of your neck, so it stays graceful without stealing attention. The twist adds a subtle lift and catches light as you move. It pairs well with a classic dress or a modern vibe. It’s simple to wear and feels classy from the ceremony to the dance floor.
Here is why it works. The style stays secure without feeling stiff. It flatters many hair types and keeps the face open. A small ribbon or a tiny flower adds personal charm without overdoing it. That touch makes your look feel intentional and fresh.
– Step 1. Brush your hair and smooth it at the nape for a clean base.
– Step 2. Gather the hair, twist it into a loose bun, and pin it firmly.
– Step 3. Leave a few tendrils to frame your face for softness.
– Step 4. Add a ribbon, bloom, or decorative pin for a delicate accent.
– Step 5. Lightly mist with spray to keep the shape without stiffness.
Pro tip: If you have second-day hair, add a touch of texture first with a dry shampoo or texturizing spray. It helps the twist grip better and looks more natural.
Next steps: try this on your next wedding guest look and adjust the accessories to match your outfit.
9. Twisted Low Braid

You’re after a wedding guest look that feels polished but simple. The twisted low braid fits. It reads elegant without looking fussy. Here is why this style works for a wedding.
Plus, it stays put through hugs and dancing. You can adjust the looseness as you move. It works with many hair types and lengths.
How to do the twisted low braid
– Step 1: Start with clean hair. Create a low ponytail at the nape of your neck. Smooth the top for a neat start.
– Step 2: Twist the ponytail a few times below the crown, then braid to the ends. The result is a soft, textured line.
– Step 3: Secure with a clear elastic. Gently loosen the braid for a soft look.
– Step 4: Pin tiny flowers along the braid for romance.Choose blossoms the color of your dress or season for a gentle touch.
Tips for different hair types
– If you have fine hair, tease the crown a bit before tying the ponytail.
– If you have thick or long hair, use extra pins for security.
Extras to consider
– Try small pearl pins or a tiny comb to finish the look.
– A light spray locks strands without stiffness.
FAQs and quick fixes
– Will it work with bangs? Yes. Tuck the fringe into the twist or pin it along the side.
– How long does it take? About 8 to 12 minutes once you practice.
Next steps: Practice once before the event. Gather a few supplies. Then you will be ready to shine.
For a wedding, simplicity is key. A twisted low braid combines elegance and ease, letting you celebrate in style without the fuss. Perfect for dancing the night away!
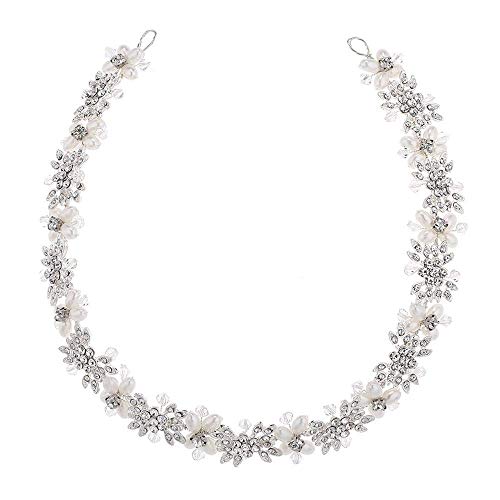
10. Glistening Hair Accessories

Glistening Hair Accessories
You want shine without weighing you down. A small accessory can lift a simple hairstyle in minutes. Here is why many wedding guests reach for sparkles: they catch the light in photos, stay secure, and let you feel polished with little fuss.
– Tiny crystal pins along one side of loose waves. Clip them where hair frames your face. The result is a gleam that looks natural in daylight and flash.
– A single statement barrette on a sleek ponytail. Choose a piece that sits flat against the hair. It anchors the look without turning your whole head into a centerpiece.
– A crystal comb at the back of a bun or half-up style. Position it just above the crown for subtle height. This adds depth and a touch of drama.
– A slim headband with crystals or pearls. Wear it behind the hairline for a soft halo effect. It works with both romantic and modern outfits.
– Mix metals to match your jewelry. If your dress has gold accents, pick gold-tone pieces. If silver shines brighter, go with silver tones.
– Practical tip: avoid pieces that bend or press too hard. Test the fit while you move. Check how it looks in mirror and in photos.
Next steps: choose one or two pieces that echo your dress and jewelry, test them with your hairstyle, and practice placing them before the wedding day.


11. Romantic Down-Do with Waves

You want a look that feels romantic and easy for a wedding guest. A soft down-do with waves fits. Here is why this look works and how to do it.
– What you need
You need a large-barrel curling wand about 1.5 inches. You need heat protectant. You need a light hold spray. You need a few bobby pins.
– Create soft waves
Section your hair. You wrap each section around the wand. Start at the ends, pull toward the roots. Hold briefly. Release with a smooth motion.
– Cool and loosen
Let curls cool completely. Run your fingers through them. This gives a relaxed, romantic look.
– Face framing options
Leave two front strands straight for a casual vibe. Or pin them back with a clip for a polished finish.
– Set and finish
Mist with a light hold spray. This keeps waves in place all day. If you want shine, add a light gloss spray. Avoid heavy products.
– Why it works
This style fits most hair types. It pairs well with many dresses. It looks elegant without feeling stiff.
– Next steps
Practice this look a day before the event. If you have fine hair, add a touch of texture spray before you start. This helps waves hold without weighing hair down.
12. Elegant Half-Up Waterfall Braid

You’re planning a wedding guest look that feels timeless but is easy to pull off. The elegant half-up waterfall braid fits long hair best and adds a fairy-tale mood without looking fussy. It stays comfy while you mingle and dance, and it photographs beautifully.
What you need
– Brush and comb
– 2–4 bobby pins
– Clear hair elastic
– Light hairspray
– Optional ribbon or tiny flowers
Step-by-step
1) Start with clean, dry hair. Add a touch of texture spray for grip.
2) Take a small front section. Begin a loose braid, letting small strands fall as you go.
3) As you descend, pull in a thin top strand, then drop the next to keep the cascade going.
4) When you reach the back, secure the braid with pins or a clear elastic.
5) Style the remaining hair into soft waves to balance the look. Finish with a light spray.
Extras
– Weave a satin ribbon along the braid for color.
– Tuck in tiny fresh flowers for a romantic touch.
Next steps
Practice once before the day. If your hair is very slippery, work a bit of texturizing product in and add extra pins. This style stays elegant and comfortable in photos and on the dance floor.
13. Sleek Braid with a Low Bun

You want a look that feels polished but is easy to wear. This sleek braid with a low bun fits. It stays neat in photos and keeps hair off your face so you can smile and mingle.
– Step 1: Prep and smooth
Wash or dry your hair as usual. Apply a light shine serum to tame frizz. Comb through to remove tangles.
– Step 2: Create the sleek braid on one side
Braid from your temple toward the back. Keep the braid tight so it sits flat. A small elastic hides at the end.
– Step 3: Gather the rest into a low bun
Collect hair at the nape. Twist it and tuck it under to form a neat bun. Secure with pins or a clear hair tie. Add a bobby pin for extra hold.
– Step 4: Polish the finish
Smooth any flyaways with your fingers. Apply a touch more shine serum. Lightly mist with flexible hold spray so it lasts through the night.
– Step 5: Quick tweaks for variety
If your hair is thick, pull a few strands loose for a softer look. If you wear a veil or accessories, position them before final pinning.
Next steps: practice once before the event so you know the feel and timing.
14. Loose and Flowing Locks with a Headband

Are you hoping for a look that feels carefree but polished at a summer wedding? Loose, flowing locks with a headband give you that easy elegance. It stays light on your head and works in heat. It’s simple yet stylish. Here is how to pull it off.
– Prep and protect: Start with clean hair and a light heat protectant to guard against heat.
– Create soft waves: Use a curling iron on medium heat to form loose curls that fall naturally.
– Choose the headband: Pick a slim metallic, satin, or beaded piece that feels light and comfortable.
– Position the headband: Set it about an inch behind your hairline so the waves frame it.
– Secure the look: Tuck any loose ends with discreet bobby pins for staying power.
– Add a touch of shine: Dab a tiny amount of shine serum on the ends if the hair looks dull.
– Match your outfit: Make sure the headband color or metal matches your dress or jewelry for a coordinated vibe.
– Test before the big day: Try the style at least once to ensure comfort and fit.
On hot days, hair can loosen and fly away. Keep a few pins and a light spray in your bag for touchups. Practice the look before the wedding and pick a headband you love.
Next steps: practice this look, then choose a favorite headband and you’ll be ready to glow.
15. Vintage-Inspired Pin-Up Curls

Want a wedding guest hairstyle that feels retro yet easy to pull off? Pin-up curls give that classic vibe without hours of work. Here is why they work for many hair types: they hold up to dancing, they photograph well, and you can tune the volume with a quick brush.
What you need
– Small barrel curling iron or wand (about 3/4 inch)
– Heat protectant spray
– Fine-tooth comb or tail comb
– Bobby pins
– Light hold hairspray
– Optional: shine serum or gloss spray
Let’s break it down
1) Prep your hair. Start with clean, dry hair. Apply heat protectant.
2) Section your hair. Work from the back to the crown, then the sides.
3) Curl small sections away from your face using the small barrel tool. Hold a few seconds, then release. Let all curls cool.
4) Gently brush through with a soft brush to soften the texture and add volume.
5) Create the vintage pin-up look by sweeping curls to one side. Pin the front sections close to the scalp for a soft curl and a little crown lift.
6) Finish with a light mist of hairspray. Add shine serum if you want a glossy finish.
Tips
– If your hair is fine, tease the crown lightly before curling for extra lift.
– For humidity, seal with a humidity-resistant spray.
Next steps: Try this on a practice day, adjust parts to suit your face, and pick a bold lip to finish the retro vibe.
16. Artistic Hair Wraps

Artistic Hair Wraps
You want a look that stands out but stays easy to wear. A hair wrap can do that. It adds color, texture, and a touch of art to your hairstyle. It works with a neat bun or soft, loose waves. This style fits boho weddings and modern receptions alike. It’s a simple, DIY-ready idea for wedding guests.
Here’s how to use it. It takes minutes and still looks polished.
– What you need: A satin or cotton scarf about 36 to 60 inches long and 2 to 4 inches wide. Pick a color that matches your dress or goes bold in contrast. Silk feels luxe and stays smooth; cotton is simple and comfy.
– How to wear it: For a bun, wrap around the base and pin the ends. For loose waves, lay the scarf across the crown, twist the ends at the back, then tuck. You can also use the wrap as a headband for a boho touch.
– Keeping it in place: Use 2 or 3 discreet pins and a light spritz. Choose a fabric with grip if your hair is very silky.
– Style ideas: Let the scarf peek out with delicate earrings, or pick a metallic or floral print for a celebratory glow. Pastel shades, metallic threads, or floral prints are on trend this season.
Practice once before the big day. It looks easy in photos.
Elevate your look effortlessly! Artistic hair wraps are the perfect blend of style and simplicity for any boho wedding guest. In just minutes, you can transform your hair into a stunning statement piece!
17. Textured Lob with Waves

Here is why a textured lob with waves fits wedding guests with short hair. It looks polished, but stays light. It moves with you and goes with many dresses.
Here is how to do it. Here is a quick plan.
– Prep the hair: Towel dry and apply a light sea salt spray; scrunch to boost texture.
– Create the waves: Take 1–2 inch sections. Wrap around a curling wand for loose waves. Leave ends soft. Alternate curl direction for a natural look.
– Set and texturize: Finger-comb the curls. Lightly mist a flexible-hold spray or texturizer. If your hair is fine, don’t overdo it.
– Finish with style: Tuck a side behind the ear to show earrings. Pull a back section to frame your face. A touch of shine on the ends adds polish.
– Practical tips: Do a quick trial a week before. Bring a small comb and travel spray for touch-ups. On humid days, a bit more spray helps.
– Common questions: Will it last all night? Yes, with light hold and a few pins. For straight hair, roughen the surface first with texture spray.
This look pairs with soft makeup or a bold necklace, letting your hair do the talking.
Next steps: practice, pack a few essentials, and you’re ready.
18. Subtle V-Shaped Layers with Waves

Subtle V-Shaped Layers with Waves: Easy, Elegant Wedding Guest Hair
You want a simple but chic wedding guest look. Subtle V-shaped layers with waves add depth and movement without heavy styling. Here is why this style works at a wedding. It stays comfortable all day and looks great in photos. You can adapt it to long or mid-length hair.
Here is how to pull it off.
– Step 1: Ask your stylist for subtle V-shaped layers that skim the ends and add a soft back shape. Keep the weight light so waves stay airy.
– Step 2: Curl the ends with a wand or curling iron to form loose waves. Twist small sections away from the face for a natural look.
– Step 3: Gently run your fingers through the curls to loosen them. This creates movement without making the style look stiff.
– Step 4: Work a pea-sized amount of mousse through the crown. Mousse lifts the roots and helps the waves hold.
– Step 5: Let your hair fall for a classic, soft look. Or clip back a small section near the temple for a twist.
– Step 6: Finish with a light flexible-hold spray. This keeps movement all day without stiffness.
– Step 7: If your hair is fine, avoid heavy products. Use a setting spray to lock in the curl.
Do a quick practice run to check fit, comfort, and shine. Bring a friend to help with clips and touch-ups.
19. Detailed Braided Updo

Want a braided updo that feels intricate but isn’t hard to master? A detailed braided updo adds real charm to a formal wedding while staying comfy from ceremony to dance floor.
What you need
– Texturizing spray or a light styling mousse
– Small clear elastics
– Several bobby pins
– Decorative pins or tiny flowers
– Strong-hold hairspray
– A fine-tooth comb
Steps to achieve it
1) Start with clean hair and add texture. A little spray gives grip so braids stay neat all day.
2) Section the crown and the sides. You’ll weave several small braids across these areas.
3) Create each braid close to the scalp. Don’t pull too tight; you want softness with shape.
4) Gather the ends and tuck them into a bun at the back. Shape the bun so it sits flat against your head.
5) Pin every braid securely. Use two pins at each braiding point for extra hold.
6) Add decorative touches. Slip in pins or tuck a flower near the bun for a romantic feel.
7) Set the look with spray. Hold the style for hours with a light mist.
Tips to personalize
– If you have thick hair, make extra small braids for more texture.
– For a softer vibe, pull out a few face-framing strands.
– In hot weather, refresh with a touch of hairspray along the bun line.
Common questions
– Will it last in humidity? Use a strong-hold spray and extra pins at the crown.
– Is this right for short hair? It works best with shoulder length or longer.
Next steps
Practice once before your big day. Small tweaks make a big difference.
20. Playful Pigtails with Flowers

If you want a fresh, playful look that still feels wedding-ready, try playful pigtails with flowers. This DIY hairstyle fits a boho wedding and shines at outdoor ceremonies. It is quick to do and stays comfy all day. A soft floral touch adds charm without stealing the spotlight.
Step-by-step guide
– Part your hair down the middle.
– Create two pigtails, placing them a bit higher for a youthful tilt.
– Weave tiny blooms or clip-on flowers into the pigtails so they peek from the braids.
– Tame flyaways with a light gel or smoothing spray.
– Secure with a couple of bobby pins so the look holds through the day.
– Optional: tuck a single bloom behind each ear for extra charm.
Choose blooms that stay fresh in heat, like baby’s breath, small daisies, or long-lasting faux flowers. Pick colors that match your wedding palette, such as soft pinks, ivory, and sage. For a garden party vibe, go with small clusters rather than big blooms. If you worry about real petals wilting, opt for high-quality faux flowers or add petals only for photos.
Next steps for keeping this easy yet elegant: keep the base smooth with a light styling spray and avoid heavy products. This simple hairstyle lets you feel carefree while looking chic on your big day.
Embrace playful elegance with DIY wedding guest hairstyles! Playful pigtails adorned with flowers bring a fresh vibe to boho celebrations—quick, comfy, and effortlessly charming for your special day.
21. Chic Top Knot

Chic Top Knot: A Simple Yet Polished Wedding Guest Look
You want a hairstyle that looks elegant and is easy to copy. The chic top knot fits that need. It keeps hair off your face so you can see and smile. It also makes your jewelry shine, especially bold earrings. You can swap a little part to change the feel.
Here is why this top knot works for a wedding. It creates clean lines with little effort. It holds up through photos, mingling, and dancing. And it can be dressed up or down to fit any dress code.
– Step 1: Gather hair at the crown or near the top of your head. Pull it into a light ponytail.
– Step 2: Twist the hair and wrap it into a bun. Secure with several bobby pins so it feels sturdy.
– Step 3: Leave a few face-framing pieces loose. This softens the look and flatters many face shapes.
– Step 4: Tease the base of the bun a little for more volume, then shape it with your fingers.
– Step 5: Finish with a light spray or setting lotion to keep it neat without stiffness.
Tips for different hair types:
– Fine hair: tease a bit more at the bun base and use a tiny clear hair tie.
– Thick or long hair: add one extra pin at the sides for extra security.
End with a touch of sparkle: a small jeweled pin or a slim ribbon can match your dress.
Next steps: practice once or twice at home, then wear this look with confidence.
22. Textured Side Part with Loose Waves

Why this look works
You want a wedding guest hairstyle that’s elegant but easy to wear. A textured side part with loose waves gives you that balance. It looks polished without feeling stiff.
How to create it
– Start with a deep side part. Let the part tilt across your crown so it shows when you turn your head.
– Curl the hair away from your face. This opens your cheekbones and frames your features.
– Use a curling iron or wand to make loose, wide waves on a medium heat.
– Gently run fingers through the curls to break them into relaxed waves. Don’t brush too much; you want movement.
– Mist a light texture spray at the mid lengths to add grip and body. Tailor the amount to your hair type.
– Finish with a shine spray for a healthy glow. A quick spritz keeps ends sleek without weighing hair down.
– Optional: tuck a small section behind one ear for asymmetry.
Tips for best results
– This works best on medium to long hair. If you have short hair, try a tighter side part with small curls instead.
– Keep strands away from your face as you style to maintain a soft silhouette.
23. Twisted Fishtail Braid

Twisted Fishtail Braid
You want a look that feels special but is easy to pull off. The twisted fishtail braid fits a wedding guest perfectly. It shines in photos and stays neat from ceremony to celebration.
Here is how to do it:
– Gather hair to one side for a clean, modern base.
– Make a simple fishtail braid by dividing into two sections and swapping small strands from each side.
– As you braid, twist each small strand before crossing it over to add that pretty twist.
– When you reach the end, secure with a clear elastic so the finish looks seamless.
– Gently pull on the outer edges of the braid to create volume and a fuller look.
– Tuck the tail behind the ear or pin it lightly for a half-up style.
– Add a tiny flower, a crystal pin, or a delicate ribbon if you want a touch of sparkle.
Here are quick tips to keep it flawless:
– Lightly mist with a soft-hold spray to tame flyaways.
– Use a couple of bobby pins to hold the tail in place, especially if hair is slippery.
– If your hair is fine, run a quick dry shampoo at the roots for extra grip.
– For very long hair, braid a little longer and fold the end under for a polished finish.
Common questions:
– Will it last all day? Yes, with pins and light spray.
– Which face shapes suit it? Most shapes work well with a side start and gentle volume.
Next steps: grab a mirror, a few pins, and a clear elastic. Try it on a trial morning so you feel confident for the big day.
24. Smooth Blowout with a Twist

You want a wedding guest look that feels polished without taking hours to finish. A smooth blowout with a twist nails that balance. It gives you a sleek base with a hint of movement perfect for any wedding theme. Best of all, you can do it at home with tools you already own.
What you need
– Heat protectant spray
– Round brush and a blow-dryer
– A curling wand or small iron for soft ends
– Light hold hairspray
– Shine spray
Step-by-step
1) Spray heat protectant all over to guard against heat.
2) Section your hair and blow-dry with a round brush, lifting at the roots for volume.
3) When the hair is smooth, curl the ends slightly for a soft wave.
4) Add the twist by twisting small sections of the ends away from your face.
5) Finish with a light mist of shine spray and a light hold spray to keep it in place.
6) Gently run a brush through to blend, then fix any flyaways with a quick touch-up.
Tips for different hair types
– Fine hair: use less product and lift the roots for more body.
– Thick or curly hair: work in larger sections and use a bigger round brush for smoother speed.
– Want more glow? A tiny amount of shine spray at the ends adds dimension without weighing you down.
Common questions
– Will this stay all night? Use light hold spray to keep it natural yet secure.
– Can I adapt it if my hair is curly? Yes. Smooth the crown first, keep the twist at the ends, and you’re ready.
This look suits many wedding styles and remains easy to tweak to your vibe.
25. Casual Loop Braid

You want a wedding guest hairstyle that looks great but is easy to do. The casual loop braid nails that mix. It starts with a simple braid, then you loop small sections back toward the scalp. The result feels playful yet pulled together. It shines in photos and on the dance floor. Pair it with a floral dress for a relaxed, chic vibe.
What you need
– Hair tie in a shade that matches your hair
– 2–3 small bobby pins
– Optional texturizing spray
– Light hold spray for staying power
How to do it
1) Brush your hair smooth. Start with a basic three-strand braid on the side you plan to work from.
2) Lift a small strand from the braid and sweep it back toward your head. Pin it to create the first loop.
3) Take another tiny strand and loop it beside the first loop, then pin. Repeat until the braid ends.
4) Tuck the end under the last loop and pin lightly. If you like, mist with a touch of spray.
5) Gently pull on a few loops with your fingers to loosen them for a casual finish.
styling tips
– Use hair ties that match your color so knots vanish into your hair.
– Add a tiny flower or decorative pin for extra detail.
– Works best with medium to long hair; try clip-ins if your hair is shorter.
– Test the look before the day to keep confidence high and avoid surprises.
26. Flowy Side-Swept Curls

– You want an elegant look that stays easy to manage on a wedding day. Flowing side-swept curls give you romance without hours in front of the mirror.
– What you need: large curling iron, heat protection spray, volumizing mousse, a few bobby pins, and light-hold spray. A shine spray is optional.
– Prep hair: wash, dry, and smooth with mousse from roots to ends.
– Curl with intent: section hair and curl away from your face with the large barrel. Hold 8 to 12 seconds, release. Keep curls loose for a soft look.
– Soften and set: gently run a wide-tooth comb through curls. Let them relax into waves, not stiff shapes.
– Sweep and pin: gather curls to one side behind the ear. Pin with one or two pins. Leave a few face-framing strands.
– Finish: mist lightly, then smooth ends with shine serum. Avoid heavy products that weigh hair down or look stiff.
– Accessorize: wear drop earrings to frame your smile. Subtle makeup completes the look.
– Quick tips: if your hair is thick, curl looser. If curls drop, recurl the crown and refresh with light spray.
– Common questions: does this work on short hair? Yes, you can fake the look with twists and pins, and a small ribbon adds charm.
27. Bouncy Ringlets

Why bouncy ringlets work for a wedding
If you want hair that moves with you down the aisle, bouncy ringlets are a great pick. They catch the light and add a soft, romantic feel. The look fits many dress styles and holds up well on camera.
What you’ll need
– A small curling iron or hot rollers
– Heat protection spray
– A strong-hold hairspray
– A few bobby pins
Steps to get the look
1) Start with clean, dry hair. Apply heat protection spray, then brush it through so every strand is ready.
2) Create tight curls. Use the curling iron on small sections or set small sections on hot rollers. Keep the curls close to the scalp for lasting ringlets.
3) Form the ringlets. Let the curls cool, then gently separate with your fingers. Do not brush hard. You want round, defined loops with a touch of volume at the crown.
4) Set and finish. Lightly spray with a strong-hold hairspray. If you want a softer edge, use a quick mist and a gentle pat with your fingers.
Tips for longevity
– Lift at the crown before the spray so the style stays full longer.
– Carry a mini kit of pins and a small bottle of spray for quick touch-ups.
– Avoid touching your hair too much during the day to keep the bounce.
Next steps: pair this look with a classic dress, and you’ll have a timeless, photo-friendly hairstyle that feels effortless.
28. Ethereal Butterfly Braid

Here is why the Ethereal Butterfly Braid can be your dream wedding look. It feels soft, romantic, and still easy to pull off.
What it is
The butterfly braid uses a regular braid with a twist. After you braid, you gently pull sections of hair away from the braid to make two wing-like sides. The result is texture, volume, and a light, airy feel.
Step-by-step
– Prep: Start with clean, dry hair. A touch of texturizing spray helps grip.
– Create the base: Braid along the crown in a simple three-strand or a loose French braid.
– Form the butterfly: Use your fingers to widen the sides of the braid so the wings look rounded.
– Secure: Tie off with a clear elastic and tuck loose ends under the wings.
– Add sparkle: Place small flowers, pearl pins, or crystal accents along the wings.
– Practice: Try the look a couple of times before the wedding day.
Tips and caveats
If your hair is silky or fine, spray a light hold and use pins every few inches. For thick or curly hair, pull the sides a bit more to enlarge the wings. This style pairs with soft makeup and a simple dress.
Next steps: Gather supplies, practice, and schedule a quick run-through with your stylist or friend.
Conclusion

With these 28 elegant yet easy DIY wedding guest hairstyles, you’ll be ready to dazzle at any celebration!
Whether you’re channeling boho vibes or going for classic elegance, there’s a style here for everyone. So gather your hair tools and get ready to impress the crowd! Don’t forget to have fun and let your creativity shine through.
Frequently Asked Questions
What are some easy DIY wedding guest hairstyles that look elegant?
If you’re looking for easy DIY wedding guest hairstyles that exude elegance, consider options like the bohemian braided crown, which offers a romantic vibe, or the messy bun with floral accents for a laid-back yet polished look. The twisted half-updo and effortless beach waves are also fantastic choices that are both simple to create and elegant for any wedding occasion.
How can I choose the right DIY wedding guest hairstyle for my dress?
Choosing the right DIY wedding guest hairstyle depends on your dress style and personal vibe. For a formal gown, consider the classic French twist or low chignon with a twist for timeless elegance. If you’re wearing something more casual, the textured lob with waves or playful pigtails with flowers can complement your outfit beautifully while keeping the look effortless.
What tools do I need for DIY wedding guest hairstyles?
To create stunning DIY wedding guest hairstyles, you’ll want to have a few essential tools on hand. Basic items include a good hairbrush, hair ties, and bobby pins for securing styles. Additionally, having a curling iron or flat iron can help you achieve those lovely waves or sleek looks. Don’t forget to have some hairspray or styling product to keep your hair in place throughout the festivities!
Can I incorporate hair accessories into my DIY wedding guest hairstyle?
Absolutely! Incorporating hair accessories can elevate your DIY wedding guest hairstyle and add a touch of glam. Consider using glistening hair clips, delicate floral accents, or even a chic headband. These little details can enhance your hairstyle, making it feel more special without requiring extensive styling time.
How can I ensure my DIY wedding guest hairstyle lasts all day?
To ensure your DIY wedding guest hairstyle lasts from the ceremony through the reception, start with clean, dry hair and use a heat protectant before styling. Finish with a good quality hairspray to lock everything in place. If you’re worried about frizz or flyaways, consider using a light serum or pomade. Lastly, avoid touching your hair too much throughout the day to keep it looking fresh!
Related Topics
diy wedding guest hairstyles
boho chic hairstyles
easy wedding hairstyles
elegant guest styles
quick hair ideas
wedding season looks
romantic hairstyles
simple bridal hair
effortless updos
hair accessories
beginner-friendly hairstyles
stylish wedding hair