We’ve all admired those gorgeous ombre locks on celebrities and influencers but assumed we’d need to spend hundreds at a salon to achieve that coveted gradient effect. The truth is we can create stunning ombre hair right from our own bathrooms without very costly or damaging our precious strands.
Ombre hair has become one of the most requested color techniques because it offers that effortless sun-kissed look that transitions beautifully from darker roots to lighter ends. Whether we’re dreaming of subtle caramel highlights or bold platinum tips the DIY approach gives us complete control over our hair transformation.
With the right tools techniques and a little patience we can master the art of at-home ombre and achieve salon-worthy results. We’ll walk through everything from choosing the perfect shade to applying the bleach safely so we can rock that Instagram-ready ombre look without ever leaving our house.
Understanding Ombre Hair and Why It’s Perfect for DIY
We’ve all admired those gorgeous sun-kissed locks that seem effortlessly chic, and that’s exactly what ombre hair delivers. This coloring technique creates the perfect foundation for at-home hair transformations.
What Makes Ombre Different from Other Hair Coloring Techniques
Ombre hair features a gradual transition from dark roots to lighter ends, unlike balayage which uses hand-painted highlights throughout the hair. The beauty of ombre lies in its forgiving nature since the color change happens gradually over several inches.
Traditional highlights require precise sectioning and uniform lightening, but ombre allows for more flexibility in application. We can blend the colors more naturally because there’s no need for perfect placement of foils or caps.
The technique focuses on lightening only the bottom half to two-thirds of your hair, making it less damaging than all-over color treatments. Root touch-ups become unnecessary since the dark roots are intentionally part of the look.
Most ombre styles use just one or two shades, making the color mixing process much simpler than complex multi-tonal techniques. This simplicity reduces the chances of color mishaps that often occur with more intricate coloring methods.
Benefits of Creating Ombre Hair at Home
Cost savings represent the most immediate advantage, with salon ombre treatments ranging from $150 to $400 compared to $30 to $60 for DIY kits. We save significantly while achieving similar results with patience and proper technique.
Time flexibility allows us to work at our own pace, taking breaks between bleaching sessions to minimize hair damage. Professional appointments often rush the process, but at home we control the timing completely.
Maintenance becomes incredibly low since ombre grows out beautifully without obvious regrowth lines. We can go 4 to 6 months between touch-ups, unlike traditional highlights that need refreshing every 8 to 12 weeks.
Privacy provides comfort for those hesitant about dramatic hair changes, letting us experiment without salon pressure or judgment. Mistakes can be corrected gradually without public scrutiny.
Learning the technique builds confidence for future hair adventures and helps us understand our hair’s unique needs. We develop skills that transfer to other DIY beauty treatments, creating long-term value beyond this single transformation.


Gathering Essential Tools and Products for Ombre Hair at Home

Success with DIY ombre hair depends on having the right materials before you begin the transformation process. We’ll walk you through each essential category to ensure your home ombre project achieves salon-quality results.
Hair Bleaching Products and Developer Ratios
Bleach powder forms the foundation of any successful ombre transformation at home. Professional colorists recommend using quality bleach powders like Wella Blondor or L’Oréal Quick Blue for consistent lightening power. Volume developers determine how much lift you’ll achieve during the bleaching process.
Different developer strengths serve exact lightening needs in your ombre journey. We suggest using 10 volume developer for subtle lifting on previously colored hair, 20 volume for standard lightening on natural hair, 30 volume for darker hair requiring important lift, and 40 volume only for very dark or resistant hair types. Most ombre projects work best with 20 or 30 volume developer mixed with bleach powder.
Mixing ratios between bleach and developer affect your results dramatically. Standard mixing ratios include 1:1 for thick consistency perfect for precise application, 1:1.5 for medium consistency ideal for blending, and 1:2 for thinner consistency that spreads easily through longer sections. We recommend starting with 1:1.5 ratio for most ombre applications since it provides good control while allowing smooth blending.
Professional-Grade Brushes and Application Tools
Application brushes make the difference between amateur and professional-looking ombre results. Wide paddle brushes work excellent for applying bleach to large hair sections quickly and evenly. Tint brushes with angled edges help create precise lines and smooth color transitions throughout your ombre gradient.
Sectioning tools keep your hair organized during the coloring process. Rat tail combs allow precise parting and sectioning of hair into manageable portions. Hair clips hold sections securely while you work on other areas without interference or accidental color transfer.
Mixing bowls and measuring tools ensure consistent bleach preparation throughout your session. Non-metallic bowls prevent chemical reactions that could affect bleach performance. Measuring cups or kitchen scales help achieve accurate ratios between bleach powder and developer for predictable results.
Protective Gear and Safety Equipment
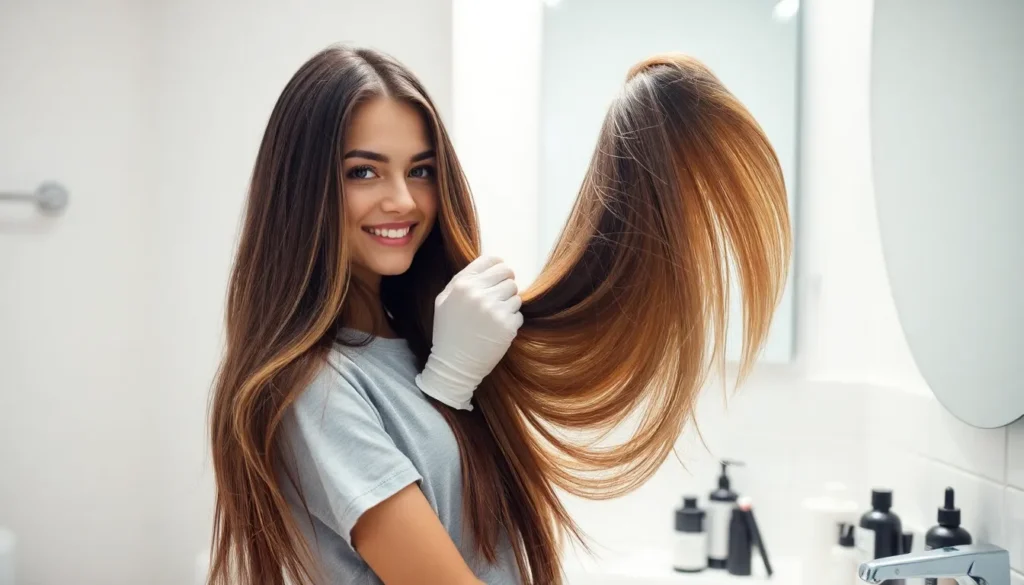
Gloves protect your hands from harsh bleaching chemicals during application and processing time. Nitrile gloves offer superior chemical resistance compared to latex options and prevent skin irritation or burns. We recommend having multiple pairs available since gloves can tear or become contaminated during longer sessions.
Protective clothing shields your skin and favorite outfits from bleach splatter and stains. Old t-shirts or salon capes work perfectly for covering your upper body during application. Towels placed around your shoulders provide additional protection while allowing easy cleanup.
Ventilation equipment ensures your safety during the bleaching process at home. Opening windows or using fans helps circulate fresh air and reduces chemical fume exposure. We suggest working in well-ventilated bathrooms or near open doors to maintain safe air quality throughout your ombre session.


Preparing Your Hair for the Ombre Process

We must evaluate our hair’s current state before beginning any ombre transformation. This preparation phase determines the success of our entire DIY ombre journey.
Assessing Your Current Hair Color and Condition
Determine your starting point by examining your natural hair color and existing damage. Dark brown or black hair requires multiple bleaching sessions to achieve the desired lightness, while lighter brown hair may need only one treatment. Previously colored or chemically treated hair presents unique challenges that affect our bleaching strategy.
Check your hair’s porosity by conducting a simple strand test. Drop a clean hair strand into a glass of water and observe how quickly it sinks. Hair that sinks immediately indicates high porosity and damaged cuticles, requiring gentler bleaching techniques and lower developer volumes.
Evaluate the overall health of your hair by examining its elasticity and texture. Healthy hair stretches without breaking when wet, while damaged hair snaps easily or feels gummy. We recommend postponing the ombre process if your hair shows signs of severe damage like excessive breakage or extreme dryness.
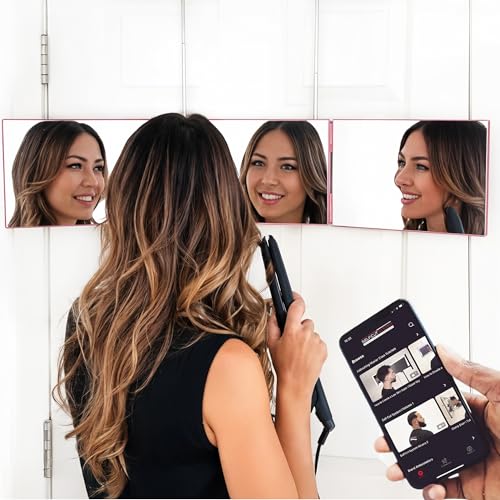
Document your hair’s current condition with photos from multiple angles. These reference images help us track our progress and ensure even color placement throughout the ombre process. Natural lighting provides the most accurate representation of your starting color.
Pre-Treatment Steps for Healthier Results
Begin deep conditioning treatments two weeks before your planned ombre session. Use protein rich masks like Olaplex No. 3 or K18 Leave-in Molecular Repair Hair Mask twice weekly to strengthen damaged bonds and improve your hair’s resilience to bleaching chemicals.
Trim split ends and damaged sections at least one week before bleaching. Healthy hair holds color more evenly and prevents further breakage during the chemical process. We suggest removing 1-2 inches of damaged length to ensure optimal results.
Avoid washing your hair for 24-48 hours before the ombre application. Natural oils create a protective barrier on your scalp and hair shaft, reducing irritation and minimizing damage from harsh bleaching agents. This protective layer helps the bleach process more evenly.
Perform a patch test 48 hours before your scheduled ombre session. Apply a small amount of mixed bleach to a hidden section behind your ear to check for allergic reactions. Redness, swelling, or excessive irritation indicates you should postpone the treatment and consult a professional.
Remove all styling products and buildup with a clarifying shampoo three days before bleaching. Clean hair allows for better chemical penetration and more predictable results. We recommend using products like Neutrogena Anti-Residue Shampoo to strip away accumulated product residue.


Choosing the Right Ombre Style for Your Hair Type

Selecting the perfect ombre style depends entirely on your hair’s natural characteristics and your desired final look. We’ll help you navigate through various ombre options to find the most flattering and achievable style for your exact hair type.
Classic Light-to-Dark Ombre Variations
Brunette to blonde ombres create the most popular and versatile look for medium to dark hair types. This traditional approach starts with your natural brown or black roots and transitions to honey, caramel, or platinum blonde ends. We recommend starting with warmer blonde tones like golden or honey shades if you have warm undertones in your skin.
Black to ash blonde transitions work exceptionally well for those with cooler skin tones and naturally dark hair. The ashy blonde creates a striking contrast while maintaining sophistication. This variation requires more bleaching sessions but delivers dramatic results.
Auburn to copper gradients suit redheads and those with warm complexions perfectly. Starting with deep auburn or mahogany roots, the color flows into bright copper or strawberry blonde ends. We find this combination requires less harsh bleaching since you’re working within similar color families.
Chocolate to caramel flows offer a gentler introduction to ombre techniques for beginners. The subtle shift from rich chocolate brown to warm caramel tones creates dimension without dramatic contrast. This style works beautifully on naturally brown hair and requires minimal bleaching.
Subtle vs. Dramatic Ombre Gradients
Subtle ombre effects blend colors within two to three shades of your natural hair color. We suggest this approach for first-time DIY colorists or professional environments that require conservative looks. The transition zone spans approximately 4-6 inches, creating a natural sun-kissed appearance that grows out gracefully.
Dramatic ombre contrasts feature stark differences between root and end colors, typically spanning 5-8 shades lighter than your base. These bold transformations require multiple bleaching sessions and advanced technique but create stunning visual impact. We recommend dramatic ombres for those comfortable with high-maintenance color and frequent touch-ups.
Gradient placement options vary based on hair length and personal preference. Short hair works best with subtle gradients starting just below the ears, while long hair can accommodate dramatic transitions beginning at mid-length or lower. We suggest marking your desired transition points with hair clips before beginning the bleaching process.
Maintenance considerations differ significantly between subtle and dramatic styles. Subtle ombres typically last 12-16 weeks before requiring touch-ups, while dramatic versions may need refreshing every 8-10 weeks. Consider your lifestyle and commitment level when choosing your gradient intensity.
Color Combinations That Work Best at Home
Warm tone pairings include chocolate to honey, auburn to copper, and chestnut to golden blonde combinations. We find these transitions easier to achieve at home because they follow natural color progressions and are more forgiving if the bleaching process varies slightly.
Cool tone combinations feature black to platinum, dark brown to ash blonde, and brunette to silver gray pairings. These require precise bleaching and toning techniques but create sophisticated results. We recommend cool combinations for those with previous bleaching experience.
Fashion color options incorporate unconventional shades like rose gold, lavender, or blue tips on pre-lightened hair. These trendy combinations require bleaching hair to a pale yellow base before applying fashion colors. We suggest starting with semi-permanent fashion dyes for easier maintenance and color changes.
| Hair Type | Best Ombre Style | Bleaching Sessions | Maintenance Frequency |
|---|---|---|---|
| Fine/Thin | Subtle gradient | 1-2 sessions | 14-16 weeks |
| Medium/Normal | Classic or dramatic | 2-3 sessions | 10-12 weeks |
| Thick/Coarse | Dramatic contrast | 3-4 sessions | 8-10 weeks |
| Previously colored | Subtle transition | 2-4 sessions | 12-14 weeks |
| Virgin/Natural | Any style option | 1-3 sessions | 12-16 weeks |


Following the Step-by-Step Ombre Application Process

Now that we’ve prepared our hair and selected the perfect ombre style, it’s time to jump into the actual application process that’ll transform our locks into a beautiful gradient masterpiece.
Sectioning Your Hair for Even Coverage
Dividing your hair into manageable sections ensures we achieve consistent results across all areas. We’ll start by creating a horizontal part from ear to ear, separating the top and bottom halves of our hair. Clip the upper section securely out of the way using metal clips that won’t melt from bleach contact.
Working from the nape upward allows us to maintain better control during application. We’ll create three to four vertical sections in the bottom half, each approximately two inches wide. Secure each section with clips to prevent mixing between areas during the bleaching process.
Starting at the bottom layer prevents dripping onto previously treated sections. We’ll begin our ombre application on the lowest sections first, working our way up methodically. This technique ensures even saturation and prevents uneven color distribution that can occur when bleach drips down onto already processed hair.
Mixing and Applying Bleach Properly
Combining bleach powder with developer requires precise measurements for optimal results. We’ll mix one part bleach powder with two parts 20 volume developer in a non-metallic bowl using a tint brush. Stir the mixture until it reaches a smooth, creamy consistency without any lumps that could cause uneven application.
Applying bleach from mid-lengths to ends creates the perfect ombre gradient. We’ll start applying the mixture approximately four to six inches from our roots, depending on our desired blend length. Use quick, confident strokes to saturate each section completely, ensuring every strand receives adequate coverage.
Blending upward toward the roots creates seamless color transitions. We’ll use a clean brush to gently pull some bleach mixture higher up the hair shaft, creating a soft fade effect. Focus on feathering the product rather than creating harsh lines that’ll result in an obvious demarcation between colors.
Timing and Monitoring the Lightening Process
Checking hair every 10 minutes prevents over-processing and potential damage. We’ll gently wipe away a small amount of bleach from a hidden section to assess the lightening progress. Most hair types require 20 to 45 minutes to achieve the desired lift, though this varies based on starting color and hair porosity.
Recognizing optimal timing prevents unnecessary hair damage during processing. We’ll look for hair that’s lifted to a pale yellow or white stage, depending on our target shade. Hair should feel slightly firm but not mushy or elastic, which indicates over-processing has occurred.
Removing bleach promptly once we’ve achieved the desired lightness protects hair integrity. We’ll rinse thoroughly with lukewarm water until the water runs clear, then apply a deep conditioning treatment immediately. This process neutralizes any remaining bleach and begins the hair recovery process essential for healthy ombre results.


Toning Your Ombre Hair for Professional Results

Toning transforms your freshly bleached ombre into a polished masterpiece that rivals salon work. We’ll guide you through selecting the perfect toner shade and mastering application techniques that create seamless, professional-looking results.
Selecting the Right Toner Shade
Purple toners neutralize unwanted yellow tones in blonde ombre hair, creating cool platinum or ashy finishes. Wella T18 Lightest Ash Blonde works exceptionally well for achieving icy tones on hair that’s been lightened to a level 9 or 10. Matrix SoColor Cult Semi-Permanent in Silver offers another excellent option for maintaining cool undertones without permanent commitment.
Blue based toners eliminate orange brassiness in medium blonde ombre sections. We recommend using these formulas on hair lightened to levels 7 or 8, where orange undertones typically appear most prominently. Pravana ChromaSilk Vivids in Blue mixed with clear developer creates custom toning answers for stubborn orange patches.
Beige and neutral toners provide natural looking results for those seeking subtle ombre refinement. Redken Shades EQ 09N vanilla cream delivers beautiful neutral tones without overpowering the lightened sections. L’Oréal Dia Richesse 10.13 offers similar results with added shine enhancement for healthier looking hair.
Ash toners eliminate red undertones while adding sophisticated gray notes to your ombre blend. Ion Color Brilliance Permanent Creme 8A Medium Ash Blonde creates professional gray tones on pre-lightened hair. These formulas work best on hair that’s been bleached to level 8 or higher for optimal color uptake.
Application Techniques for Seamless Blending
Section your hair horizontally starting from the ears down to ensure even toner distribution across all lightened areas. Create 1 inch sections using a rat tail comb, securing upper layers with clips to prevent accidental application. This systematic approach prevents missed spots that could result in uneven toning throughout your ombre.
Apply toner from mid lengths to ends using a tint brush in swift, confident strokes to avoid streaking. Start application at the lightest sections first, working your way up toward darker transition areas. Saturate each section completely but avoid overlapping onto natural hair color to maintain the gradient effect.
Work quickly but methodically to ensure consistent processing time across all treated sections. Most toners process within 10 to 20 minutes depending on desired intensity and hair porosity. Set a timer immediately after completing application to track development and prevent over processing.
Monitor color development by gently wiping small test sections with a damp cotton pad every 5 minutes. Look for even color distribution and desired tone achievement throughout the ombre gradient. Remove toner immediately once you’ve reached your target shade to prevent muddy or over processed results.
Rinse with cool water to seal the hair cuticle and lock in your newly achieved tones. Follow with a color safe conditioner to restore moisture and maintain toner longevity. Apply leave in treatments containing UV protection to preserve your professional ombre results between touch ups.


Aftercare Tips for Maintaining Ombre Hair at Home

Proper maintenance becomes essential once you’ve achieved your stunning ombre transformation. We’ll guide you through the critical steps to preserve your color and keep your hair healthy after the bleaching process.
Deep Conditioning Treatments for Bleached Hair
Weekly protein treatments restore strength to compromised hair cuticles after the bleaching process strips away natural oils and proteins. We recommend using treatments containing hydrolyzed keratin, wheat protein, or silk amino acids to rebuild damaged bonds within your hair shaft.
Apply deep conditioning masks twice per week during the first month following your ombre application. Products like Olaplex No. 3, Shea Moisture Manuka Honey Intensive Hydration Mask, or DIY avocado and coconut oil treatments provide intensive moisture restoration.
Leave treatments on for 15-20 minutes longer than package directions suggest for severely bleached ends. We’ve found that heat activation using a shower cap and warm towel enhances penetration by opening the hair cuticle more effectively.
Focus application on the lightened portions where damage concentration is highest. Starting from mid-length to ends ensures the most processed areas receive maximum nourishment without weighing down your roots.
Incorporate overnight treatments once weekly using natural oils like argan, jojoba, or coconut oil. These treatments work while you sleep to seal moisture and create a protective barrier around each strand.
Color-Safe Products and Washing Routines
Sulfate-free shampoos prevent color fading by avoiding harsh detergents that strip artificial pigments from your ombre hair. We recommend brands like Redken Color Extend, L’Oréal EverPure, or Pureology Hydrate for optimal color preservation.
Wash your hair 2-3 times per week maximum to maintain color vibrancy and natural oil production. Excessive washing accelerates color loss and removes essential sebum that protects bleached strands.
Use lukewarm water instead of hot temperatures during washing to prevent cuticle swelling and color leaching. We suggest finishing with a cool rinse to seal the hair cuticle and lock in moisture.
Apply purple shampoo once weekly to neutralize yellow tones that develop over time in bleached sections. Products like Fanola No Yellow or Matrix Total Results Brass Off maintain your ombre’s cool undertones.
Condition from mid-length to ends only to avoid weighing down your root area while providing necessary moisture to processed hair. Leave-in conditioners with UV protection offer additional defense against environmental damage.
Protect your hair before swimming by saturating it with clean water and applying a protective leave-in treatment. Chlorine and salt water can cause important color shifts and additional dryness to your ombre hair.


Troubleshooting Common Ombre Hair Mistakes

Even with careful planning and execution, DIY ombre hair can sometimes produce unexpected results. We’ve compiled answers for the most common issues you might encounter during your home ombre transformation.
Fixing Uneven Color Distribution
Patchy lightening occurs when bleach isn’t applied evenly or sections receive different processing times. Apply a clarifying treatment to remove any residual product buildup, then assess which areas need additional lightening. Mix a fresh batch of bleach with 20-volume developer and apply only to the darker patches, checking every 10 minutes until the color matches surrounding sections.
Harsh lines between your natural color and bleached sections require careful blending techniques. Create a seamless gradient by applying bleach to the transition zone using a feathering motion with your brush. Start 2 inches above the existing line and work downward, using less product as you approach the already lightened hair. This technique softens the demarcation and creates a more natural fade.
Missed sections behind your ears or at the back of your head need immediate attention to maintain consistency. Part your hair into smaller 1-inch sections and identify any areas that appear darker than the surrounding hair. Apply bleach to these spots using a cotton swab or small brush, wrapping each section in foil to prevent the product from affecting already processed areas.
Streaky results often stem from overlapping applications or inconsistent brush strokes. Smooth out these irregularities by applying toner in thin, even layers across all bleached sections. Choose a toner one shade lighter than your desired end result and process for the recommended time to even out color variations throughout your ombre.
Correcting Over-Processed or Orange Tones
Orange or brassy tones appear when bleach removes red and yellow pigments unevenly from your hair shaft. Combat these unwanted hues with a blue-based toner like Wella T18 Lightest Ash Blonde mixed with 20-volume developer. Apply the toner immediately after rinsing out bleach, leaving it on for 15-20 minutes until orange tones neutralize completely.
Over-bleached hair feels rough, stretchy, or breaks easily when wet. Stop all chemical processing immediately and focus on protein treatments to rebuild damaged hair bonds. Apply a keratin mask like Olaplex No. 3 twice weekly for one month, followed by deep conditioning treatments to restore moisture and elasticity to your compromised strands.
Yellow undertones that persist after toning require purple-based products to neutralize warm pigments. Use a purple shampoo like Fanola No Yellow twice weekly, leaving it on your hair for 3-5 minutes before rinsing. For severe yellowing, apply a purple mask weekly until your ombre reaches the desired ash or neutral tone.
Damaged cuticles from excessive processing need immediate moisture restoration to prevent further breakage. Create a weekly treatment routine using coconut oil applied to damp hair 30 minutes before washing. This penetrating oil helps seal lifted cuticles and prevents protein loss that leads to brittle, unmanageable hair texture.


Cost Comparison: Ombre Hair at Home vs. Salon

We’ve shown you how to achieve stunning ombre results at home, but let’s examine the financial benefits of this DIY approach compared to professional salon services.
Breaking Down DIY Ombre Expenses
Initial supply costs for at home ombre transformations typically range from $25 to $60 depending on your hair length and chosen products. Professional bleaching powder like Wella Blondor costs approximately $8 to $12 per package, while quality developers range from $6 to $10 for sufficient coverage. Brushes and application tools add another $10 to $15 to your shopping list, creating a complete starter kit for multiple applications.
Additional essential items bring your total investment to around $40 to $75 for a comprehensive ombre setup. Purple toning shampoo costs $8 to $15 and lasts several months with regular use. Deep conditioning treatments range from $5 to $12 per bottle, providing multiple applications to maintain hair health. Sectioning clips and protective gloves add minimal expense at $3 to $8 combined.
Premium product selections can increase costs to $80 to $120 for those seeking salon grade results. Professional toner brands like Redken or Matrix cost $12 to $18 per tube but deliver superior color correction. High end conditioning masks range from $15 to $25, offering intensive repair for bleached hair. Quality heat protectants and leave in treatments add $10 to $20 to your total investment.
| DIY Ombre Cost Breakdown | Budget Option | Premium Option |
|---|---|---|
| Bleaching Kit | $15-25 | $25-35 |
| Toner & Shampoo | $12-18 | $20-30 |
| Tools & Accessories | $8-15 | $15-25 |
| Conditioning Products | $8-15 | $20-30 |
| Total Initial Cost | $43-73 | $80-120 |
Salon ombre services typically cost $150 to $400 depending on your location and hair length. Major metropolitan areas charge premium rates of $250 to $500 for full ombre transformations. Mid tier salons in suburban areas average $120 to $250 per session. Budget friendly chains still charge $80 to $150, which exceeds most DIY supply costs significantly.
Long-Term Savings and Touch-Up Considerations
Touch up sessions every 3 to 4 months cost significantly less at home compared to returning to professional salons repeatedly. Root touch ups using existing supplies cost approximately $5 to $10 in additional bleach and toner. Salon maintenance visits range from $80 to $200 every few months, creating ongoing expenses that quickly accumulate over time.
Annual ombre maintenance costs reveal substantial home savings when calculated over multiple touch up sessions. DIY enthusiasts spend roughly $40 to $80 yearly on maintenance products and supplies. Salon clients typically invest $320 to $800 annually for regular touch ups and treatments. These calculations show home ombre maintenance costs 75% to 85% less than professional services.
Product longevity extends DIY value beyond initial applications since most supplies last through several transformation sessions. Bleaching powder containers provide 4 to 6 applications for shoulder length hair. Toning products last 8 to 12 uses with proper storage and application techniques. Conditioning treatments offer 6 to 10 applications, spreading costs across multiple ombre sessions effectively.
Skill development creates compounding savings over time as your technique improves with each application. Confident DIY stylists often help friends and family members achieve ombre looks, sharing supply costs. Advanced home colorists expand into other techniques like highlights or root touch ups, maximizing their product investments. Practice sessions using mannequin heads cost $10 to $20 but prevent costly mistakes on actual hair.
| Annual Cost Comparison | DIY Approach | Salon Services |
|---|---|---|
| Initial Treatment | $50-120 | $150-400 |
| 3 Touch-Up Sessions | $15-30 | $240-600 |
| Maintenance Products | $20-40 | $60-120 |
| Total Yearly Cost | $85-190 | $450-1120 |


Conclusion
We’ve covered everything you need to transform your hair with beautiful ombre at home. From selecting the right products and preparing your hair to mastering the application technique and perfecting your aftercare routine you now have all the tools for success.
The journey to stunning ombre hair doesn’t have to expensive or require multiple salon visits. With patience practice and the right approach you can achieve professional-looking results while saving hundreds of dollars in the process.
Remember that ombre hair is forgiving and gradual which makes it perfect for DIY enthusiasts. Trust in your preparation embrace the process and don’t be afraid to take your time. Your gorgeous sun-kissed ombre awaits!
Frequently Asked Questions
Can I really achieve salon-quality ombre hair at home?
Yes, you can create stunning ombre hair at home with the right tools, techniques, and patience. Ombre’s gradual color transition is forgiving and requires less precision than other coloring methods like balayage. With quality bleaching products, proper preparation, and careful application, you can achieve professional-looking results from your bathroom.
How much money can I save by doing ombre at home versus going to a salon?
DIY ombre costs typically range from $25-$60 for initial supplies, while salon services cost $150-$400. Annual maintenance at home can be 75-85% less expensive than professional services. The investment in quality products pays off over time, especially as your skills improve and products last across multiple uses.
What products do I need to create ombre hair at home?
Essential items include quality hair bleach (like Wella Blondor or L’Oréal Quick Blue), appropriate developer, professional-grade brushes, mixing bowls, gloves, and toner. You’ll also need deep conditioning treatments, clarifying shampoo for prep, and color-safe aftercare products. Quality tools ensure better results and safer application.
How do I know if my hair is ready for the ombre process?
Assess your hair’s current color, condition, and porosity before starting. Perform a deep conditioning treatment and trim damaged ends beforehand. Avoid washing hair 1-2 days before application to protect your scalp. Always do a patch test for allergic reactions and use clarifying shampoo to remove product buildup.
What’s the difference between toning and bleaching in the ombre process?
Bleaching lightens your hair to the desired level, while toning refines the color by neutralizing unwanted undertones. Purple toners eliminate yellow tones, blue toners combat orange brassiness, and neutral toners provide subtle refinement. Toning is crucial for achieving that polished, professional-looking finish after bleaching.
How often do I need to maintain my DIY ombre hair?
Maintenance frequency depends on your chosen ombre style and hair growth rate. Subtle ombre typically needs touch-ups every 3-4 months, while dramatic styles may require maintenance every 6-8 weeks. Regular deep conditioning treatments and using purple shampoo help maintain color vibrancy between touch-ups.
What should I do if my ombre results look uneven or streaky?
Uneven results can be fixed by applying additional bleach to darker areas or using toner to balance color differences. For harsh lines, blend with a brush and developer mixture. Streaky results often require sectioning adjustments and reapplication. Always use conditioning treatments after corrections to maintain hair health.
Is ombre hair damaging, and how can I minimize damage?
Ombre involves bleaching, which can be damaging, but it’s less harsh than full-head bleaching. Minimize damage by using quality products, avoiding over-processing, performing deep conditioning treatments before and after, and following proper application techniques. Monitor the lightening process closely to prevent excessive damage.
Can I do ombre on any hair type or color?
Ombre works on most hair types, but the process varies. Darker hair typically requires multiple bleaching sessions, while lighter hair may need only one. Consider your hair’s texture, porosity, and current condition. Fine hair processes faster than coarse hair, so timing adjustments are necessary for optimal results.
How long does the DIY ombre process take from start to finish?
The complete process typically takes 3-6 hours, depending on your hair type and desired results. This includes preparation (30 minutes), bleaching (1-3 hours depending on sessions needed), toning (30-45 minutes), and conditioning treatments. Factor in drying time between steps for the full transformation timeline.