
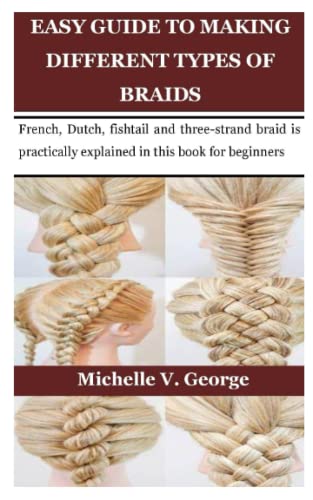
Braiding has evolved from a simple hair management technique into one of today’s most versatile and stunning styling methods. Whether you’re looking to create an elegant updo for a special occasion or seeking a protective style that’ll last for weeks, there’s a braid type that perfectly matches your needs and hair texture.
From classic three-strand braids that we’ve all mastered as children to intricate fishtail and Dutch variations that turn heads everywhere, the industry of braiding offers endless possibilities. We’ve discovered that understanding different braid types isn’t just about following trends—it’s about finding styles that complement your face shape, lifestyle, and personal aesthetic.
Ready to transform your hair game? We’ll walk you through the most popular and practical braid types that every hair enthusiast should know, complete with styling tips that’ll help you achieve salon-worthy results at home.
Classic Three-Strand Braid
We’ll start with the most fundamental braid style that serves as the foundation for countless other braiding techniques. This timeless technique remains one of our most versatile and beginner-friendly options.
Basic Technique and Variations
Creating the basic three-strand braid begins with dividing clean, dry hair into three equal sections at the nape of your neck. We cross the right section over the middle section, then cross the left section over the new middle section, repeating this pattern until we reach the hair ends. Securing the braid requires a clear elastic or hair tie that matches your hair color for the most polished appearance.
Side braids offer an elegant variation by starting the three-strand technique at one ear and braiding diagonally across the back of the head. We can create multiple small braids throughout the hair for a bohemian look, or combine two side braids into a low ponytail for added sophistication. Loose braids work beautifully for casual occasions when we gently pull apart the woven sections after securing the ends.
Reverse braiding involves crossing sections under instead of over, creating a braid that appears to sit on top of the hair rather than woven through it. We recommend practicing this technique on damp hair first, as the added texture makes sectioning easier for beginners.
Best Hair Types and Lengths
Medium to long hair lengths work best for classic three-strand braids, requiring at least 6 inches of hair length for a secure hold. We find that shoulder-length hair and longer creates the most visually appealing results, allowing for proper sectioning and multiple crossovers.
Straight and wavy hair textures hold three-strand braids most effectively throughout the day. We suggest applying a light-hold mousse to fine hair before braiding to add grip and prevent sections from slipping. Thick hair benefits from sectioning into smaller portions, while thin hair appears fuller when we gently tug at the outer edges of completed braids.
Layered cuts can present challenges with shorter pieces falling out, but we overcome this by using bobby pins to secure loose ends or incorporating texturizing spray for better hold. We recommend avoiding this style immediately after washing hair with heavy conditioners, as overly smooth strands won’t maintain the braid structure as long.


French Braid

French braids elevate the classic three-strand technique by incorporating hair sections as you work down the head. We consider this sophisticated braid a cornerstone style that creates an elegant, woven appearance perfect for countless occasions.
Step-by-Step Creation Process
Start by sectioning a triangular portion of hair at the crown of your head about 2-3 inches wide. Divide this initial section into three equal strands and begin with a standard braid pattern by crossing the right strand over the center, then the left strand over the new center.
Add hair to each outer strand before crossing it over the center strand. Pick up a small section of loose hair (about half an inch) and combine it with the right strand before crossing over. Repeat this process on the left side, gathering hair and adding it to the left strand.
Continue braiding downward while incorporating hair from both sides of your head. Maintain even tension throughout the process to ensure uniform appearance and prevent loose sections from escaping the braid structure.
Secure the end with an elastic band once you’ve incorporated all available hair. We recommend leaving about 2-3 inches of loose hair at the bottom to create a traditional finish that complements the overall French braid aesthetic.
Styling Tips for Different Occasions
Professional settings benefit from sleek French braids positioned at the center back of the head. Apply smoothing serum to damp hair before braiding to eliminate flyaways and create a polished appearance that maintains its structure throughout long workdays.
Casual outings allow for relaxed French braid variations like side-swept styles or slightly loosened sections. Gently tug at the edges of completed braids to create volume and texture that appears effortlessly chic for weekend activities or social gatherings.
Formal events call for French braids incorporated into updos or adorned with accessories. Braid hair while slightly damp and pin sections strategically to create intricate patterns, then finish with decorative pins, flowers, or ribbons that match your outfit’s color scheme.
Athletic activities require secure French braids that stay in place during movement. Start with completely dry hair and use strong-hold elastic bands, then apply texture spray to grip loose pieces and prevent the braid from loosening during exercise or sports.


Dutch Braid (Reverse French Braid)

The Dutch braid creates stunning dimension by weaving hair sections under instead of over, making the braid appear to sit on top of your head like a raised rope.
Key Differences from French Braiding
Crossing technique forms the primary distinction between Dutch and French braiding methods. We cross side sections under the middle strand rather than over it, which creates the signature raised appearance that sets Dutch braids apart from their French counterparts.
Visual impact differs dramatically as Dutch braids appear more prominent and three-dimensional against your scalp. The inverted weaving technique pushes the braid forward, creating a bold statement that stands out beautifully in photos and everyday wear.
Tension requirements demand slightly firmer grip control when working with Dutch braid patterns. We need to maintain consistent pressure while crossing sections underneath, which requires more deliberate hand positioning than traditional French braiding methods.
Starting position begins with the same sectioning approach as French braids, but the fundamental weaving direction reverses immediately. We gather hair from the crown area and begin the under-crossing motion from the very first weave to establish the proper pattern.
Styling versatility expands with Dutch braiding since the raised texture complements both casual and formal occasions. The pronounced braid structure holds accessories like ribbons or flowers more securely than flatter French braid variations.
Common Mistakes to Avoid
Inconsistent crossing direction ruins the Dutch braid pattern when we accidentally revert to over-crossing motions. Maintaining the under-weaving technique throughout the entire braiding process ensures the characteristic raised appearance remains uniform from crown to nape.
Insufficient hair incorporation creates gaps and loose sections that compromise the braid’s structural integrity. We must gather adequate amounts of hair from each side section to maintain full coverage and prevent the underlying scalp from showing through.
Uneven tension distribution causes lopsided braids that appear messy and unprofessional. Keeping consistent pressure on all three sections while weaving prevents some areas from becoming too tight while others remain too loose.
Starting too low on the head limits the Dutch braid’s dramatic visual impact and reduces styling options. We recommend beginning at the crown or slightly forward to maximize the raised effect and create more surface area for the distinctive pattern.
Rushing the sectioning process leads to uneven hair distribution and difficulty maintaining the proper crossing technique. Taking time to create clean, equal sections at each step ensures smoother braiding and better final results.
Neglecting hair texture preparation affects how well the Dutch braid holds throughout the day. We suggest applying light texturizing spray to fine hair or smoothing serum to coarse hair before beginning the braiding process for optimal grip and longevity.


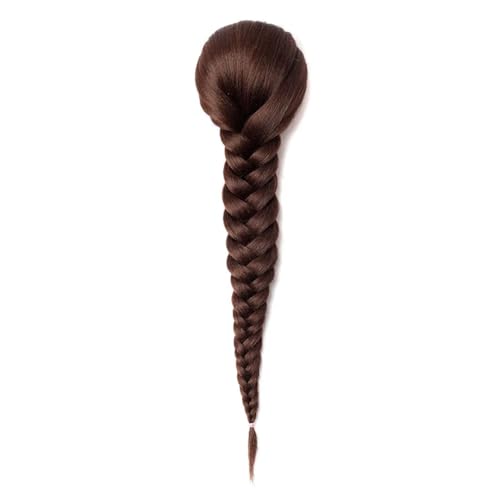
Fishtail Braid

The fishtail braid creates an intricate woven pattern that mimics the scales of a fish, making it one of the most visually striking braiding techniques. Even though its complex appearance, this two-strand method proves surprisingly achievable with proper preparation and technique.
Essential Tools and Preparation
Clear hair elastics form the foundation of successful fishtail braiding since they secure sections without adding bulk or creating visible breaks in the pattern. We recommend gathering multiple elastics before starting, as this braid style often requires mid-braid adjustments and temporary securing points.
Fine-tooth combs help create the precise partings essential for clean fishtail sections, while wide-tooth combs work better for initial detangling without creating static. Sectioning clips keep unused hair portions organized and prevent interference during the braiding process.
Hair should be completely dry before attempting a fishtail braid, as damp strands create uneven tension and compromise the final appearance. We suggest starting with day-old hair rather than freshly washed strands, since natural oils provide better grip and control throughout the braiding process.
Bobby pins in colors matching your hair tone serve as backup securing tools for flyaway pieces or areas where the braid needs additional support. Professional stylists often keep these within easy reach during fishtail creation sessions.
Achieving the Perfect Texture
Texturizing spray applied to clean hair creates the ideal foundation for fishtail braids by adding grip without weighing down individual strands. We recommend focusing application on mid-lengths and ends rather than saturating the roots, which can create an oily appearance.
Sea salt spray works particularly well for fine hair types that typically lack the natural texture needed for secure braiding. This product adds volume and creates microscopic texture that helps sections grip each other throughout the braiding process.
Dry shampoo serves dual purposes in fishtail preparation by absorbing excess oils and creating additional texture for better hold. Apply this product 30 minutes before braiding to allow full absorption and prevent visible residue in the finished style.
Light-hold mousse distributed through damp hair before air drying creates lasting texture that supports intricate fishtail patterns. We suggest scrunching the product through sections rather than combing it straight, which maintains natural movement while adding essential grip.
Avoid heavy conditioning treatments or smoothing serums on braiding days, as these products create slippery surfaces that prevent sections from maintaining their woven positions. Natural hair texture provides the best foundation for achieving professional-looking fishtail results.


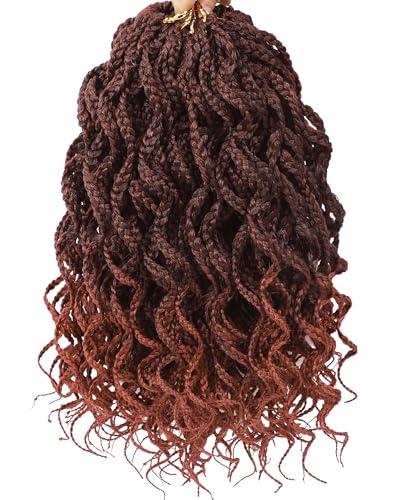
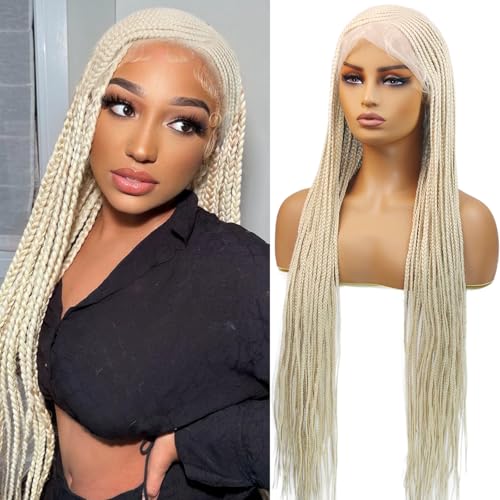
Box Braids

Box braids represent one of the most popular protective braiding styles that create individual square-shaped sections throughout the scalp. These structured braids offer both versatility and hair protection for those seeking long-term styling answers.
Protective Styling Benefits
Box braids excel at safeguarding natural hair from environmental damage and daily manipulation stress. The individual sectioning method allows each strand to remain untangled and protected within its own braid compartment, reducing breakage significantly compared to loose hair styling.
Length retention becomes achievable when we minimize daily combing and brushing routines that often lead to hair damage. Box braids keep hair ends tucked away from friction against clothing and pillowcases, preserving the most fragile portions of our hair strands.
Moisture preservation improves dramatically since the braided structure creates a barrier against humidity loss. Natural oils distribute more evenly along the hair shaft when contained within protective braiding patterns, maintaining healthier hair conditions over extended periods.
Scalp health benefits from reduced tension compared to tight ponytails or other restrictive styles that pull continuously at the hairline. Box braids distribute weight evenly across the entire head, preventing concentrated stress points that can lead to traction alopecia.
Time efficiency increases substantially once box braids are installed, eliminating daily styling routines for weeks or months. We can simply wrap our braids at night and wake up with a ready-to-go hairstyle that requires minimal morning preparation.
Maintenance and Care Requirements
Weekly washing routines should focus on the scalp rather than manipulating the actual braids excessively. We recommend diluting shampoo with water in a spray bottle to cleanse the scalp without disturbing the braid structure or creating frizz along the hair shafts.
Moisturizing protocols require lightweight oils like jojoba or argan oil applied directly to the scalp using applicator bottles with pointed tips. Heavy creams and butters can build up within the braids, attracting dirt and creating an uncomfortable weight that pulls at the roots.
Nighttime protection involves wrapping box braids in silk or satin scarves to prevent friction against cotton pillowcases. Satin pillowcases serve as an alternative option for those who find head wraps uncomfortable during sleep, providing similar friction reduction benefits.
Edge care demands special attention since the hairline remains the most vulnerable area during protective styling periods. We apply lightweight edge control products sparingly to maintain neat appearances without creating buildup that can clog follicles or weigh down delicate baby hairs.
Professional maintenance appointments every 4-6 weeks help assess scalp health and adjust any braids that may have loosened over time. These touch-up sessions prevent braids from slipping down the hair shaft, which can create tension points and reduce the protective benefits of the original installation.


Cornrow Braids

Cornrow braids represent one of the most culturally important and versatile protective styling techniques, featuring hair braided close to the scalp in continuous raised rows. These intricate styles offer endless creative possibilities while providing excellent protection for natural hair textures.
Traditional Patterns and Designs
Geometric patterns form the foundation of classic cornrow styling, with straight-back rows being the most fundamental design. We recommend starting with simple parallel lines that run from the hairline to the nape for beginners mastering this technique. Curved patterns create elegant flowing designs that follow the natural shape of the head, offering sophisticated alternatives to linear styles.
Zigzag cornrows add ever-changing visual interest through alternating directional changes that create striking patterns across the scalp. Circular designs work particularly well for special occasions, forming spirals or flower-like arrangements that showcase advanced braiding skills. Diamond and triangle patterns provide bold geometric statements that highlight precision and artistry in cornrow creation.
Feed-in cornrows represent modern evolution in traditional techniques, starting with small sections that gradually incorporate additional hair for natural-looking fullness. Complex combination patterns blend multiple design elements, creating unique styles that reflect personal creativity and cultural heritage. Tribal-inspired designs honor ancestral braiding traditions while adapting ancient patterns for contemporary wear.
Scalp Health Considerations
Proper tension management ensures cornrow longevity without compromising follicle health or causing unnecessary stress to the hairline. We emphasize maintaining consistent but gentle pulling throughout the braiding process to prevent breakage and promote healthy hair growth. Excessive tightness leads to traction alopecia, a preventable condition that results from prolonged tension on hair follicles.
Regular scalp cleansing becomes essential when wearing cornrows for extended periods, requiring weekly washing with diluted shampoo applied directly to the scalp. Natural oils like jojoba or coconut oil provide necessary moisture without weighing down the braided structure or causing product buildup. Nighttime protection using silk or satin pillowcases reduces friction and helps maintain braid integrity while you sleep.
Edge preservation requires special attention during cornrow installation and maintenance, as hairline areas are particularly vulnerable to damage from tight braiding. We recommend leaving approximately 1/8 inch of space between braids and the hairline to prevent receding and promote healthy edge growth. Professional assessment every 2-3 weeks ensures braids aren’t creating undue stress on sensitive scalp areas.
| Cornrow Maintenance Schedule | Frequency | Action Required |
|---|---|---|
| Scalp cleansing | Weekly | Diluted shampoo application |
| Oil treatment | 3 times per week | Light moisturizing oils |
| Edge assessment | Daily | Gentle massage and monitoring |
| Professional check | 2-3 weeks | Tension and health evaluation |
| Complete refresh | 4-6 weeks | Full takedown and reinstall |


Waterfall Braid

Waterfall braids create a stunning visual effect that mimics water cascading down a mountainside. This romantic styling technique combines elements of traditional braiding with strategic strand release to achieve an effortlessly elegant appearance.
Creating the Cascading Effect
Creating the waterfall braid requires a methodical approach that differs from conventional braiding techniques. We begin by sectioning a small portion of hair near the temple and dividing it into three equal strands. The magic happens when we cross the top strand over the middle section then immediately release it instead of continuing the traditional braid pattern.
Fresh hair sections replace each released strand as we work horizontally across the head. This substitution creates the signature cascading effect where loose strands appear to flow through the braid structure. We maintain consistent tension throughout the process while ensuring each dropped section remains visible and distinct.
The braid typically follows the hairline from one ear to the other though variations can curve around the crown area. We secure the endpoint with a clear elastic and gently tug at the woven sections to create fullness. Bobby pins placed strategically behind the ear help anchor the braid and prevent slipping throughout the day.
Ideal Hair Textures for Success
Medium to thick hair textures provide the best foundation for waterfall braids since they offer sufficient grip and volume. We find that straight to slightly wavy hair showcases the cascading effect most dramatically while maintaining the braid’s structural integrity. The individual strands remain clearly defined against varied hair textures creating optimal visual contrast.
Layered cuts enhance the waterfall effect by providing natural variation in strand lengths. We recommend avoiding heavy conditioning treatments on braiding days since slightly textured hair grips better than silky smooth strands. Day old hair often works better than freshly washed hair due to natural oils that provide necessary friction.
Fine hair benefits from volumizing products applied before braiding to prevent the style from appearing flat. We suggest using dry shampoo at the roots and texturizing spray throughout the mid lengths for improved hold. Curly hair requires additional preparation including smoothing serums to prevent frizz from disrupting the clean lines of the cascading pattern.
| Hair Texture | Preparation Time | Hold Duration | Recommended Products |
|---|---|---|---|
| Fine | 10-15 minutes | 4-6 hours | Volumizing mousse, dry shampoo |
| Medium | 8-12 minutes | 6-8 hours | Texturizing spray, light hold gel |
| Thick | 12-18 minutes | 8-10 hours | Smoothing serum, flexible hairspray |
| Curly | 15-20 minutes | 5-7 hours | Anti-frizz cream, strong hold gel |


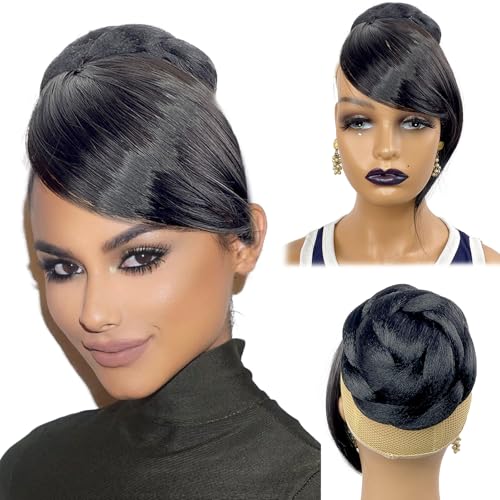
Crown Braid (Halo Braid)

Crown braids create a stunning circular pattern around your head that frames your face like a natural halo. This elegant style transforms any basic braid into a regal statement piece perfect for special occasions or everyday sophistication.
Wrapping Technique Around the Head
Starting position determines the success of your crown braid by establishing proper hair flow direction. Begin with a deep side part and section hair horizontally from ear to ear across the back of your head. Divide the lower section into three equal strands at your nape, then initiate a standard Dutch braid technique.
Moving clockwise around your head creates the most natural braid direction for right-handed styling. Add small sections of hair from the hairline as you progress, maintaining consistent tension throughout the braiding process. Keep your working sections approximately one inch wide to ensure even coverage and prevent gaps in the halo pattern.
Positioning your hands correctly becomes crucial as you navigate the curved hairline around your ears. Angle your elbows outward and adjust your grip every few crossovers to maintain comfortable wrist alignment. Continue braiding along your hairline, incorporating hair from the top section as you work toward your starting point.
Reaching the completion point requires careful planning to blend the braid ends seamlessly. Stop adding new hair when you arrive at your original part line, then braid the remaining length using the traditional three strand method. Secure temporarily with a clear elastic while you prepare for the final connection.
Securing Methods for All-Day Wear
Bobby pin placement provides the foundation for long lasting crown braid security throughout active days. Insert pins at a 45 degree angle pointing toward the center of your head, catching both the braid and underlying hair. Use pins that match your hair color exactly to maintain the seamless halo appearance.
Crossing technique with bobby pins creates maximum hold by forming an X pattern at key stress points. Place the first pin vertically through the braid base, then insert a second pin horizontally across the first. Target areas behind each ear and at the crown connection point where movement typically loosens the style.
Elastic positioning requires strategic placement to avoid visible bumps while maintaining structural integrity. Tuck the final elastic underneath the starting point of your crown braid, then wrap the loose end around the base. Cover the connection area with a small section of hair secured with additional bobby pins.
Texture spray application before and after braiding extends wear time by creating grip between hair strands. Mist dry shampoo lightly through your hair before beginning the crown braid process. Follow with a light hold hairspray once the style is complete, focusing on the hairline areas where pieces typically escape first.
Professional finishing touches include gentle tugging to create controlled volume and movement within the crown structure. Pinch small sections of the braid gently to widen the pattern and create a fuller appearance. Complete the look by smoothing any flyaways with a small amount of hair oil applied to your palms before running them over the finished braid.


Side Braid

Side braids offer versatile positioning options that enhance natural features while creating effortless elegance. We’ll explore how strategic placement transforms any basic braid into a flattering style.
Positioning for Face Shape Flattery
Oval faces benefit from side braids positioned at temple level, creating balanced proportions that complement natural symmetry. We recommend starting the braid 2-3 inches from the hairline to maintain facial harmony.
Round faces achieve elongating effects when side braids begin higher on the crown, typically 4-5 inches from the center part. Strategic positioning draws attention upward while creating the illusion of added length.
Square faces require softer placement around the jawline area, with braids starting at ear level to minimize angular features. We suggest incorporating loose face framing pieces to create gentle curves.
Heart shaped faces work best with side braids positioned lower on the head, beginning near the nape area. This placement balances wider foreheads while adding fullness around the chin region.
Long faces need horizontal emphasis through side braids placed at mid ear level, creating width that counters vertical length. We recommend thicker braid sections to maximize the broadening effect.
Incorporating into Various Hairstyles
Ponytail combinations transform basic styles into sophisticated looks by weaving side braids into gathered hair at the nape. We create texture contrast by leaving the ponytail loose while the side sections remain braided.
Half up styles showcase side braids as decorative elements that sweep hair away from the face before securing at the crown. This technique works perfectly for medium to long hair lengths.
Bun incorporations use side braids as foundational elements that wrap around classic chignon styles. We recommend Dutch braiding the side sections to create raised texture that adds dimensional interest.
Loose wave pairings combine side braids with flowing hair for romantic styling options suitable for special occasions. Strategic placement allows natural movement while maintaining controlled sections.
Layered cut adaptations use side braids to manage shorter pieces that typically escape traditional braiding methods. We recommend starting with texturizing spray to improve grip on layered sections.
Curly hair applications benefit from side braid positioning that follows natural curl patterns while reducing volume on one side. This creates asymmetrical balance that enhances curl definition throughout the remaining hair.


Rope Braid (Twist Braid)

Rope braids offer a refreshingly simple alternative to complex multi-strand techniques while delivering impressive visual impact. This twisted styling method creates elegant spirals that work beautifully for both casual and formal occasions.
Two-Strand Twisting Method
Divide your hair into two equal sections at your desired starting point, ensuring both portions contain similar amounts of hair for balanced results. Twist each section clockwise in the same direction, maintaining consistent tension throughout the entire length to prevent loose areas. Wrap the twisted sections around each other in a counterclockwise direction, creating the signature rope appearance that distinguishes this technique from regular twists.
Start with slightly damp hair for better control, as completely dry strands can create flyaways during the twisting process. Secure small sections with clear elastics every few inches if you’re working with particularly long or thick hair that tends to unravel. Practice the alternating motion slowly at first, focusing on muscle memory rather than speed for more consistent results.
Position your hands correctly by keeping your dominant hand on the section that crosses over, while your non-dominant hand guides the underneath portion. Maintain steady pressure as you work down the length, tightening any loose areas immediately to prevent the entire braid from becoming slack. Finish with a strong elastic band, leaving approximately one inch of hair beyond the secured point for a polished appearance.
Adding Volume and Texture
Prepare your hair with volumizing mousse applied from mid-length to ends, avoiding the root area to prevent weighing down your natural lift. Tease gently at the crown before beginning your rope braid, creating subtle height that enhances the overall dimensional effect. Use texturizing spray on clean, dry hair to provide the grip necessary for maintaining twist integrity throughout the day.
| Hair Type | Preparation Time | Recommended Products | Hold Duration |
|---|---|---|---|
| Fine Hair | 5-7 minutes | Volumizing mousse, root lift spray | 6-8 hours |
| Medium Hair | 3-5 minutes | Sea salt spray, light-hold hairspray | 8-12 hours |
| Thick Hair | 8-10 minutes | Texturizing paste, strong-hold spray | 12+ hours |
Create deliberate looseness by gently pulling apart sections of the completed rope braid, working from bottom to top for controlled volume distribution. Focus on the outer edges of each twist, pinching and pulling small amounts to achieve that coveted undone texture without compromising structural integrity. Avoid over-manipulation, as excessive pulling can cause the entire braid to unravel and require starting over.
Apply dry shampoo to freshly washed hair before styling, as clean strands often lack the necessary texture for secure rope braid formation. Scrunch your hair while damp with a curl-improving cream, then allow it to air dry for natural wave patterns that enhance the twisted appearance. Finish with a light misting of flexible-hold hairspray, focusing on areas where flyaways typically occur around the hairline and nape.


Conclusion
Mastering different braid types opens endless possibilities for transforming your hair game. Whether you’re reaching for a classic three-strand for everyday elegance or experimenting with intricate fishtail patterns for special occasions each technique offers unique benefits that complement various lifestyles and hair textures.
We’ve explored how protective styles like box braids and cornrows promote hair health while statement pieces like crown braids and waterfall braids add romance to any look. The key lies in understanding which techniques work best for your hair type and practicing consistently to build confidence.
Remember that braiding is both an art and a skill that improves with time. Start with simpler styles and gradually work your way up to more complex patterns. With the right preparation tools and techniques you’ll soon discover that achieving salon-quality braids at home is entirely within reach.
Frequently Asked Questions
What are the most popular types of braids for beginners?
The classic three-strand braid is perfect for beginners due to its simple technique and versatility. French braids and Dutch braids are also excellent starting points, offering more sophisticated looks while building foundational skills. Side braids provide an easy way to add elegance to any hairstyle without complex techniques.
How long should my hair be for braiding?
Medium to long hair works best for most braiding techniques, providing enough length to secure the braid properly. However, shorter hair can still accommodate certain styles like crown braids or side braids. Hair that reaches at least shoulder length typically offers the most styling versatility.
What’s the difference between French and Dutch braids?
French braids weave hair sections over each other as you braid down the head, while Dutch braids (reverse French braids) weave sections under each other. This creates a raised, dimensional appearance in Dutch braids that sits on top of the head rather than lying flat.
How do I prepare my hair for braiding?
Start with dry hair for the best grip and control. Use texturizing products like sea salt spray or dry shampoo to create ideal texture. Avoid heavy conditioning treatments on braiding days, as natural hair texture provides better hold and prevents slipping.
How long do protective braids like box braids last?
Box braids typically last 6-8 weeks with proper maintenance. Cornrows can last 4-6 weeks depending on hair texture and care routine. Regular scalp cleansing, moisturizing with lightweight oils, and nighttime protection with silk scarves help extend their lifespan and maintain scalp health.
What tools do I need for fishtail braids?
Essential tools include clear hair elastics, fine-tooth and wide-tooth combs, sectioning clips, and bobby pins. Texturizing products like sea salt spray enhance grip, while dry shampoo adds necessary texture. A detangling brush helps prepare hair before starting the intricate two-strand weaving process.
How can I make my braids last longer?
Use strong-hold elastics and texture spray for secure hold. Sleep with silk or satin scarves to reduce friction. Apply lightweight moisturizing oils to maintain hair health without weighing down the style. Schedule professional maintenance appointments every 4-6 weeks for protective styles.
Which braid styles work best for different face shapes?
Oval faces suit side braids at temple level, while round faces benefit from higher placements for elongation. Square faces look best with softer, lower side braid positions. Heart-shaped faces are flattered by braids positioned lower on the head to balance proportions.
Can I braid layered hair successfully?
Yes, but layered cuts require special techniques. Use bobby pins to secure shorter pieces, and apply texturizing products for better grip. Start with looser braids and gradually tighten as you work. Consider incorporating the layers into the braid design for a more intentional, textured look.
What’s the easiest romantic braid for special occasions?
The waterfall braid creates a stunning romantic effect with moderate difficulty. It involves releasing strands strategically to create a cascading appearance. Crown braids also offer elegant sophistication for special events, wrapping around the head like a beautiful halo while framing the face perfectly.