Think short hair can’t do elegant updos? We’re here to prove that wrong! Short hair offers incredible versatility for stunning updo styles that’ll turn heads at any event. From pixie cuts to shoulder-length bobs we’ve discovered dozens of creative ways to elevate your look with sophisticated styling techniques.
We’ve tested countless updo methods specifically designed for shorter lengths and found some truly game-changing approaches. Whether you’re preparing for a wedding date night or professional event these styles work beautifully without requiring extensions or complicated tools.
Classic French Twist for Short Hair
The classic French twist adapts beautifully for shorter lengths and creates an instant sophisticated look that works for both casual and formal occasions.
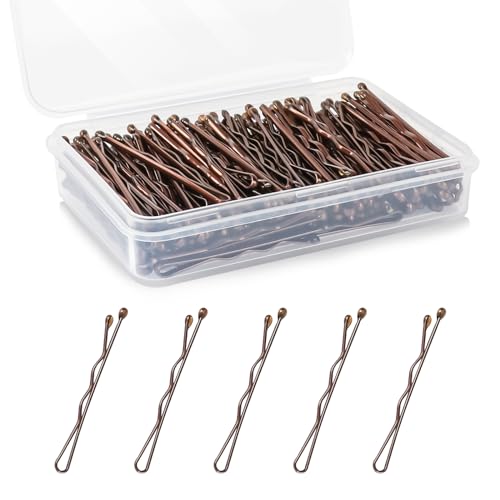
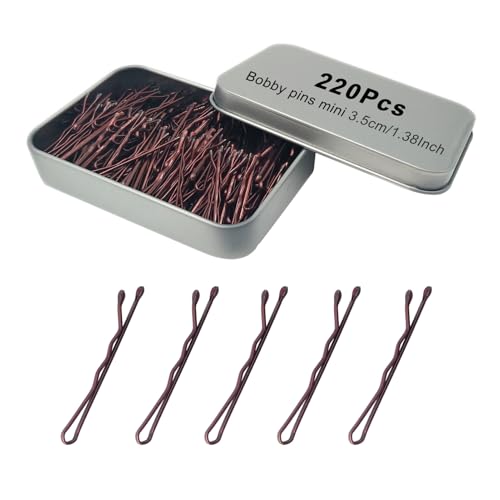
【 Quality Material 】 Our small bobby pins are made of durable metal, double smooth-coated and rust-proof, not easy to break or fade after long time using.

1. Material: Made of metal alloy, imitation pearl and acrylic resin, strong and durable material, pretty and exquisite out looking;

✅Perfect Bobby Pins: These hair pins for women are made of good quality metal and double smooth-coated, rust resistant, not easy to break or fade after applying for a long time
Creating Volume at the Crown
Tease the hair sections at your crown using a fine-tooth comb to build essential height. We recommend starting with dry hair that has some texture spray applied beforehand. Lift small sections of hair from the top of your head and gently backcomb toward your scalp. This teasing technique creates the foundation your French twist needs to look full and polished.
Apply volumizing mousse to damp hair before styling to maximize lift and hold. The product works best when distributed evenly through your crown area using your fingertips. Focus on the roots where you’ll need the most support for your twist.
Position your head upside down while blow drying to encourage natural volume at the roots. Use a round brush to lift hair away from your scalp as you dry. This method helps shorter hair achieve the body necessary for a successful French twist.
Securing Loose Ends with Bobby Pins
Insert bobby pins in an X pattern to lock shorter pieces that tend to escape the twist. We’ve found this crossing technique provides maximum grip on hair that’s too short to tuck completely into the roll. Match your bobby pins to your hair color for seamless blending.
Slide pins into the twist at an upward angle to catch any loose strands around your ears and nape. The key is to place pins close together along the seam of your twist. This creates a solid foundation that holds throughout the day.
Use smaller bobby pins specifically designed for fine hair if you have thin or slippery strands. These pins have tighter grips and work better on shorter lengths that regular pins might not catch effectively. Place them every half inch along your twist for optimal security.
Spray each pinned section with strong-hold hairspray before moving to the next area. This locks each bobby pin in place and prevents the twist from loosening. Allow the spray to set for a few seconds before adding additional pins.
Messy Bun Variations for Shorter Lengths

Messy buns prove that short hair can achieve effortlessly chic styles without requiring length extensions. We’ve discovered that these relaxed updos work beautifully on hair ranging from chin-length bobs to shoulder-grazing cuts.

SALON QUALITY TAIL COMB: Professional Grade, Durable and Built to Last!
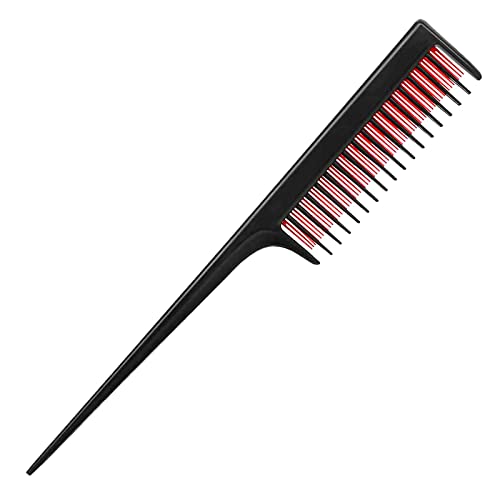
Design: This tail comb is designed to cater to those with thin, fine, and normal hair types. It features 3 rows of teeth that provide 3 times the volume, making it perfect for backcombing, teasing, sectioning, and finishing hair. The multi-length tooth and tail comb design allow for fast and easy parting, making it a versatile styling tool

Low Messy Bun Technique
Starting at the nape creates the most secure foundation for shorter hair lengths. We recommend gathering your hair into a loose ponytail about two inches above the hairline using a clear elastic. Twist the ponytail gently counterclockwise while leaving face-framing pieces loose for a softer appearance.
Wrapping the twisted hair around the elastic base forms the bun shape. Don’t pull the hair through completely on the final loop, creating that signature messy texture. Shorter pieces will naturally fall out, which adds to the effortless charm rather than detracting from the style.
Securing with bobby pins in multiple directions ensures lasting hold. Insert pins at various angles through the bun, catching both the twisted hair and the base underneath. We suggest using at least six to eight bobby pins for shoulder-length hair, adjusting the quantity based on your hair’s thickness and texture.
High Textured Bun Style
Positioning the bun at the crown creates dramatic height and elongates the neck. Begin by sectioning off the top portion of your hair from ear to ear, temporarily clipping away the lower sections. Tease this crown section gently with a fine-tooth comb to build volume before gathering.
Creating texture through strategic backcombing adds fullness to fine hair. Work from the mid-lengths to the roots using short, gentle strokes that won’t damage shorter strands. Spray each teased section with volumizing mist to maintain the lift throughout your event.
Twisting and pinning in sections prevents shorter pieces from escaping. Gather the teased hair into a high ponytail, then divide it into three smaller sections. Twist each section individually before wrapping it around the base, securing each piece separately with bobby pins that match your hair color.
Side-Swept Messy Bun
Sweeping hair to one side before gathering creates asymmetrical elegance. Part your hair deeply on your preferred side, allowing the longer section to fall naturally across your forehead. This technique works especially well for those with shorter layers that might otherwise stick out awkwardly.
Gathering hair at the ear level on the heavier side balances facial features. Collect all the hair except for the front swooped section into a loose ponytail positioned behind and slightly below your ear. Leave the face-framing pieces free to maintain that romantic, undone appearance.
Pinning the bun while allowing strategic pieces to fall creates controlled messiness. Twist the ponytail loosely and wrap it around the elastic, deliberately allowing some ends to stick out at various angles. Use bobby pins to secure the bun while intentionally leaving a few shorter pieces to frame your face and neck naturally.
Braided Updos That Work with Limited Length

Braided updos transform short hair into intricate styles that rival longer hairstyles. We’ve discovered these techniques create stunning results even when you’re working with minimal length.

PROFESSIONAL QUALITY: Our Amplified Volume Mousse sculpts your lasting voluminous style with 24 hour full-body boost & bounce

L’Oreal Boost It Volume Inject Mousse, a high performance, lightweight aerated mousse gives lifeless hair a volume injection for 24 hours

INSTANT VOLUME, FULLNESS, & BODY: Get ready to show off your bouncy new look with our hair mousse for women styling - designed to maximize volume and texture on all hair types
Dutch Braid Crown Updo
Dutch braid crown updos maximize short hair’s potential by creating a regal headband effect around your hairline. Start this style by sectioning off the front portion of your hair from ear to ear, leaving the back section loose for now. Part your hair deeply on one side and begin the Dutch braid at your stronger part, incorporating small sections as you work around your head.
Weave the braid by crossing sections under rather than over, which creates the signature raised appearance of Dutch braiding. Continue braiding around your hairline until you reach the opposite ear, then secure with a small clear elastic. Gather the remaining back hair into a low bun or twist, tucking any loose ends underneath and securing with bobby pins.
Pin the Dutch braid’s end piece into the back section to create a seamless crown effect. This technique works particularly well for bob length hair and adds instant sophistication to your updo repertoire.
Fishtail Accent Braid Style
Fishtail accent braids serve as elegant focal points that complement the main updo structure without requiring extensive length. Create this look by sectioning off a small portion of hair from one side of your head, approximately two inches wide from your temple to behind your ear.
Divide this section into two equal parts and begin the fishtail technique by taking a thin strand from the outer edge of the right section and crossing it over to join the left section. Repeat this process on the left side, taking a thin strand from the outer edge and crossing it to the right section.
Continue alternating sides until you reach the end of your hair, then secure with a small elastic. Gently tug at the braid’s edges to create a fuller, more textured appearance that adds visual interest to your overall style. Incorporate this fishtail accent into a side swept updo or use it to frame one side of a messy bun.
Multiple Small Braids Combination
Multiple small braids combinations maximize your styling options by creating texture and volume throughout shorter hair lengths. Section your hair into four to six small portions, depending on your hair thickness and desired final look.
Create different braid types in each section to add visual variety. Try a regular three strand braid on one side, a rope braid on another section, and mini Dutch braids near your hairline. Each braid should be approximately one to two inches wide to ensure they’re substantial enough to work with but small enough to manipulate easily.
Gather all the small braids at your nape and twist them together into a low chignon style base. Wrap each braid around this central point, tucking ends underneath and securing with bobby pins that match your hair color. This approach creates incredible texture and dimension while making your short hair appear fuller and more voluminous than traditional single braid styles.
Pin Curl Vintage Updos for Short Hair

Pin curls offer timeless elegance that transforms short hair into stunning vintage masterpieces. These classic techniques create sophisticated updos that channel old Hollywood glamour while working beautifully with shorter lengths.

Extra Strong Hold, Soft Finish: Elnett formula delivers the hold you love without compromise. Luxe spray delivers brushable hairspray hold with only 6 ingredients to lock styles in place all day with hold that never feels stiff, crunchy, or sticky

TAME THE MANE: Our Masterpiece Hairspray is our extra-strength hairspray, with an extreme hold designed and used by professional stylists to keep your hair stunning and stylish when it's your turn to steal the show

HOLD AND CONTROL: Our Hard Head Hairspray is our maximum-strength hairspray, an extreme hold that's designed and used by professional stylists to keep your hair stunning and stylish when it's your turn to steal the show
1940s Victory Roll Adaptation
Victory rolls become achievable on short hair when we adapt the traditional technique to work with limited length. Start by sectioning off the front portions of your hair into two-inch wide strips on each side of your head. Tease each section gently at the roots to create the necessary volume for rolling.
Roll each section backward toward your crown, securing the ends with bobby pins placed inside the roll where they won’t show. Pin the rolls firmly against your head using an X-pattern with multiple bobby pins for maximum hold. The remaining hair at the back can be styled into pin curls or swept into a small chignon.
Apply strong-hold hairspray to each completed roll before moving to the next section. This vintage updo works exceptionally well on bob-length hair and creates an instantly recognizable retro silhouette that’s perfect for themed events or when you want classic sophistication.
Finger Wave Integration
Finger waves add texture and movement to short hair updos while maintaining that authentic vintage appeal. Begin by applying setting lotion to damp hair and comb it smoothly to one side for a dramatic part. Use your fingers and a fine-tooth comb to create S-shaped waves along the hairline and temples.
Press each wave into place using clips while the hair is still damp, allowing the pattern to set for at least 20 minutes. Remove the clips once the waves have dried and gently brush through the ends that will form your updo base. Gather the waved sections along with the remaining hair into a low twisted bun or pin curl cluster at the nape.
Secure the arrangement with bobby pins that match your hair color, tucking any loose ends under the style. The finger waves frame your face beautifully while the gathered back creates an elegant focal point that works for formal occasions.
Side Pin Curl Arrangement
Side-swept pin curl arrangements create asymmetrical beauty that flatters most face shapes and hair lengths. Part your hair dramatically to one side, leaving more hair on the heavier side to work with. Divide the hair into small sections approximately one inch wide for optimal curl formation.
Curl each section around your finger, then slide the curl off and pin it flat against your scalp in a spiral pattern. Work systematically from the heavy side across to the lighter side, creating a cascading effect of pin curls. The curls on the heavier side should be larger and more prominent, while those on the lighter side can be smaller and more delicate.
Finish by pinning any remaining lengths into hidden pin curls at the back of your head. This arrangement creates stunning texture and movement while keeping all your hair securely in place throughout the day.
Half-Up Styles for Short to Medium Hair

Half-up updos bridge the gap between casual and formal styling, making them perfect for transitional hair lengths. We’ve discovered these versatile techniques work exceptionally well for bob-length hair and growing pixie cuts.

Mia French Twister is a styling tool that helps one to make a beautiful French Twist, Up-do. Follow the instructions on the back of the packaging.

Package Content:includes 10 assorted french hair pins for everyday styling, outfit matching, or sharing with friends; Compact and travel friendly, these pins fit easily in purses or beauty kits
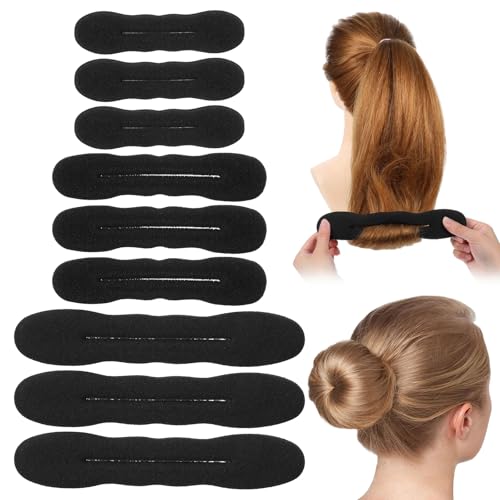
【Sufficient Quantity】You will receive 9 hair bun makers. A sufficient quantity of hair donuts for buns is enough for you to design different hairstyles according to your preferences.
Twisted Half-Up Crown
Twisted crown styles create an elegant focal point while keeping the rest of your hair flowing freely. Start by sectioning off the top layer of hair from temple to temple, working with pieces approximately 2-3 inches wide on each side.
Twist each section away from your face, beginning at the hairline and working backward toward the crown. Secure both twisted sections at the back of your head using bobby pins arranged in an X pattern for maximum hold. Pull gently at the twisted sections to create volume and texture, giving the style a more relaxed, romantic appearance.
For shorter lengths, we recommend using texturizing spray before twisting to add grip and prevent slipping. The remaining hair naturally cascades down, creating a beautiful contrast between the structured crown and loose ends.
Braided Half-Up Design
Braided half-up styles add intricate detail to medium-length hair while maintaining an effortless vibe. Create two small Dutch braids starting at each temple, incorporating hair as you braid backward toward the crown area.
Dutch braiding technique works better than regular braiding for shorter hair because it sits on top of the head rather than laying flat. Braid each section until you reach approximately 2 inches behind the ears, then secure with small clear elastics.
Gather both braided sections together at the crown and twist them into a small bun or knot. Pin the gathered braids securely using 2-3 bobby pins, allowing any shorter pieces to frame your face naturally. The combination creates texture and visual interest while keeping hair out of your face.
Pinned Back Side Sections
Side-pinned styles offer the simplest approach to half-up styling for shorter hair lengths. Section off hair from one side, starting at the temple and working back to behind the ear in a diagonal line.
Smooth this section back using a fine-tooth comb and a light coating of smoothing serum to tame flyaways. Create a deep side part on the opposite side to add asymmetrical balance to the overall look.
Pin the swept section behind the ear using decorative bobby pins or small barrettes for added style. For extra security, cross two bobby pins in an X formation, especially important for fine or slippery hair textures. This technique works particularly well for bob cuts and shoulder-length hair, creating an instantly polished appearance perfect for both professional settings and evening events.
Faux Updo Techniques Using Hair Accessories

Hair accessories transform short hair into elegant updos without requiring complex styling skills or additional length. We’ve discovered that the right accessories can create the illusion of sophisticated updos while working with your natural hair texture and length.
✅Perfect Bobby Pin: These hair pins for women are made of good quality metal and double smooth-coated, rust resistant, not easy to break or fade after applying for a long time
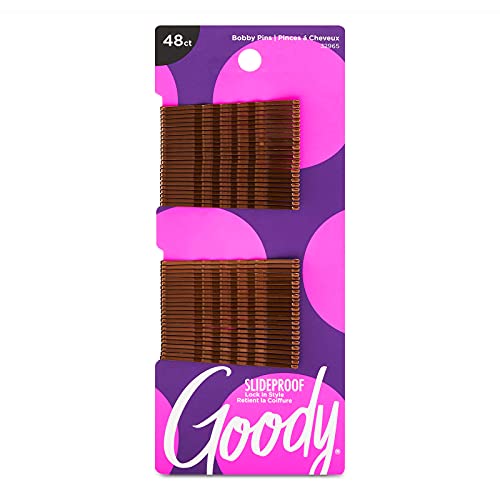
SlideProof Bobby Pins: Goody's Basic Hair Pins are the go-to accessory for keeping your hair securely in place & out of your face. The SlideProof technology ensures they stay put all day, while their sleek design blends seamlessly with any hairstyle

【 Quality Material 】 Our small bobby pins are made of durable metal, double smooth-coated and rust-proof, not easy to break or fade after long time using.
Headband Tuck Method
Headband tuck method creates an instant updo by concealing shorter strands behind a wide fabric headband. We position a stretchy headband about two inches back from the hairline to allow for volume at the crown. Tease the front sections lightly with a fine-tooth comb before placing the headband to create lift and texture.
Starting with one side, we twist small sections of hair upward and tuck them behind the headband. Continue this process around the entire head, ensuring each strand disappears completely behind the accessory. For hair that’s too short to tuck fully, we twist the pieces and pin them directly against the scalp with small bobby pins that match your hair color.
Finish the look by pulling out a few face-framing pieces for a softer appearance. We recommend using a texturizing spray on these loose strands to create movement and prevent the style from looking too rigid. This technique works exceptionally well with bobs and lobs, creating an effortless vintage-inspired updo.
Hair Scarf Wrapping Style
Hair scarf wrapping style transforms short hair into a chic updo using a silk or cotton scarf as the primary styling tool. We fold a long scarf in half to create a headband-like band, then position it at the nape of the neck with the folded edge facing down. This placement allows us to wrap the hair upward and create the illusion of length.
Beginning at the nape, we gather all hair into the scarf and twist both the hair and fabric together in an upward motion. Continue wrapping until you reach the crown area, then secure the twisted bundle by tying the scarf ends together. For shorter layers that escape the wrap, we use bobby pins to tuck them into the twisted fabric.
Create visual interest by allowing the scarf ends to flow freely or by tucking them into the wrapped base for a more polished appearance. We’ve found that patterned scarves work particularly well for casual occasions, while solid colors in silk create elegant looks perfect for formal events. This method works beautifully with pixie cuts and short bobs.
Decorative Clips Arrangement
Decorative clips arrangement involves strategically placing multiple hair accessories to create an updo effect without traditional styling. We select 3-5 coordinating clips in graduated sizes, using larger pieces as focal points and smaller ones to secure loose sections. The key lies in creating visual balance while ensuring each clip serves a functional purpose.
Position the largest decorative clip at the back of the head to gather the majority of hair into an upward sweep. We twist the hair slightly before clipping to add dimension and prevent the style from appearing flat. Smaller clips then secure any shorter layers or side sections that won’t reach the main gathering point.
Layer additional clips at varying heights to create depth and texture throughout the arrangement. We place clips at slight angles rather than perfectly horizontal to achieve a more organic, flowing appearance. This technique allows us to incorporate hair jewelry, pearl clips, or metallic barrettes that complement your outfit while creating a sophisticated updo that celebrates short hair’s natural movement and texture.
Modern Textured Updos for Short Hair

Today’s textured updos embrace natural movement and deliberate imperfection for short hair lengths. These contemporary styles work beautifully with layered cuts and add effortless sophistication to any look.
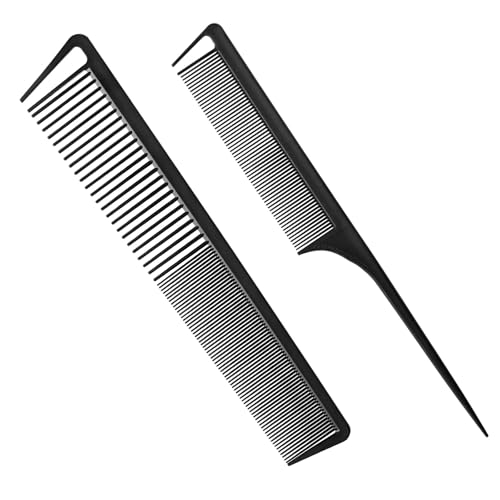
【2-Piece Value Set for Multi-Scenario Needs】The set includes 1 high-precision rat tail comb and 1 dual-sided wide-tooth & fine-tooth comb, designed unisex for men & women. It meets both daily hair combing needs and professional hair styling demands, making it an indispensable multi-functional hair comb set for your vanity—one set solves various styling requirements.

Material: the carbon comb is made of celcon, anti-static and heat-resistant, virtually unbreakable, lightweight and durable; The end is sharp, please keep it away from children

Wide application:Rat tail combs for precise parting, intricate braiding, styling sectioning. Ideal for hair stylists, wig braiding, coloring, and cutting. Pick comb design, durable for long-lasting use
Tousled Crown with Pinned Sides
Create volume at your crown by gently teasing hair sections with a fine-tooth comb. We recommend working from the back forward, lifting each 2-inch section and backcombing toward the roots. Apply a volumizing mousse to damp hair before blow-drying to enhance natural lift and texture.
Gather side sections loosely and pin them behind your ears using bobby pins in an X pattern. Leave some shorter pieces around your face to frame your features naturally. Position pins at slight angles rather than straight across to create visual interest and better grip.
Finish by scrunching the crown area gently with your fingertips to enhance texture. A light-hold texturizing spray will maintain the tousled effect while keeping flyaways in check throughout the day.
Asymmetrical Twisted Style
Part your hair deeply on one side to create dramatic asymmetry before starting the twist. We suggest using a tail comb to create a clean, precise part that extends from your hairline to the crown area. This foundation sets up the entire style’s visual impact.
Twist the larger section of hair loosely from the part down toward your nape. Secure the twist with bobby pins every few inches, allowing some pieces to escape for texture. Insert pins horizontally into the twist rather than vertically for maximum hold.
Sweep the shorter side section back and pin it low behind your ear. This creates beautiful asymmetrical balance while showcasing your bone structure. Use smaller bobby pins for fine hair and larger ones for thicker textures.
Set the style with a flexible-hold hairspray to maintain movement while preventing frizz. Focus the spray on the twisted sections rather than the loose pieces to preserve the intentional texture.
Voluminous Teased Updo
Begin by sectioning your hair into three horizontal layers from ear to ear. We find this systematic approach ensures even volume distribution throughout the updo. Clip the top layers away while working on each section individually.
Tease each section thoroughly at the roots using a boar bristle brush for maximum lift. Start at the crown and work backward, creating height that will support the finished style. Smooth the surface lightly with the brush to tame any harsh lines.
Gather the teased sections into a high ponytail, leaving the volume intact at the crown. Use a clear elastic to avoid visible hardware, then twist the ponytail loosely and wrap it around the base. Secure with bobby pins placed strategically around the bun’s perimeter.
Pull gently at the bun’s edges to create fullness and soften the overall shape. This technique, called pancaking, adds visual weight and makes your updo appear more substantial. Finish with strong-hold hairspray to lock everything in place.
Essential Tools and Products for Short Hair Updos

Creating stunning updos with shorter hair requires the right arsenal of tools and products. We’ll guide you through the must-have items that make all the difference in achieving polished, long-lasting styles.
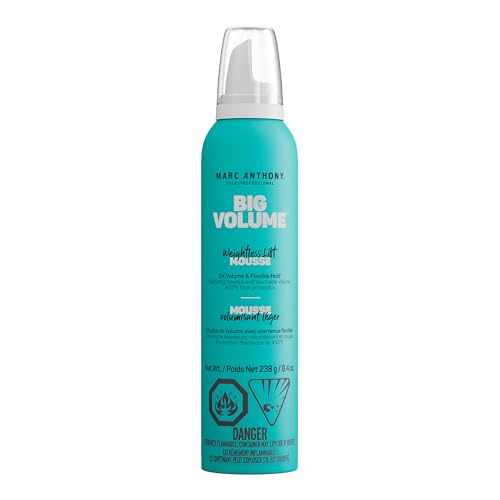
Big on Volume, Light on Feel: Say goodbye to flat, lifeless strands. Marc Anthony’s Big Volume Weightless Lift Mousse transforms fine, limp hair into full, voluminous styles with weightless body and bounce – all while keeping it soft and touchable. 8.4 oz

This thickening hair mousse contains conditioning ingredients that lock in moisture for increased manageability and added shine

Lightweight formula that won't weigh hair down.
Must-Have Bobby Pins and Hair Ties
Bobby pins serve as the foundation for securing short hair updos effectively. We recommend investing in pins that match your hair color for seamless blending, with brown or blonde options working best for most hair tones. Small bobby pins work particularly well for fine or slippery hair textures, while standard-sized pins provide stronger hold for thicker strands.
Quality matters significantly when selecting bobby pins for short hair styling. We prefer pins with a wavy or textured grip surface rather than smooth ones, as they catch shorter pieces more securely. Professional-grade bobby pins from brands like Goody or Scunci typically offer superior holding power compared to generic drugstore options.
Hair ties designed for short hair differ from standard elastics in both size and material. We suggest using small, snag-free elastics made from soft fabric or silicone that won’t damage delicate shorter strands. Clear elastics work exceptionally well for creating messy buns and half-up styles without visible hardware.
Mini hair ties prove invaluable for sectioning and securing small portions of short hair during styling. We keep these on hand for creating intricate braided elements or temporarily holding sections while working on other parts of the updo. Spiral hair ties also work well for short hair as they distribute tension evenly without leaving creases.
Texturizing Sprays and Volume Products
Texturizing sprays transform fine, short hair into workable material for updo creation. We rely on sea salt sprays or dry texture sprays to add grip and substance to clean hair, making it easier to twist, braid, and pin into place. These products also help shorter pieces stay put throughout the styling process.
Volume-boosting mousses applied to damp hair before blow drying create the foundation lift needed for short hair updos. We recommend using a golf ball-sized amount distributed evenly from roots to ends, focusing extra product at the crown area where height is most crucial. Lightweight formulas work best to avoid weighing down shorter strands.
Dry shampoo serves dual purposes in short hair updo preparation by adding texture and absorbing excess oils. We spray it at the roots and massage it through with our fingers to create the perfect amount of grip for styling. This step is particularly important for second-day hair or fine textures that tend to slip.
Root-lifting sprays applied before blow drying help create maximum volume at the crown area. We section the hair and spray directly onto the roots, then use our fingers or a round brush to lift the hair while drying. This technique provides the height needed for dramatic updos on shorter lengths.
Heat Protection and Holding Sprays
Heat protectant sprays prevent damage when using hot tools for short hair updos that require curls or waves. We apply these products to damp hair before any heat styling, ensuring even coverage from roots to ends. Look for formulas that offer protection up to 450°F for complete peace of mind.
Strong-hold hairsprays lock finished updos in place throughout the day or evening. We prefer working hairsprays that allow for repositioning during the styling process, followed by a final application of maximum-hold spray once the style is complete. This layering technique ensures both workability and longevity.
Flexible hold hairsprays work best for textured or messy updos where some movement is desired. We choose formulas that provide hold without stiffness, allowing the style to move naturally while maintaining its shape. These products are particularly useful for vintage pin curl styles and tousled crown arrangements.
Setting sprays with humidity resistance help short hair updos withstand challenging weather conditions. We apply these as the final step in our styling routine, holding the bottle 8-10 inches away from the finished style for even coverage. This extra protection is especially important for special events or outdoor occasions where the updo needs to last for hours.
Conclusion
Short hair doesn’t limit your styling options – it opens up a industry of creative possibilities. We’ve shown you that everything from elegant French twists to modern textured updos can be achieved with shorter lengths.
The key lies in understanding which techniques work best for your hair length and having the right tools at your disposal. With practice these styles become second nature and you’ll find yourself reaching for updos more often than you might expect.
Whether you’re preparing for a special event or simply want to switch up your everyday look these updo techniques prove that short hair can be just as versatile and sophisticated as longer styles. Your shorter locks are ready to make a statement.

Maximum-Hold Hairspray: Lock It Down Hairspray is our strongest hold hairspray; this hairspray has an all-day hold that doesn't lose its shape, and a natural shiny finish; safe for color-treated hair
Ideal for building updos with movable yet firm hold or for use as a foundation before braiding.

48-Hour Extra Strong Hold: Lock It Weather Control Hairspray locks in smooth styles for up to 48 hours with a non-crunchy finish. This anti humidity spray for hair works on short, medium, and long hair for all-day hold
Frequently Asked Questions

1:[Be different from others]: These topsy tail hair tools from the design, raw materials, process to completely solve the product pull ring easy to break, too fragile, easy to pull the hair shortcomings. The use of new materials is not only good toughness, easy to rebound. Precision mold, thickened upgrade design will not pull your hair is also very durable, It won't break.

2 Piece 3.5 Inch two prong chignon bun Sticks Women Vintage Hairstyle Accessories. Hair fashion french twist pins stick beauty accessory for womens. Ladies style french twist hair pins clip for thick or fine, long and shorter hair. Perfect for creating easy elegant chignons and twists hairstyles; partial quick updo or bun or full updos, holding your hair securely and tightly in place without any discomfort Flexible design works with most hair types

7.5 Inch Decorative Classic Hairpin. Hair fashion french twist pins stick beauty accessory for womens. Ladies style french twist hair pins clip for thick or fine, long and shorter hair. Perfect for creating easy elegant chignons and twists hairstyles; partial quick updo or bun or full updos, holding your hair securely and tightly in place without any discomfort Flexible design works with most hair types.
Can you really create elegant updos with short hair?
Yes, absolutely! Short hair can be styled into sophisticated updos without extensions or complex tools. Various techniques work for different short lengths, from pixie cuts to shoulder-length bobs. The key is using the right methods, quality bobby pins, and styling products to create volume and secure the style.
What’s the best updo for very short hair like a pixie cut?
Pin curl vintage updos and textured styles work exceptionally well for pixie cuts. Victory rolls, finger waves, and tousled crown styles can create elegant looks. Using texturizing spray and strategic bobby pin placement helps achieve sophisticated styles even with minimal length.
How do you make a French twist work with short hair?
Start by building volume at the crown using teasing techniques and volumizing mousse. Twist the hair upward and secure loose ends with bobby pins in an X pattern for maximum grip. Use strong-hold hairspray to lock each section in place throughout the styling process.
What are the easiest updo styles for shoulder-length hair?
Messy buns, half-up styles, and braided updos are perfect for shoulder-length hair. Low messy buns, twisted half-up crowns, and Dutch braid crown updos are particularly effective. These styles are beginner-friendly and don’t require advanced styling skills.
Can you create braided updos with short hair?
Yes, braided updos work beautifully with limited length. Dutch braid crowns create a regal headband effect, while fishtail accent braids serve as elegant focal points. Multiple small braids can add texture and volume, proving that intricate braided looks are achievable with shorter hair.
What hair accessories work best for short hair updos?
Wide fabric headbands, hair scarves, and decorative clips are excellent for creating faux updos. The headband tuck method creates instant elegance, while strategic placement of multiple clips can simulate an updo effect. These accessories make sophisticated styling accessible without complex techniques.
How long do short hair updos typically last?
With proper technique and quality products, short hair updos can last 8-12 hours. Using strong-hold hairspray, quality bobby pins, and texturizing products helps maintain the style. The key is securing each section properly and using products that provide lasting hold.
What products are essential for short hair updos?
Essential products include volumizing mousse, texturizing spray, strong-hold hairspray, and heat protectant. Quality bobby pins that match your hair color and provide strong grip are crucial. These products help create volume, texture, and ensure your updo stays secure all day.